Are you looking to migrate your form data from WPForms to Gravity Forms? It’s easier than you think!
In this post, we’ll show you how to migrate your form entries from WPForms to Gravity Forms and rebuild your old forms automatically in a few quick steps.
Keep reading to find out more!
What you’ll need
To migrate form entries from WPForms to Gravity Forms, you’ll need the GravityImport plugin. While this plugin cannot migrate actual forms, it can build forms for you automatically based on your entry data.
Important: WPForms Lite vs WPForms Pro
It’s important to note that the free version of WPForms, called WPForms Lite, does not let you save form entries to your WordPress database. For this functionality, you’ll need WPForms Pro.
Therefore, if you’re using WPForms Lite to collect form submissions, it’s not possible to migrate those as there’s no way to export that data. On the other hand, with WPForms Pro, you have full control over your data, including the ability to export it.
Why migrate from WPForms to Gravity Forms?
There are several reasons why you may want to start using Gravity Forms as your primary WordPress form plugin. Here are some of the main advantages of migrating to Gravity Forms.
Accessibility
When it comes to accessible forms for WordPress, Gravity Forms is the undisputed champion. Accessibility refers to the process of building websites that are usable by people with physical, visual, or cognitive disabilities.
Unrivaled add-ons and extensions
There are 7 Gravity Forms certified developers that build and maintain a range of versatile add-ons for Gravity Forms, allowing you to build all kinds of powerful web applications!
A powerful form editor
Gravity Forms comes with a drag-and-drop block editor that makes it quick and easy to create any kind of form for your website. The interface is intuitive with several powerful settings including conditional logic, calculation fields, and more.
More features
Gravity Forms is full of features, allowing you to build any type of web form – including product order forms, contact forms, and user registration forms. Gravity Forms also integrates with a range of third-party apps such as HubSpot, ActiveCampaign, and more.
Steps for migrating from WPForms to Gravity Forms
To migrate your entry data from WPForms to Gravity Forms, you’ll need to follow these steps:
- Export your form entries from WPForms
- Import your entries to Gravity Forms using the GravityImport plugin
- Automatically create a new form during the import process (optional)
Let’s go through each step in detail 👇
Exporting your entries from WPForms
To migrate your form entries from WPForms, you first need to export them as a CSV file. To do this, log in to your WordPress website, hover over “WPForms” in the left-hand menu and click on “Tools”. Now, click on the “Export” tab at the top of the page and select your form from the dropdown menu.
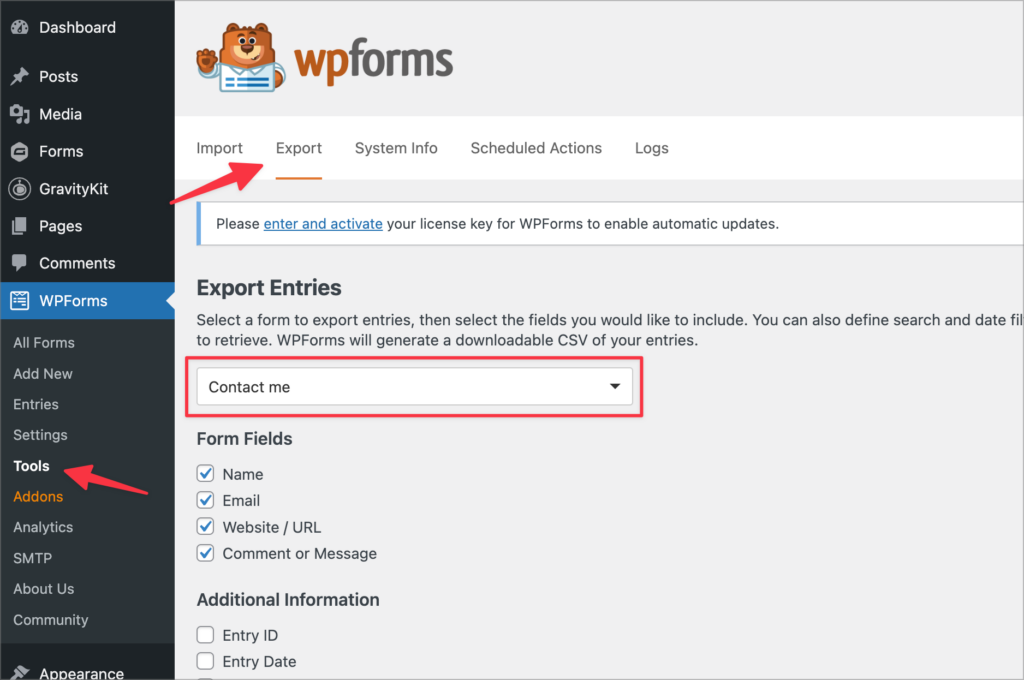
If you want to exclude fields from the export, you can do this by unchecking the box next to the field name. Under “Additional Information” you can choose to include extra data in your export such as the Entry ID or the User IP.
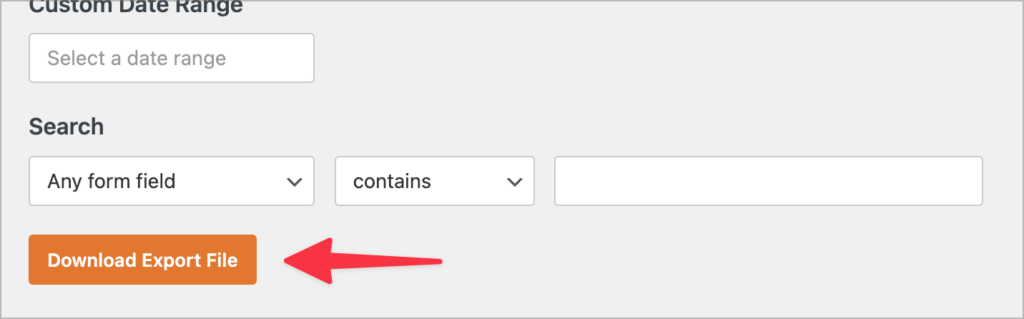
Finally, you can set a custom date range and filter entries based on conditional logic. When you’re finished, click “Download Export File” to download the CSV containing your form entries.
Import your entries to Gravity Forms
GravityImport by GravityKit (that’s us 👋) is a plugin that allows you to import data into Gravity Forms from a CSV file. This powerful add-on for Gravity Forms makes it easy to migrate data from popular form plugins (including Ninja Forms, WPForms, Fluent Forms, Caldera Forms, Typeform, and more) to Gravity Forms. After importing your entries, GravityImport will also rebuild your form based on the data in the CSV!
After installing GravityImport, follow the steps below to import your entries to Gravity Forms.
Upload your CSV file
To import your form entries into Gravity Forms, hover over “Forms” and click on “Import/Export”. Next, click on the tab that says “Import Entries”.
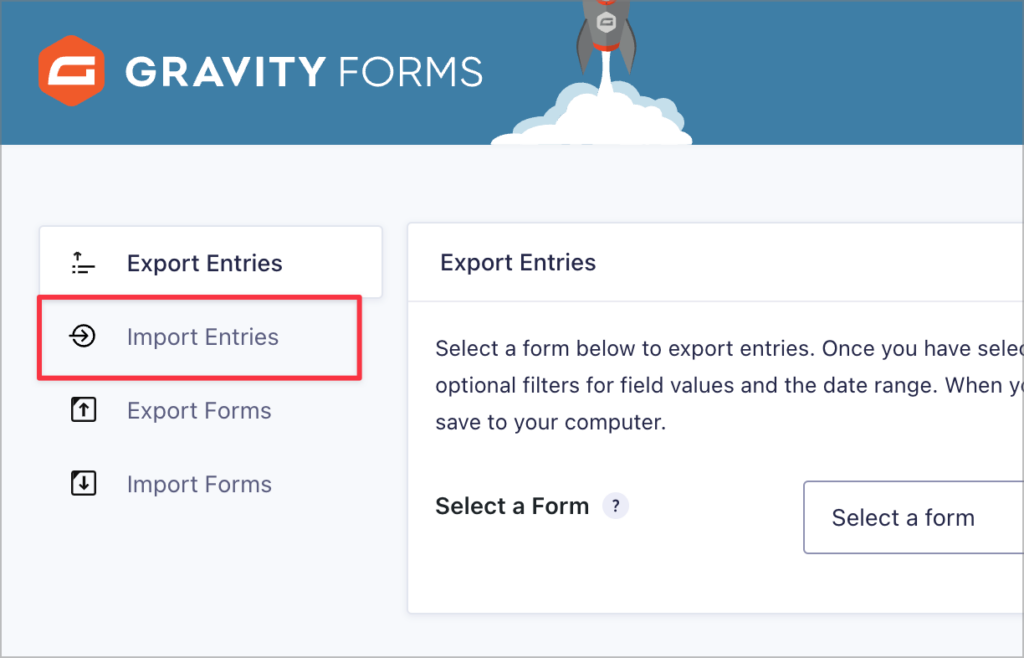
Here you can drag and drop your CSV file onto the screen to upload it.
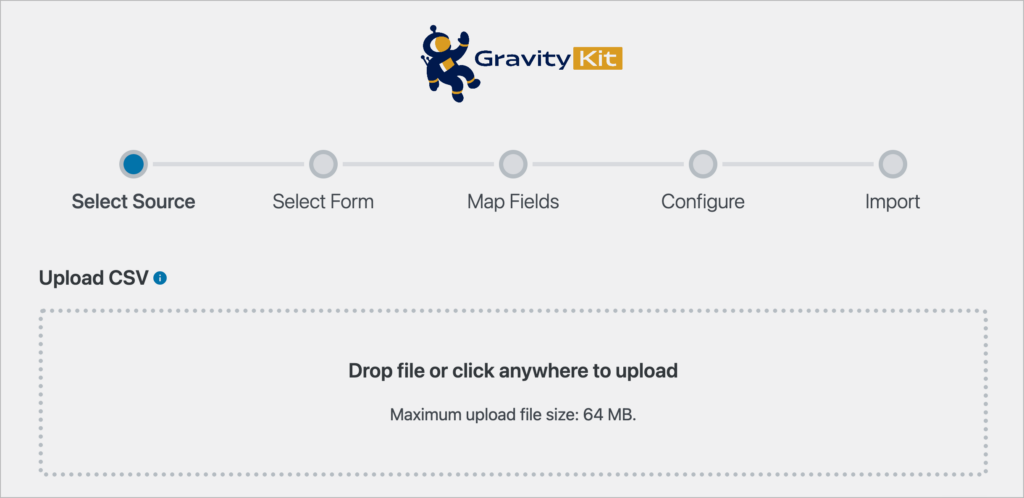
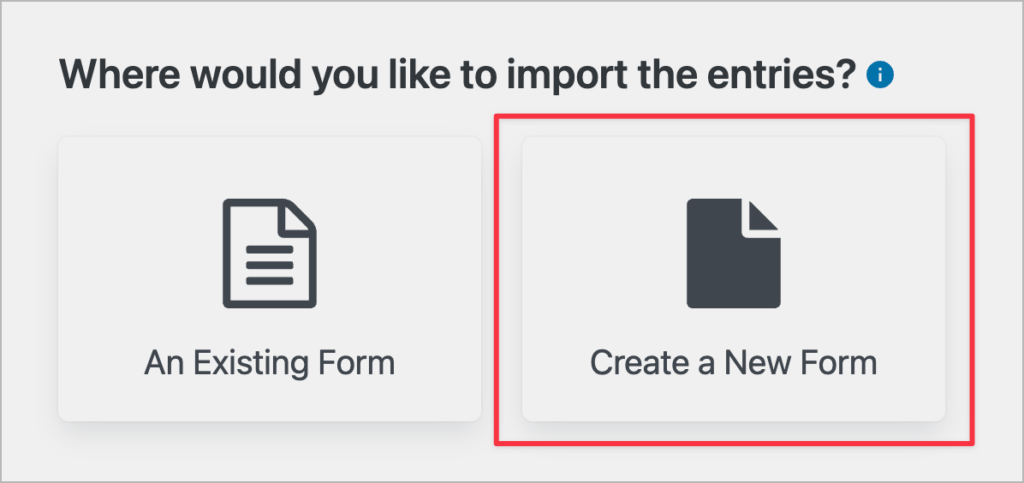
After uploading your CSV file, you’ll have the option to upload entries to an existing form or create a new form.
Creating a new form
By selecting “Create a New Form” the GravityImport plugin will detect the different field types in your CSV file and automatically create a form for you in Gravity Forms. Pretty cool, right?
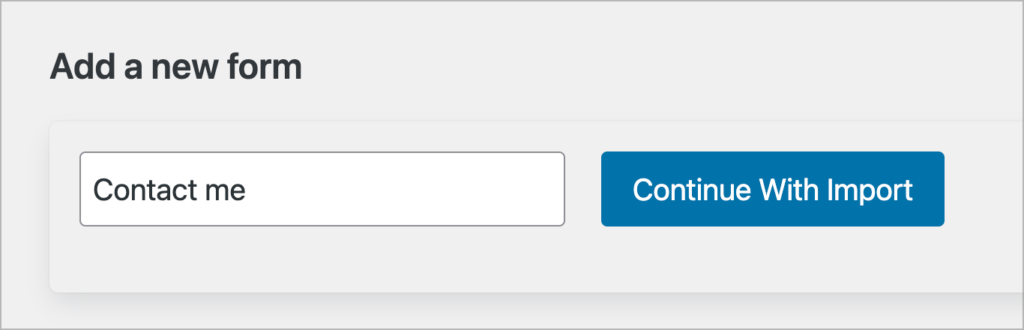
Now, give your new form a name and click “Continue With Import”.
Mapping different field types
The next step is to map the columns in your CSV file to the correct field type in Gravity Forms.
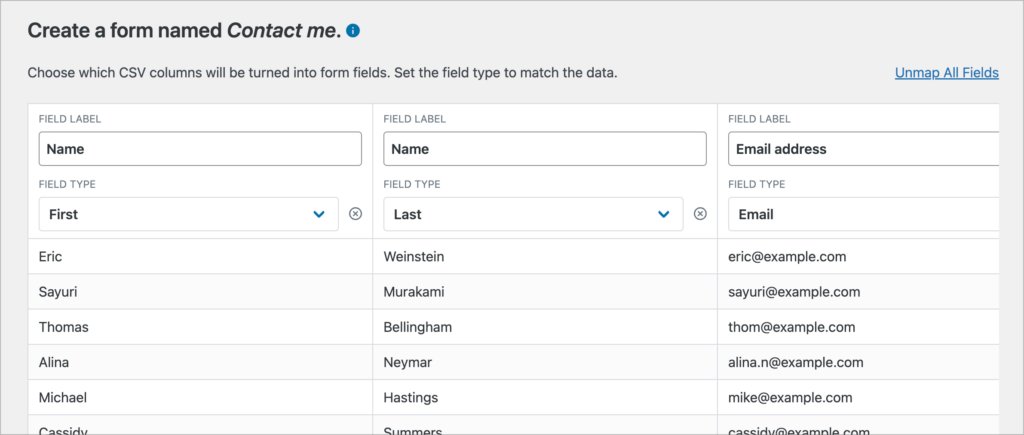
After mapping the columns in your CSV to the correct field type in Gravity Forms, scroll down and click “Continue With Import”.
Configuring the import options
The final step in the import process is to configure the import options. Here you’ll find three options:
- Continue Processing if Errors Occur: Enabling this option will ensure that the import carries on even if errors are found.
- Condition Import: Enabling conditional import will allow you to import entries based on parameters that you set using conditional logic. For example, only import entries where the email address ends with “@example.com”.
- Email Notifications: Enabling this option will send an email notification for each imported entry.
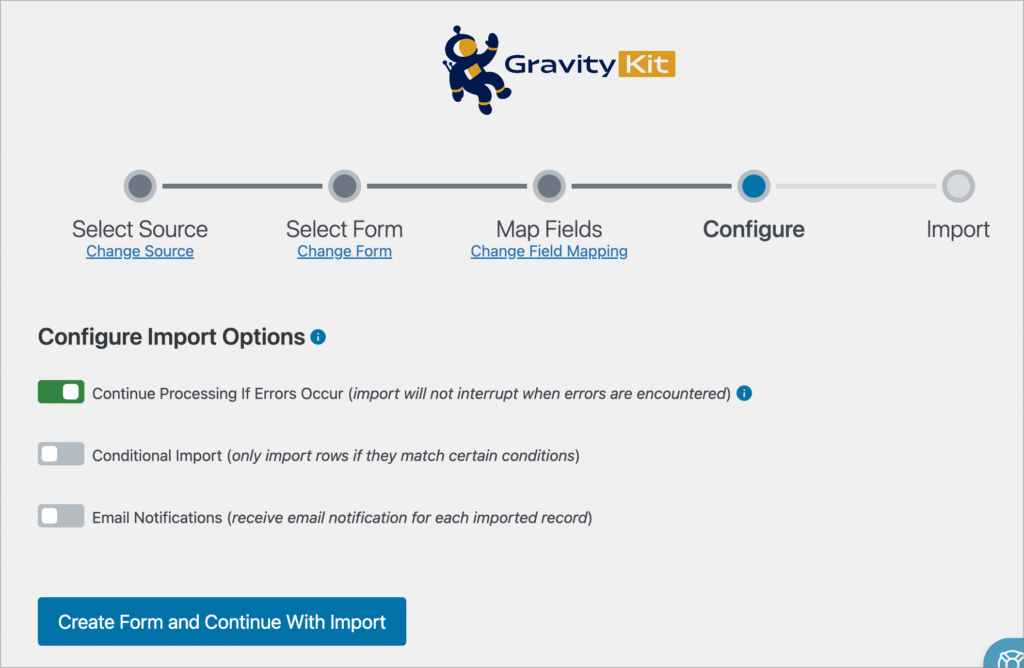
When you’re done configuring the import options, click “Create Form and Continue With Import”.
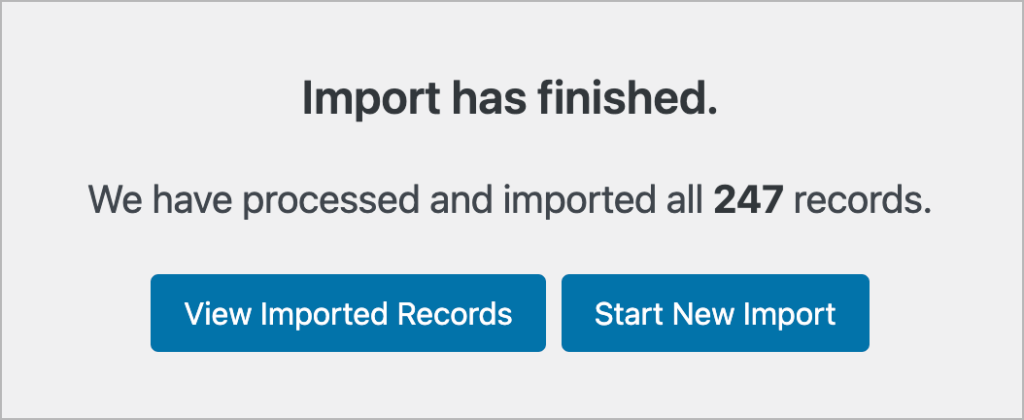
Confirming the import was successful
You should now see a message confirming the import has finished, with a count for how many entries were processed and successfully imported. Now you can either view the imported records or start a new import.
Clicking “View Imported Records” will take you to Gravity Forms where you can view the entries along with your new form!
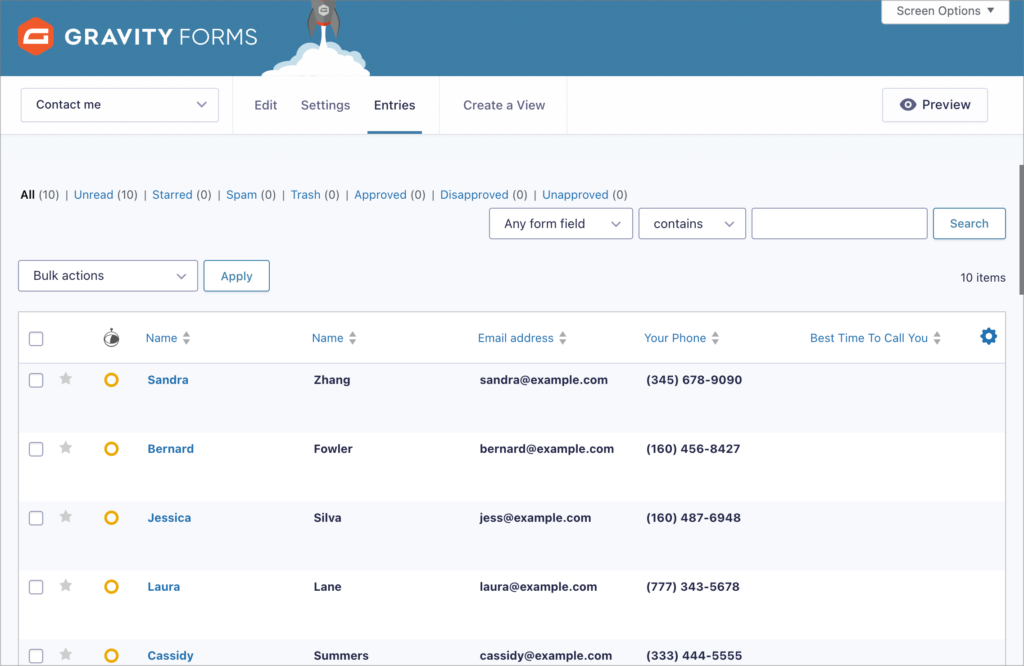
As you can see, we have successfully migrated our form entries from WPForms to Gravity Forms! All you need to do is export your data as a CSV file and GravityImport takes care of the rest by importing the data and creating a new form for you.
Migrating from WPForms to Gravity Forms is easy!
Gravity Forms’ accessibility features, its rich ecosystem of extensions, and its intuitive, drag-and-drop, block-style editor make it the most powerful form plugin for WordPress. In this post, we showed you how to migrate your form entries from WPForms to Gravity Forms using the GravityImport plugin.
GravityImport allows you to import data into Gravity Forms from a CSV file. The plugin also enables you to create new forms during the import process. If you found this post helpful, see how GravityView compares to WPForms Views next!

Helpful tips right in your inbox.
Subscribe to our biweekly newsletter for tips, special offers, and more!
Helpful tips right in your inbox.
Subscribe to our biweekly newsletter for tips, special offers, and more!