
As the most flexible and robust form plugin for WordPress, Gravity Forms is packed full of powerful features. For example, did you know that Gravity Forms provides two handy shortcodes that allow you to embed forms and show/hide content based on conditional logic?
Gravity Forms shortcodes may seem confusing at first, but once you start playing with them, you’ll realize how intuitive and simple they are to use. In this post, we provide a comprehensive overview of the different shortcodes including examples of how to use them on your website.
Let’s get started 🙌
Table of contents
- What Is a WordPress shortcode?
- Embedding a form without a shortcode
- The Gravity Forms embed shortcode
- Where to find the Gravity Forms shortcode?
- How to find your form ID
- Gravity Forms shortcode parameters
- Gravity Forms embed shortcode examples
- Gravity Forms shortcode field values: dynamic field population
- Gravity Forms shortcode not working? Here’s the problem
- When to use the Gravity Forms embed shortcode:
- The Gravity Forms conditional shortcode
- Shortcodes added by Gravity Forms add-ons
- Gravity Forms shortcodes: final thoughts
What Is a WordPress shortcode?
Shortcodes in WordPress allow you to do awesome things without having to write custom code! With shortcodes, you can embed interactive content, create attractive page layouts, and much more.
Shortcodes are text strings enclosed in square brackets, like this: [shortcode].
WordPress Core ships with a bunch of preset shortcodes that you can take advantage of to improve the way you build websites. Certain plugins also add shortcodes to WordPress, including Gravity Forms!
Embedding a form without a shortcode
First off, it’s important to point out that you can add a Gravity Form to your website without using a shortcode! That’s right, Gravity Forms integrates with the Block Editor (Gutenberg) as well as the Classic Editor, allowing you to embed forms on your pages with the click of a button.
However, if you’re using a page builder like Divi or Elementor, you’ll need to use the Gravity Forms embed shortcode to insert your form inside a page or post.
The Gravity Forms embed shortcode
First up is the most important shortcode for Gravity Forms – the embed shortcode.
You can use the embed shortcode to:
- Embed Gravity Forms anywhere on your site (including pages, posts, and sidebar widgets)
- Show or hide the title and description of a form
- Enable or disable AJAX
- Pre-populate form fields with specific values
An example of typical Gravity Forms embed shortcode looks like this:
[gravityform id="7" title="false" description="false" ajax="true"]Let’s explore the shortcode in more detail.
Where to find the Gravity Forms shortcode?
To find the shortcode for any form in Gravity Forms, all you need to do is edit your form, click on “</> Embed” in the top right and then click the button that says “Copy Shortcode”.
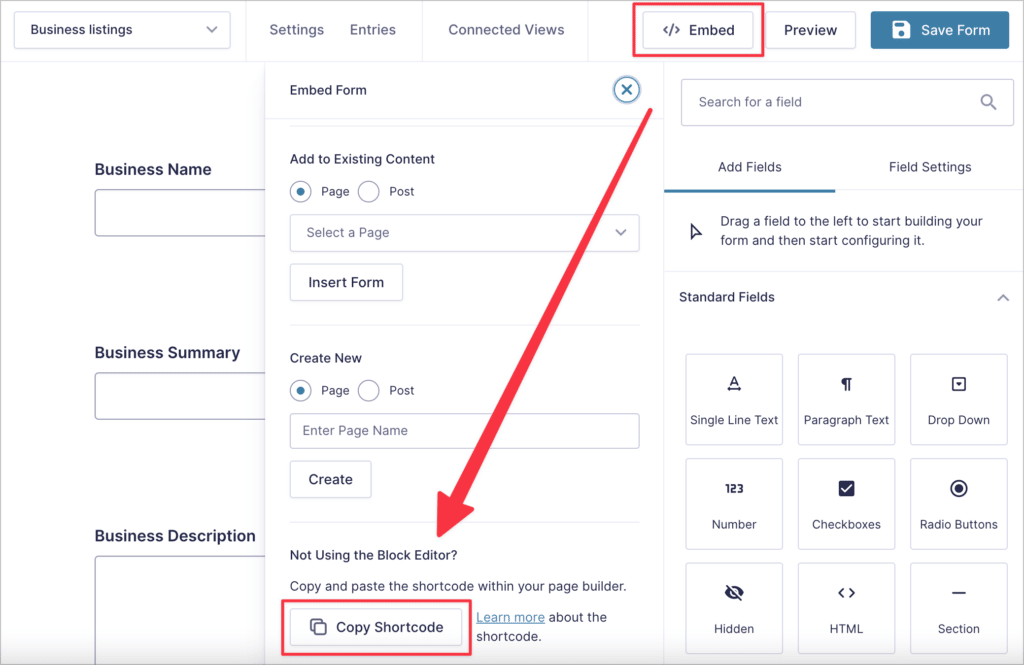
You can now paste the shortcode anywhere on your website where you want your form to appear. You can also construct the shortcode manually: all you need is the form ID.
How to find your form ID
The most important Gravity Forms shortcode parameter is the form ID. This indicates which form should be displayed.
Although it might not be obvious at first, finding your form ID is easy! First, hover over “Forms” in your WordPress admin menu and click “Forms”. Now, you’ll see a list of all your forms in Gravity Forms. The form ID is in the column on the right.

While the form ID is a required shortcode parameter, it’s not the only parameter that you can add to your shortcode.
Gravity Forms shortcode parameters
The Gravity Forms embed shortcode supports the following 6 parameters: id, title, description, ajax, tabindex, and field_values.
Okay, let’s break them down, one by one. 🕵️♂️
id
The id parameter refers to the ID of the form you want to embed. It’s the most important parameter and it’s the only one that’s required. The rest are optional.
title
Either true or false. If true, the title will be displayed, if false, it will be hidden.
description
Either true or false. If true, the description will be displayed, if false, it will be hidden.
ajax
Either true or false. If true, the form will use AJAX submit, if false it will require a page-load to process submissions.
tabindex
Takes a number, such as 11, and uses this as the starting tab index for the form.
field_values
Allows you to dynamically populate fields with preset values. This is helpful if you’re using the same form on multiple parts of your website and need to include a custom value based on which page the form is displayed on. This is explained in-depth below.
Note: The first four parameters are the most common. The other two are only used in specific circumstances.
If you’re feeling confused, don’t worry! We’ll go over some helpful examples below.
Gravity Forms embed shortcode examples
Let’s look at some examples of the embed shortcode in action.
Here’s a shortcode example where the title and description parameters are set to “true”:
[gravityforms id=“21” title=“true” description=“true”]And here’s what our form looks like on the front end:
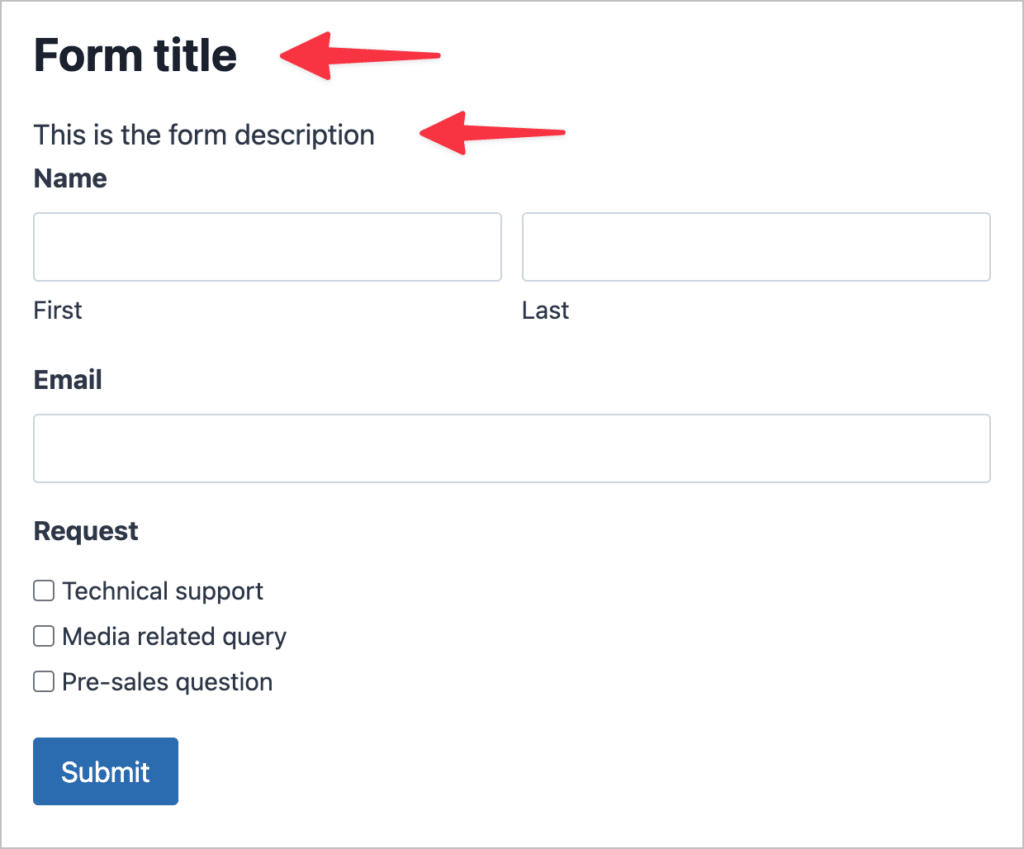
As you can see, setting the title and description parameters to “true” makes them visible on the front end.
Gravity Forms shortcode field values: dynamic field population
The field_values parameter allows you to dynamically populate form fields. In this example, our form contains a checkbox field with three options and we want to auto-select the first option when the user loads the page.
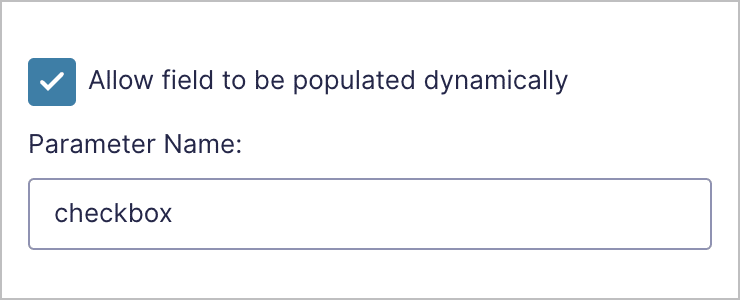
For the field_values parameter to work correctly we first need to enable dynamic population on the form field that we’re targeting. To do this, we’ll click on the field inside the Gravity Forms editor, open the “Advanced” settings tab and check the box that says “Allow field to be populated dynamically”.
Next, we’ll enter a parameter name in the box. This is how we’ll reference the field when constructing our shortcode.
Okay, done! Now we can write our shortcode. Here’s what it looks like:
[gravityforms id=“21” field_values=“checkbox=Technical support”]And here’s what our form looks like on the front end.
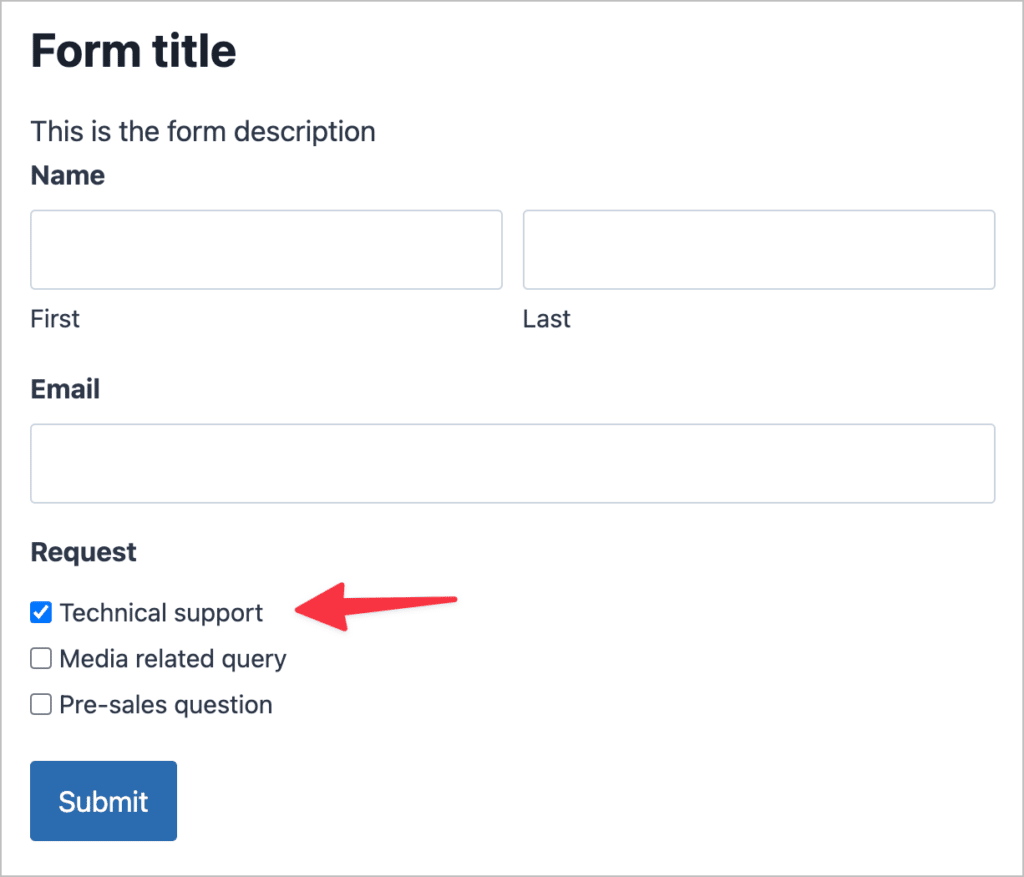
As you can see, when the user opens the page containing our form, the “Technical support” checkbox is already checked. Let’s have a look at the field_values parameter in a little more detail.
field_values=“checkbox=Technical support”After “field_values=” you need to specify the parameter name and then the value you want to populate it with. In the above example, we’re passing the value of the first checkbox field.
Now, let’s look at another example involving a text field.
In this case, we’ve got a Single Line Text field and we’ve given it the parameter name “event_name”. We can now use the field_values shortcode parameter to dynamically populate the field with the correct event name.
[gravityforms id="36" field_values="event_name=5K Charity Run"]
The “Event Name” field is automatically populated with the value we specified in our shortcode!
💡 Pro tip: You can dynamically populate multiple fields by separating them with an ampersand (“&”).
Gravity Forms shortcode not working? Here’s the problem
If you’ve added your shortcode to a page or post but your form isn’t showing up on the front end, it’s likely because the form ID is incorrect. If you accidentally entered an ID that does not exist, Gravity Forms will display an error message saying that your form could not be located.

Double-check your form ID and try again!
When to use the Gravity Forms embed shortcode:
- Your page builder doesn’t have a Gravity Forms integration and you need to add a Form to your post or page
- You want to add a Form to your sidebar
- You want to use the dynamic field population functionality
That’s it for the embed shortcode, let’s have a look at the Gravity Forms conditional shortcode.
The Gravity Forms conditional shortcode
Next up is the Gravity Forms conditional shortcode, which allows you to show or hide content based on conditions that you set. The shortcode is helpful for customizing messages based on user responses. You can use the conditional shortcode inside confirmation messages, or email notifications! 😎
The conditional shortcode looks like this:
[gravityforms action="conditional" merge_tag="" condition="" value=""]
The content you want to show/hide based on a condition.
[/gravityforms]
Conditional shortcode parameters
The conditional shortcode accepts the following four parameters: action, merge_tag, condition, and value.
Unlike the embed shortcode, all four of these parameters are required for the conditional shortcode to work. So what do they all mean? Let’s examine each of them in more detail.
action
Describes the action to be taken and should always be set to “conditional”.
merge_tag
The merge tag of the field whose value you’re assessing in your conditional logic statement.
condition
The condition you’re evaluating. Accepted values include: is, isnot, greater_than, less_than, contains, starts_with, ends_with.
value
The value you’re comparing against for the condition to be met.
The conditional shortcode may seem a little more difficult to understand than the embed shortcode, but once you start playing around with it, you’ll see that it’s simple to master. Let’s have a look at some helpful examples.
Gravity Forms conditional shortcode examples
In this example, we have a form asking the user to choose their favorite color. There are three options; “Blue”, “Green” and “Yellow”. Let’s suppose we want to show a customized confirmation message if the user chooses “Green” as their favorite color.
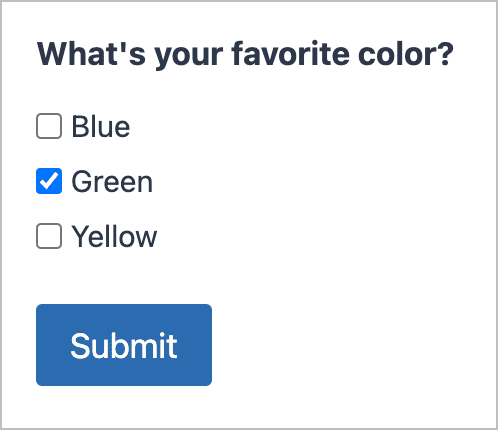
We can do this by constructing a conditional shortcode to check if the value of the checkbox field is “Green”, and if it is, display a custom message.
[gravityforms action="conditional" merge_tag={What\'s Your Favorite Color?:5} condition="is" value="Green"]
You chose green!
[/gravityforms]
Here’s what it looks like inside the confirmation message:
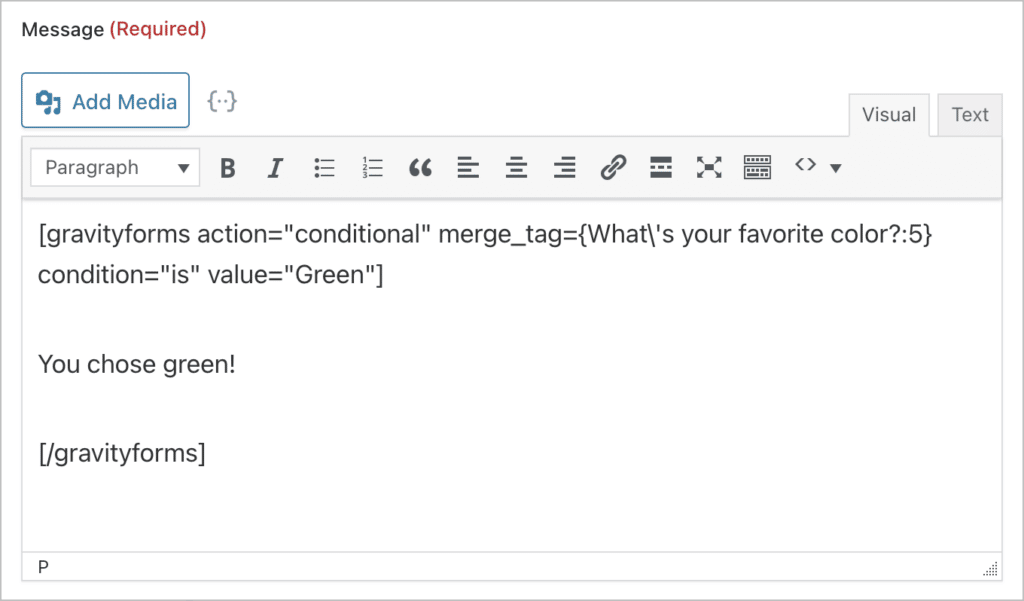
If the user chooses green and submits the form, they will see a message saying, “You chose green!”
💡 Pro tip: The content that you want to show/hide should be placed between the opening and closing shortcodes.
We can extend this example to account for other choices as well by adding another shortcode after the first one, like so:
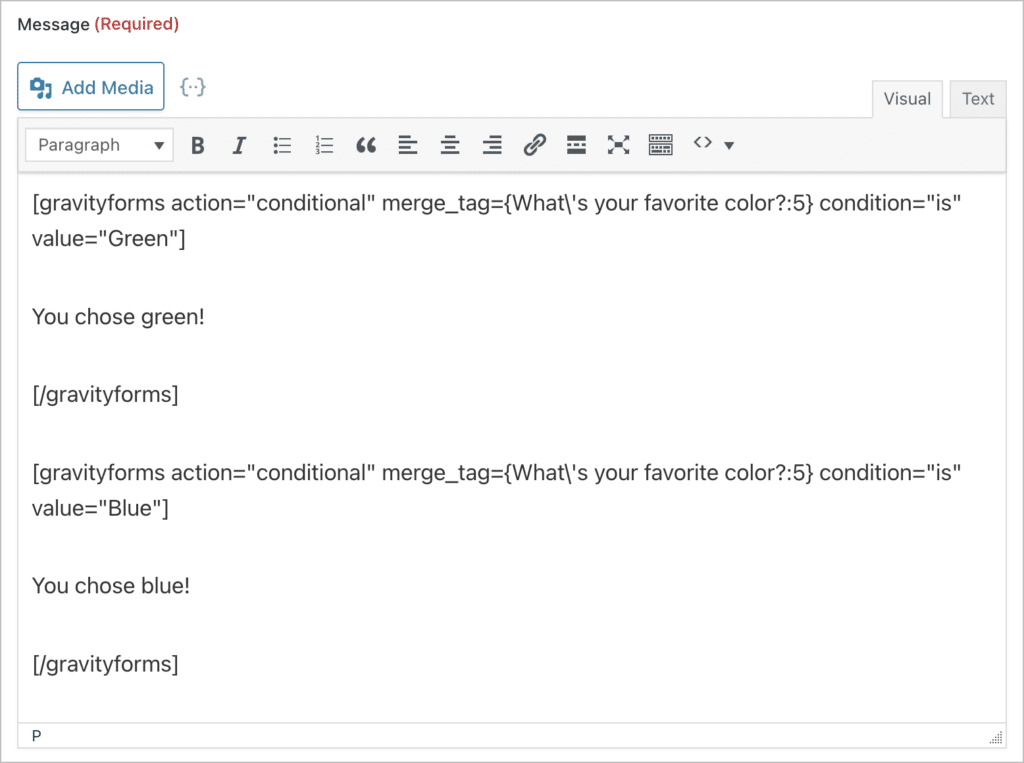
Now when a user chooses the color blue, they’ll see a message saying “You chose blue!”
When to use the Gravity Forms conditional shortcode:
- You want to display a custom confirmation message based on information included in the user’s submission.
- You want to send a custom notification (to an admin or user) based on information included in the user’s submission.
Shortcodes added by Gravity Forms add-ons
Many Gravity Forms add-ons allow you to use additional shortcodes on your website. For example, our add-on GravityView includes a range of shortcodes for displaying Gravity Forms field values on the front end.
Gravity Forms shortcodes FAQ
Here are some answers to frequently asked questions relating to the Gravity Forms shortcodes.
Must I enable Gravity Forms shortcodes within a form?
No! By default, every form you create will have an associated shortcode. The shortcode for a specific form is simply: [gravityform id="3"] where 3 is the form ID.
How do I use shortcodes within a Gravity Forms HTML field?
The Gravity Forms HTML field allows you to add custom content to your forms in the forms of text, HTML or other embedded content. The HTML field also accepts shortcodes.
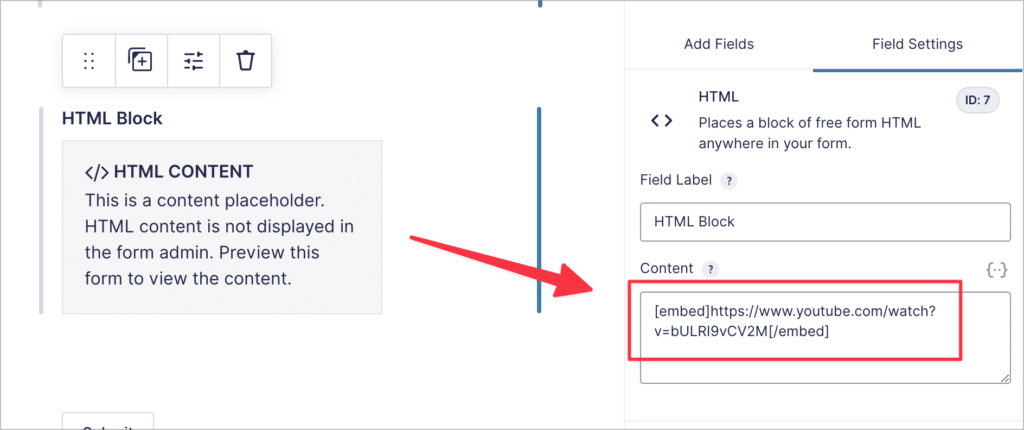
In the example above, we added a WordPress shortcode to the HTML field content in order to embed a YouTube video inside the form.
Can I use shortcodes inside Gravity Forms notifications?
Yes, you can use shortcodes inside Gravity Forms notification messages. An example of this is the conditional shortcode, which you can use to show different notification messages based on a user’s submission.
Can you use the Gravity Forms shortcode to embed forms outside WordPress?
No. Gravity Forms is a WordPress plugin and therefore, you can only use the Gravity Forms embed shortcode to embed forms on WordPress websites.
Gravity Forms shortcodes: final thoughts
Gravity Forms includes two powerful shortcodes that you can use to embed forms on your website and show/hide content based on conditional logic.
The embed shortcode includes the field_values parameter, allowing you to populate forms fields dynamically. This is helpful if you’re using the same form in multiple locations and need a way to differentiate between submissions.
On the other hand, the conditional shortcode is great for showing custom confirmation messages or notifications based on information submitted by the user.
Want to learn more about Gravity Forms? Become an expert by reading our ultimate guide, teaching you how to use Gravity Forms!

Helpful tips right in your inbox.
Subscribe to our biweekly newsletter for tips, special offers, and more!
Helpful tips right in your inbox.
Subscribe to our biweekly newsletter for tips, special offers, and more!