Are you looking to host your own online petition using Gravity Forms?
Creating a petition is a good way to raise awareness about important issues and make your voice heard. Are you ready to start effecting real change? In this post, we’ll show you how to create a petition on your website using Gravity Forms and display signatures on the front end using GravityView.
Let’s get started! 🙌
Download the free online petition form template now!
Import the template into Gravity Forms and customize as necessary.
Sneak peek
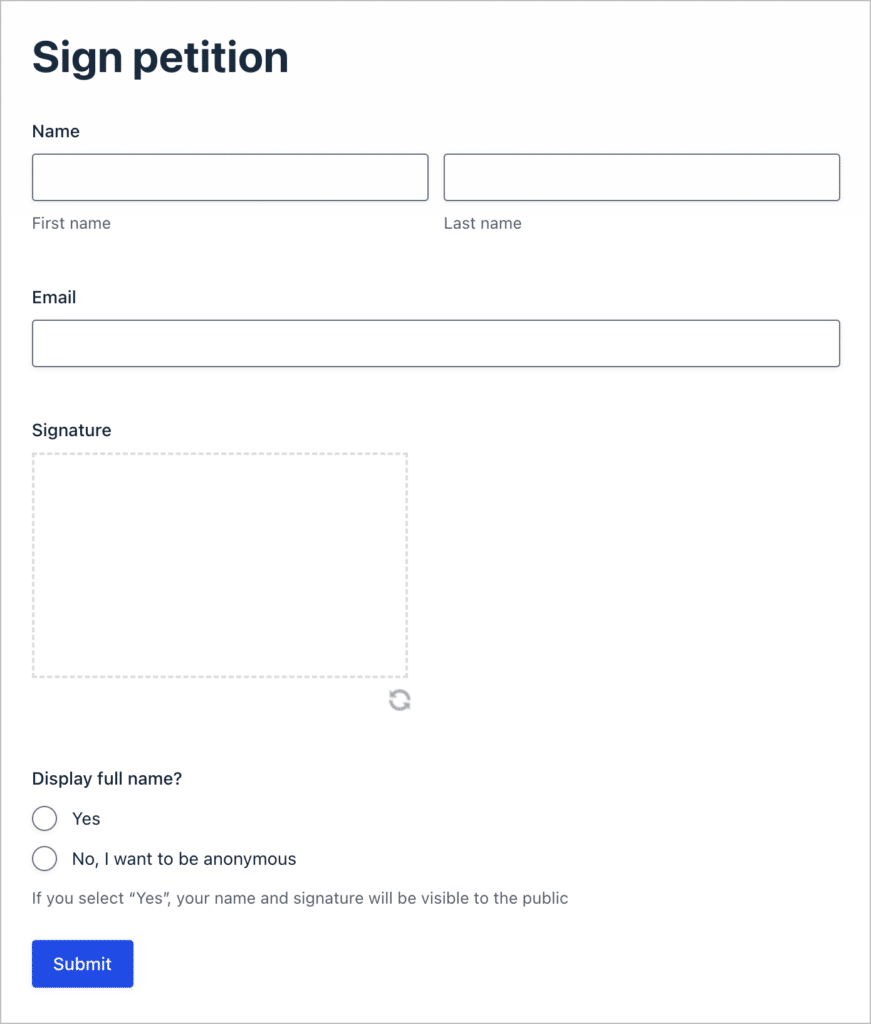
Here’s what our finished petition looks like on the front end. Below is the form we built for users to fill out when they want to sign the petition.
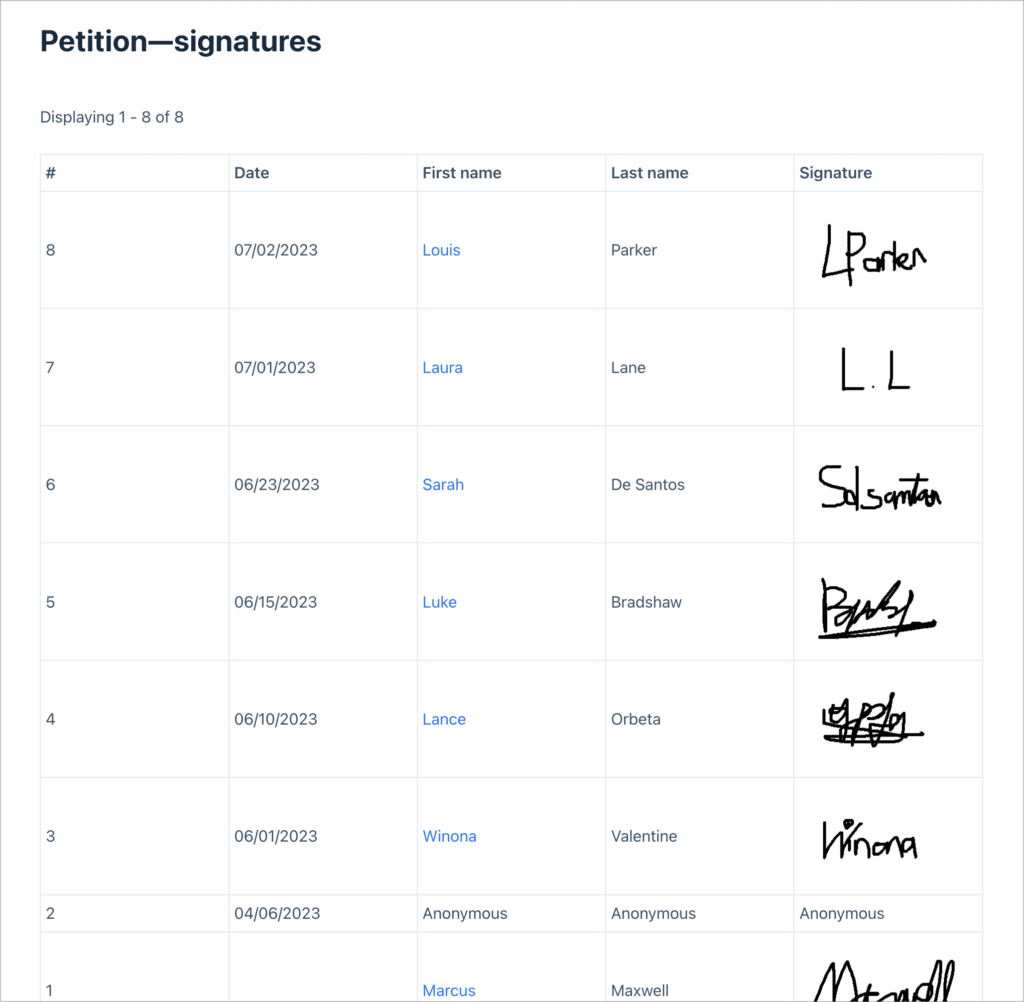
And here’s the table of signatures that we built to display anywhere on our website!
What you’ll need
Here are the plugins/extensions you’ll need to build an online petition like the one in this tutorial:
- Gravity Forms
- GravityView
- Gravity Forms Signature Add-On
- GravityView Advanced Filtering Extension (optional)
What is an online petition?
A petition is a formal request appealing to authority. Hosting an online petition is one of the best ways to rally a large group of people behind a common cause.
Traditionally, petitions were signed using pen and paper by a group of people to indicate their support of a petition letter. However, most petitions these days are carried out online.
Thanks to the ubiquity of the internet, online petitions can spread quickly and generate thousands of signatures in a short amount of time. Online petitions have a better chance of “going viral” and generating lots of support.
There are various websites out there that allow you to draft petitions and then share them online to generate signatures. However, hosting a petition on your own website gives you more control over the process.
How to create a petition online
There are various methods available for creating online petitions. One popular option is change.org, a widely recognized platform dedicated to creating and promoting petitions.
However, Gravity Forms stands out when it comes to building a custom petition that you can host on your own website. With its user-friendly interface and extensive features, Gravity Forms simplifies the petition creation process. Offering diverse form fields like text, checkboxes, and dropdown menus, petition creators can easily capture specific information.
Gravity Forms is a plugin for WordPress, a widely used content management system. WordPress makes it easy to build websites with simple or advanced functionality.
Additionally, GravityView, a complementary extension, allows organizers to effortlessly display signatures in an elegant and accessible format. With its versatility and comprehensive features, Gravity Forms proves to be an exceptional tool for impactful online petitions.
Creating the petition form
The first step is to create the petition form so we can collect signatures for our petition letter.
We’ll start by hovering over “Forms” in the WordPress Admin menu and clicking on “New Form”. Next, we’ll give our form a name and click “Create Form”.
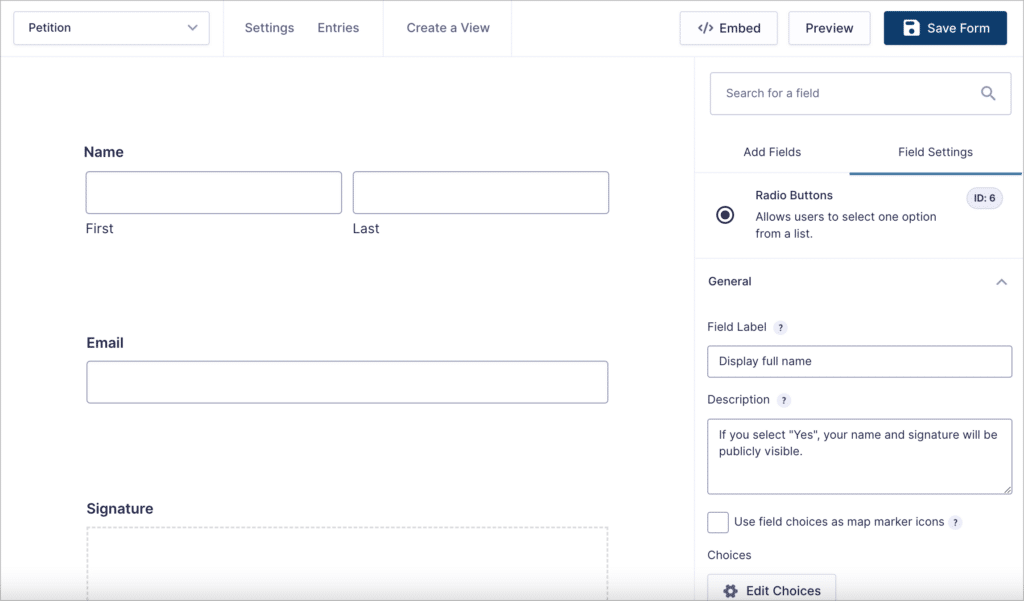
Now we can start building our petition form using the Gravity Forms drag-and-drop builder. Feel free to add different fields to your form depending on the information you want to capture for your petition.
For this example, we’ll keep things simple by adding the following 4 fields:
- Name (Name field)
- Email (Email field)
- Signature (requires the Gravity Forms Signature add-on)
- Display full name? (Radio Buttons field)
The final Radio Buttons field will allow users to choose whether to show their name publicly on the front end or keep it anonymous. This field will have two options—either “Yes” or “No”.
Here’s what our form looks like on the front end:

💡 Pro tip: If you’re looking to create an email petition, or send an email every time a user signs your petition letter, you can do that by configuring Gravity Forms email notifications.
Now that we have a way to collect signatures for our petition, we can use GravityView to display those signatures on the front end!
Displaying signatures on the front end
The next step is to use GravityView to create a View that allows you to display signatures on the front end of your site.
What is GravityView?
GravityView is an add-on for Gravity Forms (the number one WordPress form plugin!) that allows you to display form entries on the front end of your website. Using Gravity Forms in combination with GravityView gives you a powerful way to build WordPress-powered web applications.
Creating the petition View
To create a new View, we’ll hover over “GravityKit” and click “New View”. Next, we’ll give our View a name (something like “Petition Signatures”) and select the data source. After selecting a data source, we’ll need to choose a View Type.
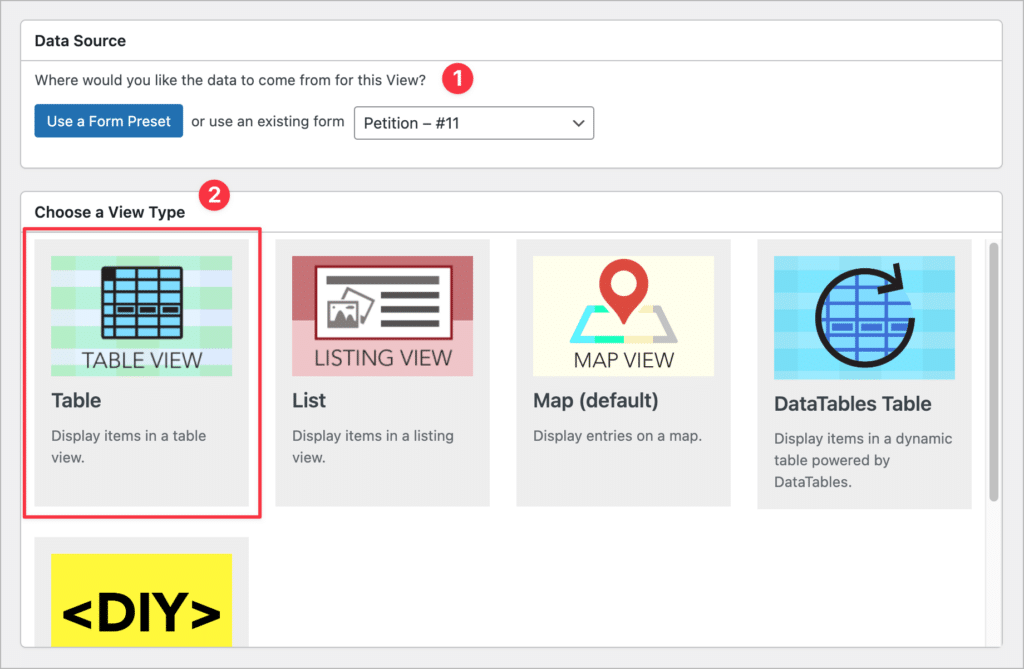
- Select a data source: Here we’ll need to select an existing form from the dropdown menu containing the entries we want to display.
- Choose a View Type: Different View Types allow you to display data using different layouts. For this example, we’ll choose the “Table” layout.
Now we can start constructing our View using GravityView’s drag-and-drop interface!
Adding fields to our View layout
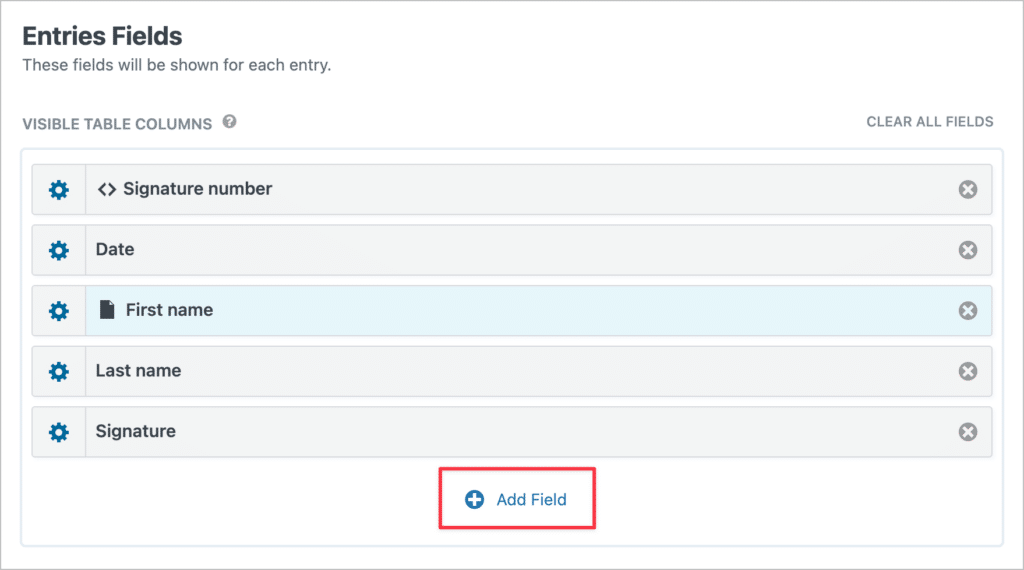
We’ll start by scrolling down to the “Entries Fields” section. Here we can add fields that display as columns in a table.
To add a new field, we’ll click the “Add Field” button. Here, we’ll add the Entry Date, First Name, Last Name, and Signature fields. We’ll also add a counter that keeps track of the number of signatures.
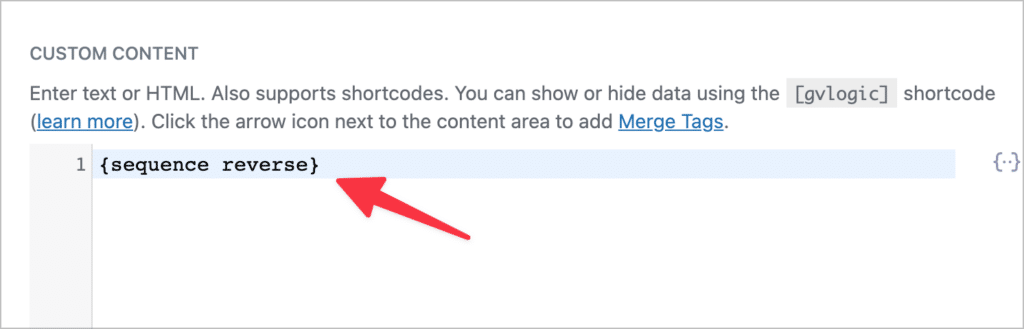
To add the signature counter field we’re going to use GravityView’s Custom Content field. This allows us to add merge tags, shortcodes, and HTML to our View layouts! After adding a Custom Content field to our View, we’ll click on the gear icon to open the field settings.
To create a signature counter, we’ll use the sequence merge tag. This merge tag displays the result number of an entry. To ensure that the first signature displays as number 1, the second as number 2, and so on, we’ll add the “reverse” modifier.
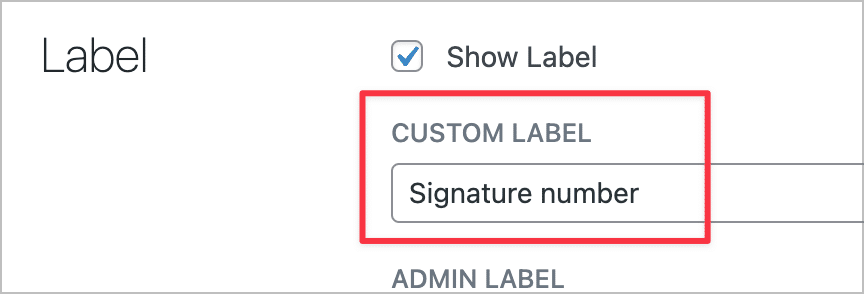
Finally, we’ll add a custom field label by modifying the Label settings.
Finally, we need a way to conditionally display the name based on whether the user selected “Yes” or “No” from the “Display full name?” dropdown field. If they selected “Yes”, we want to display their full name and signature, but if they selected “No”, we want to replace their name with “anonymous”.
There are two ways to do this in GravityView. We could accomplish this using the handy shortcode. However, for this example, we're going to use the Advanced Filtering Extension, which allows us to make use of field conditional logic. Woth this powerful feature, we can show/hide fields depending on whether a value matches a certain condition.
Here's how we set this up for the fields we want to hide:
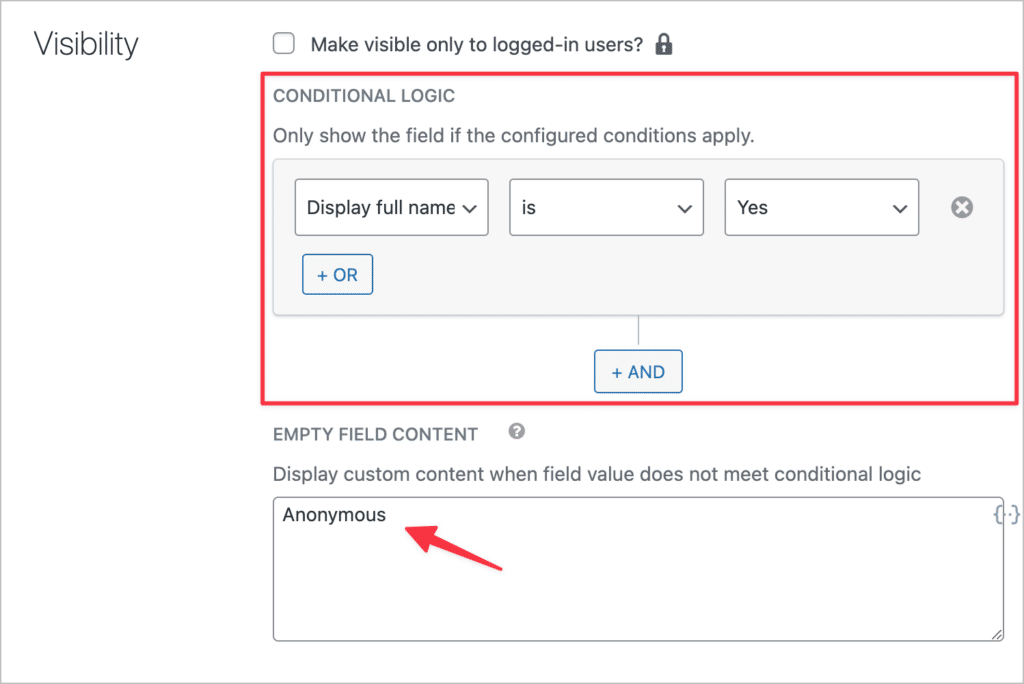
Now feel free to add any other fields to your View that you think are necessary!
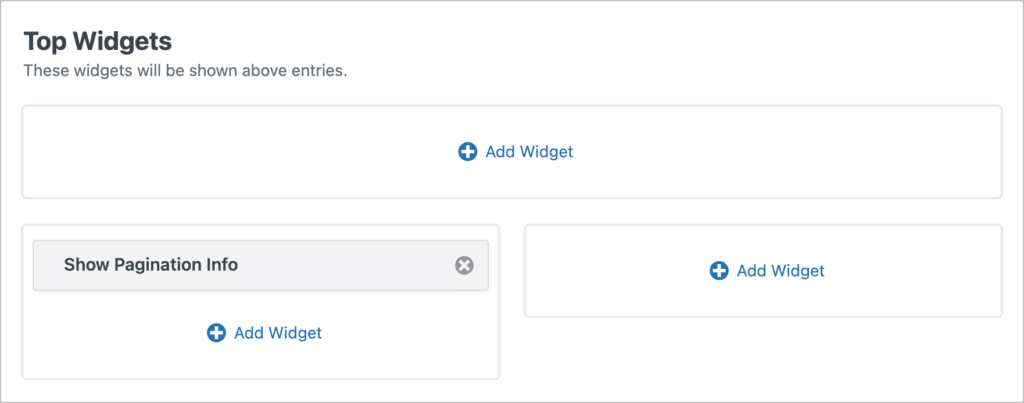
Adding widgets to our View
Widgets are tools for navigating a View and displaying extra information. You can add widgets to the widget areas located at the top or bottom of the view layout.
Widgets include things like search bars, pagination info, and page navigation links.
After adding fields and widgets to our View Layout, the final step is to enable entry approval.
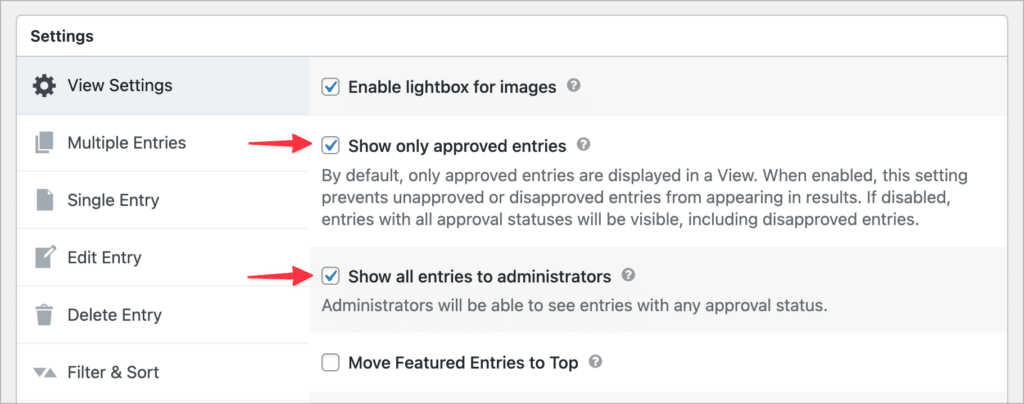
Enable entry approval (optional)
GravityView includes a robust entry approval system. This allows you to screen entries before they show up in a View. This can help you filter out spam and other signatures that don't comply with the rules of your petition.
Entry approval is enabled by default on all new Views. You'll find this option in the View settings at the bottom of the View editor.
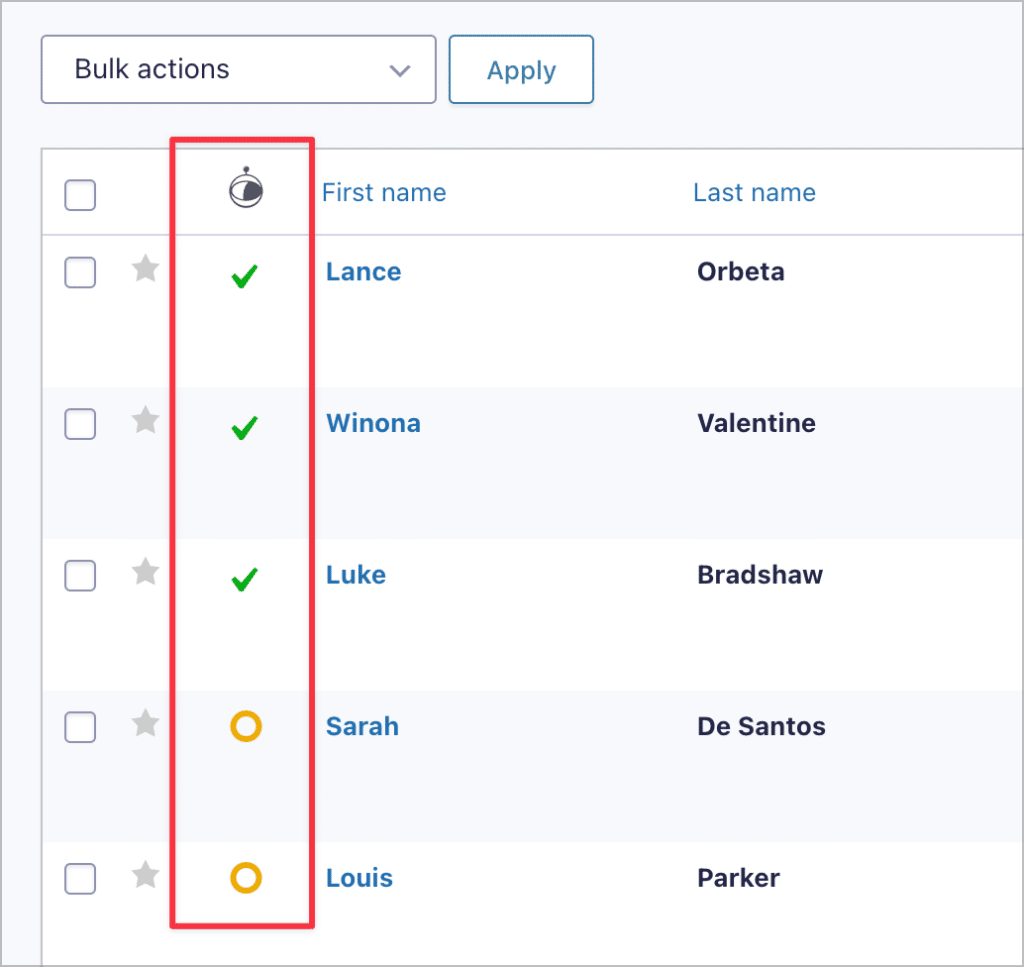
If we leave this option enabled, we'll be able to either approve or reject new signatures as they come in. All we need to do is select the check mark or cross in the approval column on the Gravity Forms "Entries" page.
Finally, you may also wish to enable entry exporting.
Enable entry exporting (optional)
Enabling the entry export option gives users the ability to export a list of signatures to either CSV or TSV by adding /csv or /tsv” to the end of the View URL!

When you’ve finished configuring the View Settings, you can embed your View on a page or post using the GravityView Gutenberg block!
Embed your View where you want signatures to appear
We can embed our View anywhere on the front end using the GravityView Gutenberg block. After adding the block to your page, you can toggle the "Preview" option to see what the View looks like.
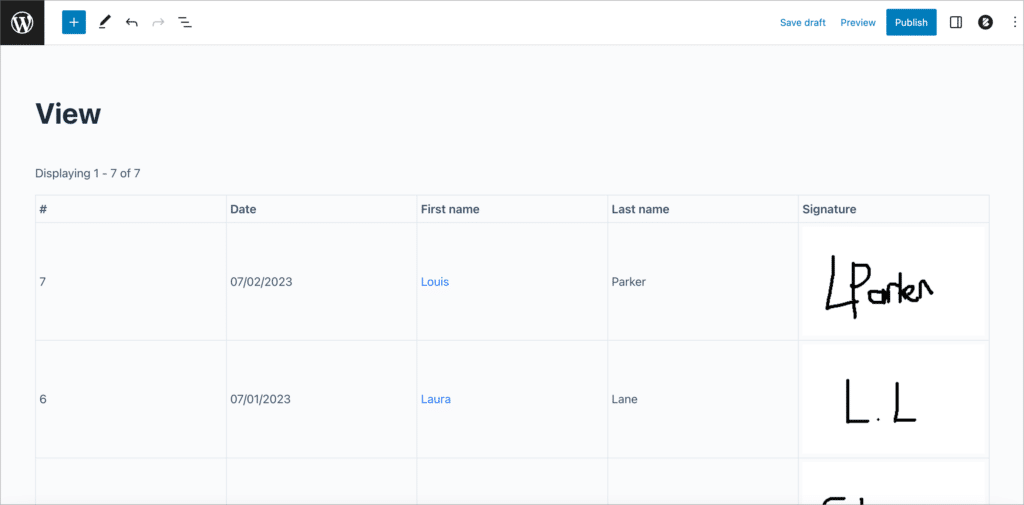
That's it!
Bonus: Display the total number of signatures
Instead of displaying the names of everyone who signs your petition, you may only want to display the total number of signatures. This is easy to accomplish using our plugin, GravityMath! With GravityMath you can perform advanced calculations on your Gravity Forms data.
Using the [gravitymath] shortcode, you can output calculations anywhere on your website, including posts, pages, and widgets.
To display the total signatures added, all you need to do is construct a shortcode that will count the number of submissions and output the correct number. Here's an example:
[gravitymath scope="form" id="9"] {Name:5:count} [/gravitymath] people have already signed this petition!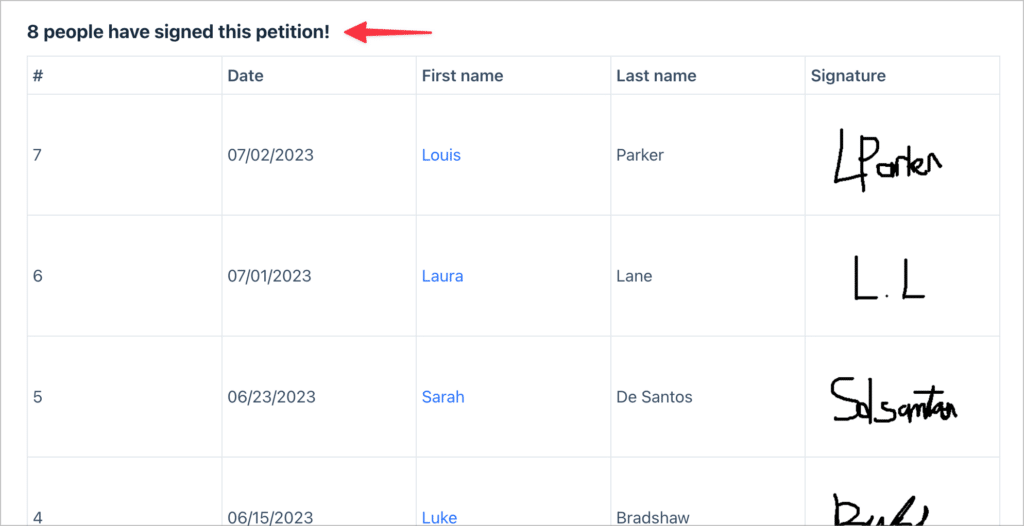
The number will update as you receive new submissions!
💡 Pro tip: You can learn more about performing calculations in Gravity Forms by reading our ultimate guide.
Why not use a WordPress petition plugin?
There are several WordPress plugins that allow you to create petitions on your website and collect signatures. However, most of them lack flexibility, which can make it difficult to find an optimal solution.
Create your petition now using Gravity Forms and GravityView
Creating an online petition is a great way to bring large groups of people together in support of a common cause. Unlike traditional pen and paper petitions, online petitions are easy to access and can garner signatures from all over the world.
In this post, we showed you how to create an online petition form using Gravity Forms and display signatures on the front end using GravityView. We also covered how to use the GravityMath add-on to display the total number of signatures anywhere on your website!
So now it’s over to you. Have you found a cause that you’re passionate about? Are you ready to take action and start effecting real change? Start building your online petition today!