A calendar is a great way to keep your audience updated regarding upcoming events.
Whether you run a nonprofit, charity, restaurant, or yoga studio, adding a calendar to your website is the perfect way to showcase upcoming events and engage with your users. To save yourself precious time, it’s important to automate as much of the event registration process as possible.
Luckily, that’s easy to do using Gravity Forms!
In this tutorial, we’ll show you how to build a Gravity Forms event registration calendar and allow users to sign-up for different events from the front end of your site 📅👇
💡 Check out a live demo of the finished event calendar and get your own free trial site preloaded with all GravityKit add-ons!
Table of contents
- Sneak peek
- What you’ll need to build a Gravity Forms event registration calendar
- Installing GravityView
- Installing Gravity Forms calendar
- Creating the event submission form
- Editing the Single Entry Layout
- Creating the Calendar feed
- Creating the Gravity Forms event registration form
- Bonus: Syncing your events calendar with Google or Apple Calendar
- Create a Gravity Forms event registration calendar
Sneak peek
Here’s a quick preview of what we’re going to build in this tutorial. We’ll start by creating an event submission form linked to an interactive calendar that displays event information on the front end.
When users hover over an event on the calendar, they’ll see a “Read more” link that takes them through to a page that displays more detailed information about the event.

Here we’ll add a link to register for the event.

Clicking on the link will take the user to a registration form, prefilled with the name of the event they want to register for.
Okay, let’s get started!
💡 Pro tip: If you’re wondering what the difference is between Gravity Forms Calendar and The Events Calendar, read Gravity Forms Calendar vs The Events Calendar: Which Plugin Should You Choose?
What you’ll need to build a Gravity Forms event registration calendar
Here are the different plugins you’ll need to accomplish the above result:
| Plugin/Add-On | Free/Paid |
| Gravity Forms | Paid (any license level) |
| GravityView | Paid |
| Gravity Forms Calendar | Paid (also included in the GravityView All Access license) |
Okay, let’s start by installing everything we need.
Installing GravityView
📝 GravityView is an add-on for Gravity Forms that allows you to display form entry data on the front end of your site.
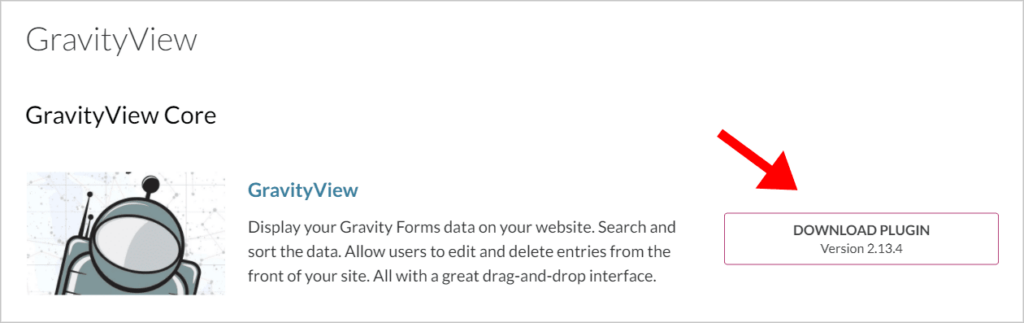
If you don’t have GravityView yet, pick up a license from our website. Next, head over to your Account page, click on the Downloads tab, and download the GravityView plugin file to your computer.
To install GravityView follow these steps:
- Log in to your WordPress website, hover over Plugins and click Add New.
- Click Upload Plugin.
- Click Choose File and select the GravityView plugin file.
- After the plugin has finished installing, click Activate.
After you’ve installed GravityView, you’ll need to install the Gravity Forms Calendar add-on.
Installing Gravity Forms calendar
📝 Adding a calendar to Gravity Forms is easy using the Gravity Forms Calendar add-on. This add-on allows you to display Gravity Forms entries on a customizable calendar that you can embed on your website.
Gravity Forms Calendar is included in the GravityView All Access plan. If you don’t have All Access, you can purchase the plugin separately from our website. After doing so, the installation process is the same as described above!
If you have an All Access license, you can install Gravity Forms Calendar from inside WordPress. To do this, follow these steps:
- Hover over Views and click Manage Add-Ons.
- Scroll down to Gravity Forms Calendar and click Install.
- After the plugin has been installed, click Activate.
That’s it! Now that you have everything you need, let’s continue with the tutorial.
Creating the event submission form
First off, you’ll need to create an event submission form that allows you to add new events to your calendar. When building your form, ensure that you add a Date field, as this is required for the calendar feed to work.
If you want to save time and simplify the process, you can use GravityView’s built-in form presets. Form presets are preconfigured templates that allow you to set up a new View and a corresponding form in only a few clicks.
First, hover over Views and click New View. Next, give your View a name and under where it says “Data Source”, select Use a Form Preset.
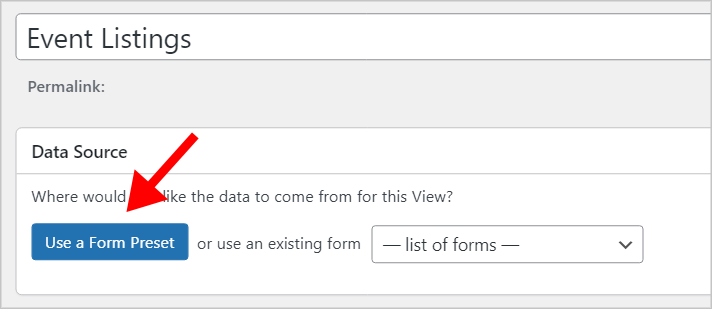
You’ll now see several preset options, including an “Event Listings” option. After clicking on this option, you’ll see the GravityView drag and drop View editor, preconfigured with various fields and widgets required to display a list of in-person or virtual events.
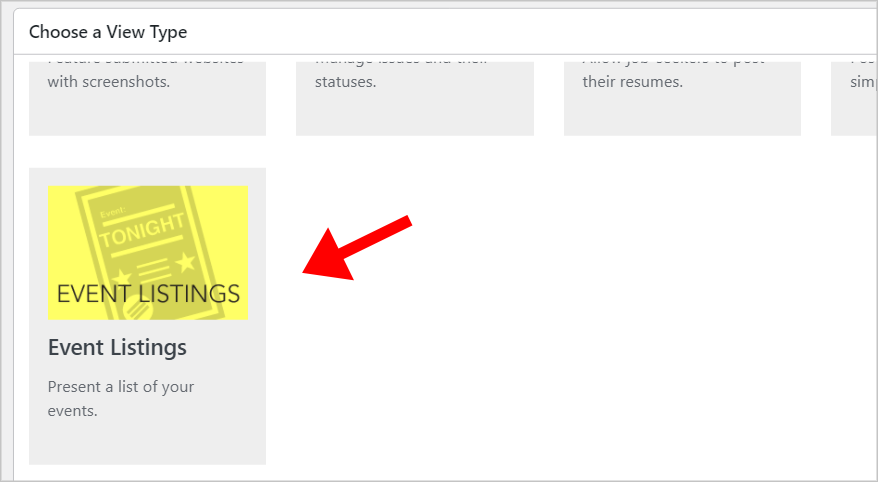
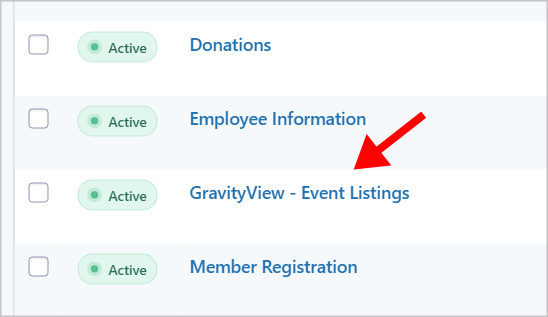
Before you make any changes, click Publish. This will automatically create a corresponding “Event Listings” form in Gravity Forms.
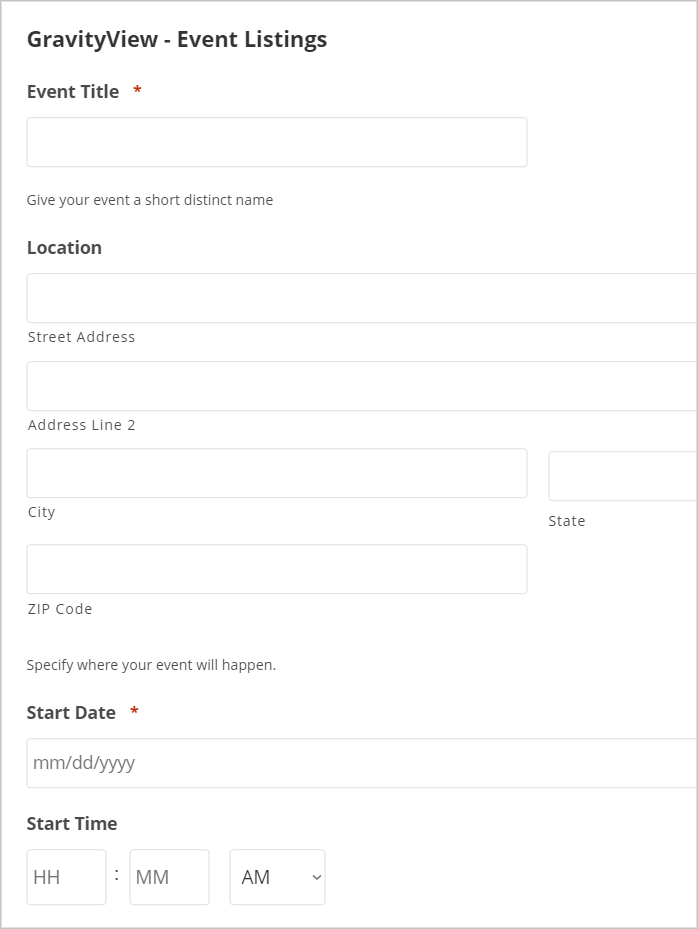
If you preview the form, you’ll see that it contains all the fields necessary for submitting event details including the Event Name, Location, Start Date, Start Time, End Time, and more.
To make changes to the form, simply hover over it and click Edit. This will take you to the Gravity Forms visual form editor where you can add/delete fields, change field labels, add conditional logic rules, and more.
Embedding the form
When you’re done, you’ll need to embed your form on a page or post. To do this, create a new page/post and add your new form using the Gravity Forms Gutenberg block.
📝 There are two ways to embed Gravity Forms – using the Gravity Forms block or using the embed shortcode.
Here’s what our form looks like on the front end:
If you’d like your event submission form to be hidden from the public, you can change the page visibility settings to Private or Password Protected.
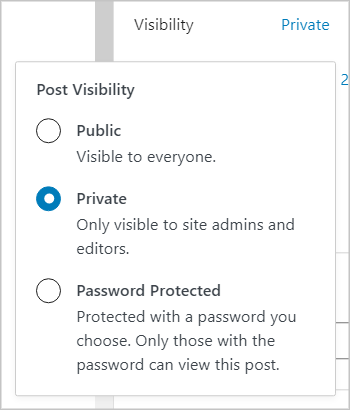
📝 Alternatively, you can make your form only accessible to logged-in users by updating the form settings.
To display events on a calendar, you’ll need to create a calendar feed. But before doing that, you may want to make some changes to the Single Entry View layout.
Editing the Single Entry Layout
In GravityView, a “View” is made up of three different pages – the Multiple Entries page, the Single Entry page, and the Edit Entry Page. The Multiple Entries page displays each entry one after the other. The Single Entry page is where users will go to view more information about a specific event.
To edit the Single Entry layout, edit your View and click on the Single Entry Layout tab at the top of the View editor.

Now you can add and delete fields using GravityView’s intuitive drag and drop builder.
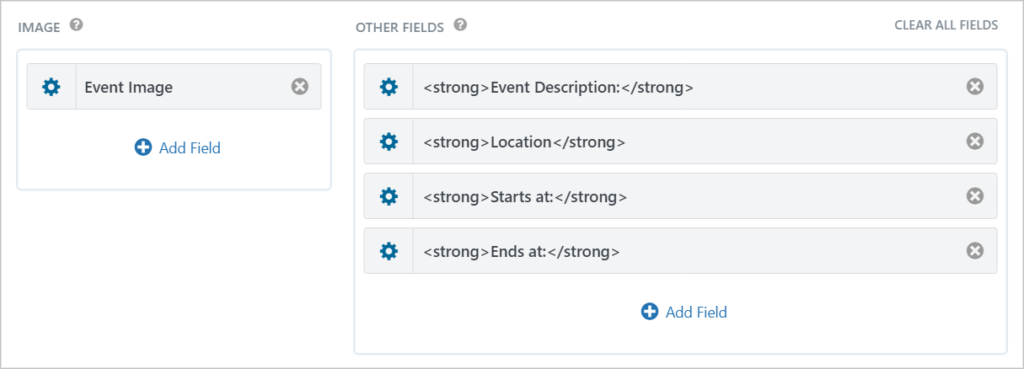
When you’re finished editing the Single Entry layout, make sure to save your changes by clicking Update.
Creating the Calendar feed
Head over to the Form Settings page and click on the GravityView Calendar tab.
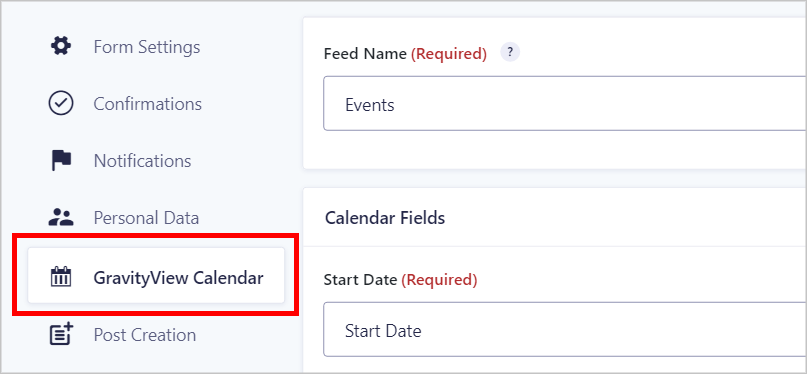
Give your feed a name and then map the Start Date, End Date, Start Time, and End Time fields.
📝 Only the start date is required. You can leave the rest blank if you want to!
Now scroll down and fill in the Event Title and Description. Here you can use merge tags to dynamically display information from your form. To add a merge tag, click on the button to the right of the input box.
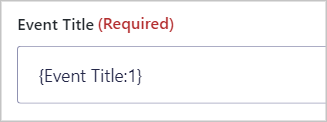
As you can see, we’re using the Event Title merge tag to display the event title field from our event submission form.
💡 Pro tip: To learn more about merge tags, check out the Gravity Forms documentation.
Adding a link to the Single Entry
Now we’re going to add a link to the Single Entry page in GravityView, so users can view more information about a specific event. To do this, we’ll use the [gv_entry_link] shortcode.
This shortcode allows us to dynamically generate a link through to an individual entry.
Here’s what the shortcode looks like:
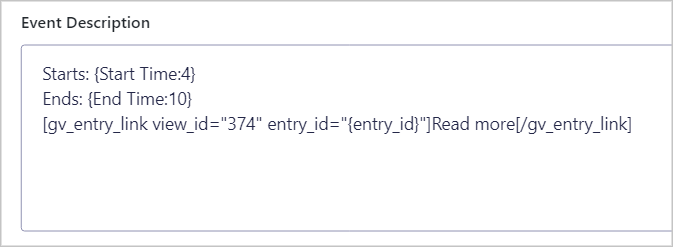
[gv_entry_link view_id="374" entry_id="{entry_id}"]Read more[/gv_entry_link]The above shortcode includes two important parameters:
view_id– the ID of your View in GravityViewentry_id– the ID of the entry you want to link to
As you can see, we’ve set the entry_id parameter equal to the {entry_id} merge tag, this will ensure that that entry ID value is dynamically populated based on the event the user wants to register for.
We’ll add this shortcode to the Event Description, along with the Start Time and End Time. Feel free to include other information in your event description alongside your “Read more” link.
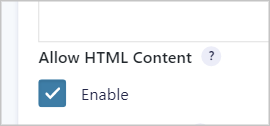
To ensure that your link works correctly, be sure to check the box that says “Allow HTML Content”.
When you’re done, scroll down to configure the remaining calendar settings.
Configuring the remaining calendar settings
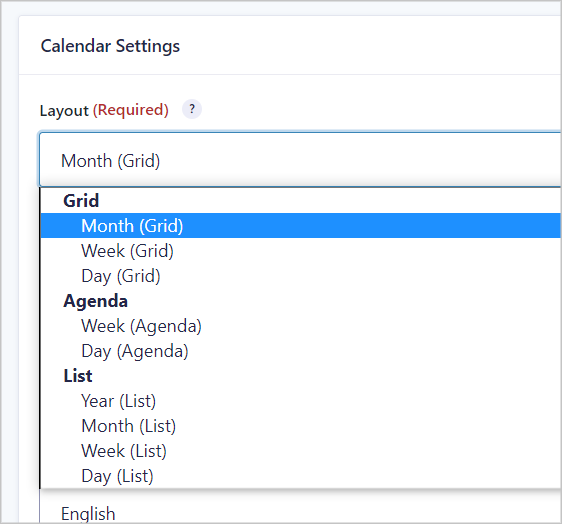
Gravity Forms Calendar includes a host of settings that allow you to customize your calendar. Start by choosing a layout – you can choose between the Grid, Agenda, or List layouts. Each one has the option to display events by month, week, or day.
Below that is an option to dynamically load events. Enabling this option will ensure that only the events displayed will be loaded. This can help to speed things up if your calendar is jam-packed full of events!
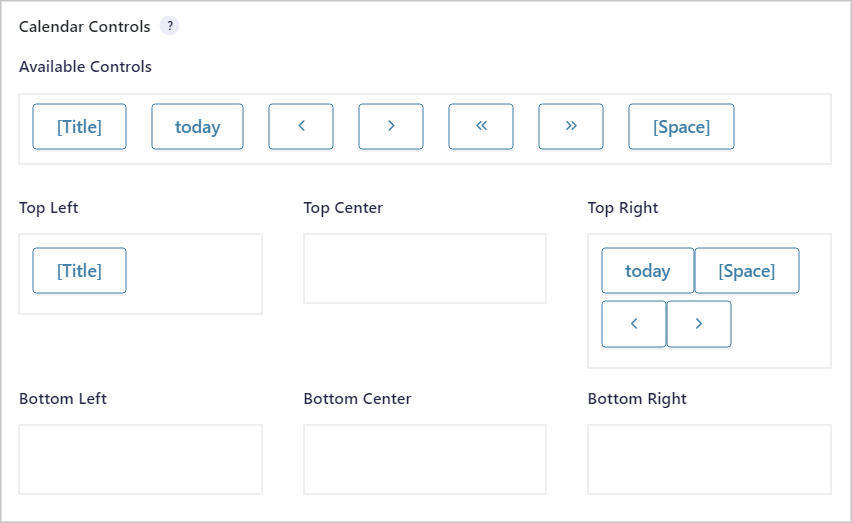
You can also add controls above or below the calendar, making it easier for users to navigate through events.
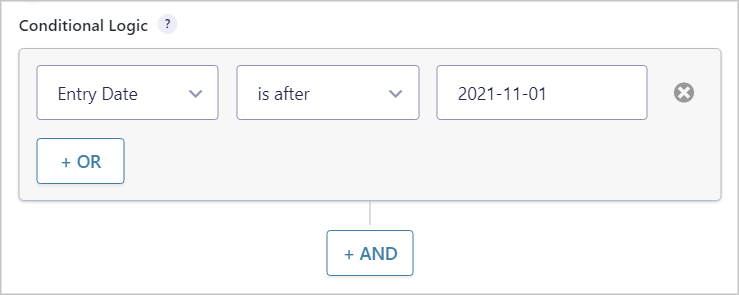
Below the calendar controls, you’ll find the conditional logic settings. Conditional logic allows you to display events based on certain parameters. For example, the below condition ensures that we’ll only see events that begin after November 1st, 2021.
At the bottom, you’ll see a preview of your calendar. When you’re done configuring the different fields and options, click Save Settings.
💡 Pro tip: Check out our documentation for guidance on how to color-code different types of events.
Embedding your calendar
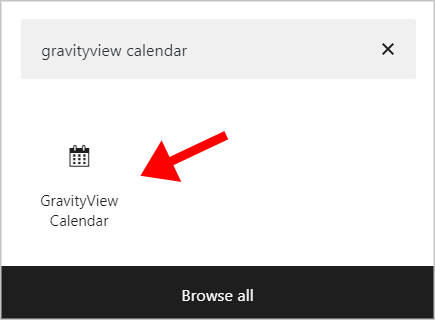
To showcase events on the front end, you’ll need to embed your calendar on a page or post. This is easy to do using the GravityView Calendar block! Simply click the ‘+’ icon and search for “GravityView Calendar”.
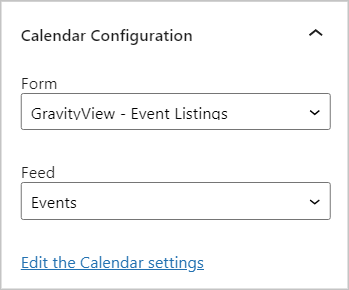
After adding the block to your page, select your form and calendar feed from the dropdown menus on the right.
When you’re done, save your page and open it on the front end to view your new calendar.
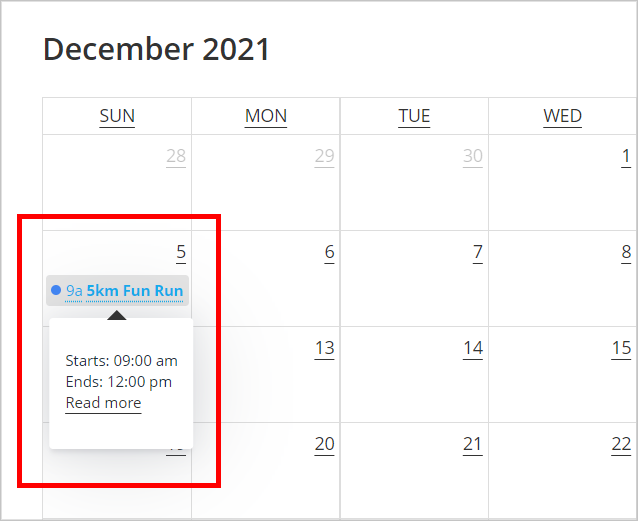
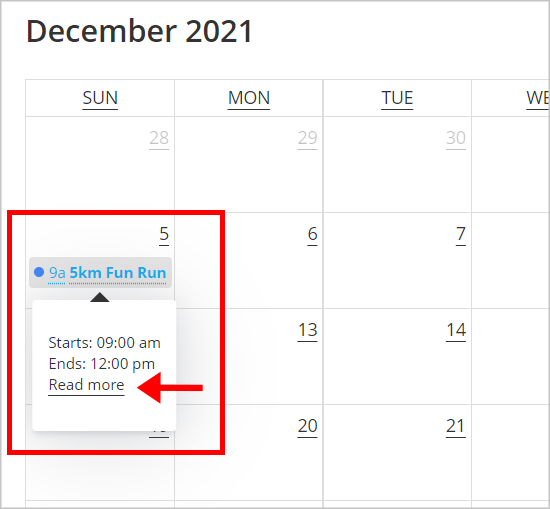
Opening our calendar on the front end, we can see an event on the 5th of December titled “5km Fun Run”. Hovering over the event brings up an info box containing the event description (the start time, end time, and a link to “Read more”).
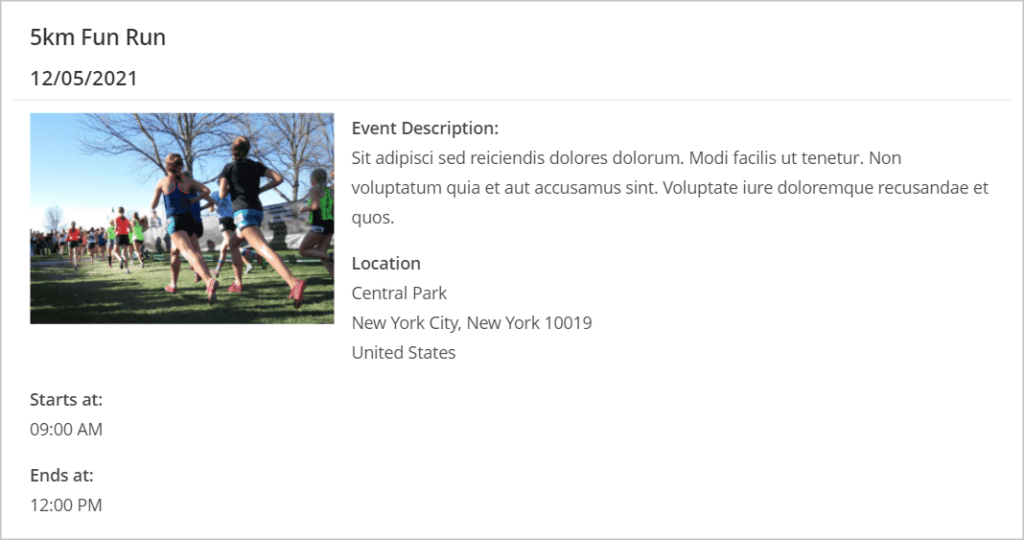
Clicking on the “Read more” link takes us to the Single Entry page where we can view more information about the event.
Okay, our events calendar is all set up, but what if users want to register for an upcoming event? Let’s create a new form that allows them to do so.
Creating the Gravity Forms event registration form
Although we have an event submission form, we don’t yet have an event registration form that allows users to sign-up for upcoming events. Luckily, Gravity Forms is also a powerful WordPress event registration plugin.
To create a new form hover over Forms and click Add New. Now give your form a name and click Create Form.
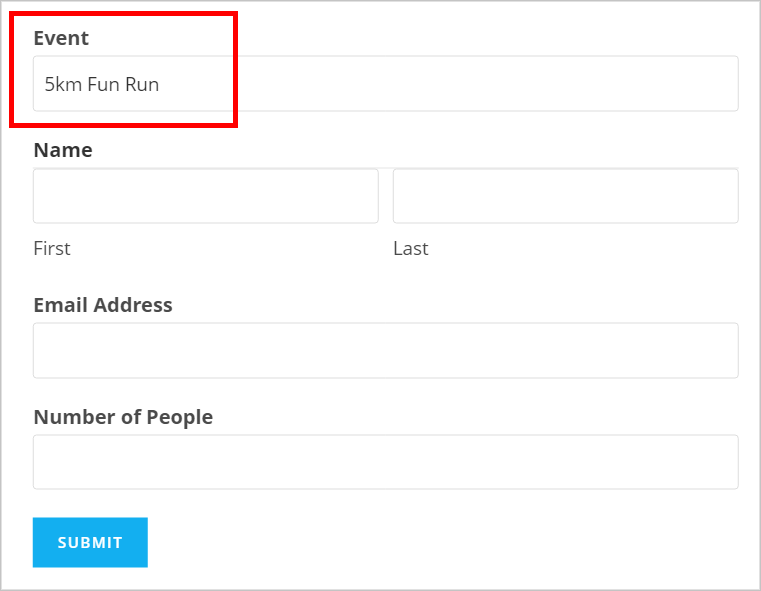
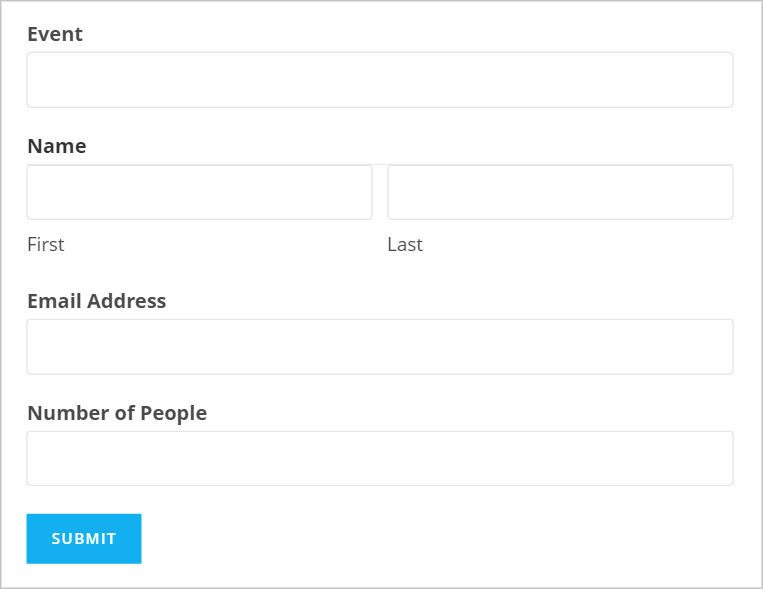
We’ll create a simple registration form with the following fields:
- Event
- Name
- Email Address
- Number of People
Here’s what it looks like on the front end:
💡 Pro tip: Get a headstart by downloading and installing the event registration form template from the Gravity Forms template library.
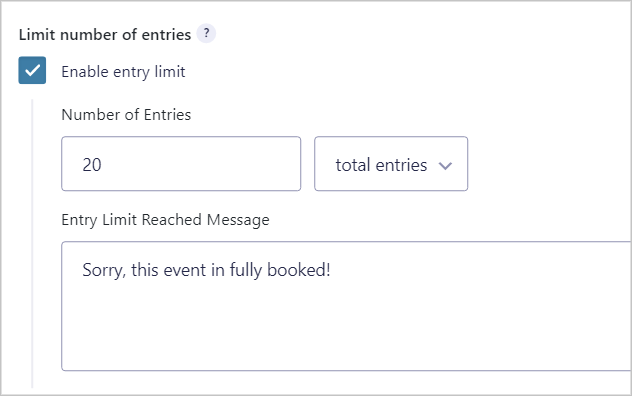
Gravity Forms also allows you to limit the number of entries for a form. This is helpful if your event has limited capacity and you want to avoid overbooking.
To set a limit on the number of submissions, go to the Form Settings page and scroll down to Restrictions. Now check the box that says “Enable entry limit” and define numerical a limit. You can also add a message that appears when the limit is reached.
When you’re done, embed your registration form on a new page or post.
Now we’re going to add a link to the registration form from the Single Entry layout. Using Gravity Forms URL query parameters, we’ll dynamically populate the “Event” field with the name of the event that the user wants to register for.
Linking to the event registration form and dynamically populating the event field
Start off by editing your form in Gravity Forms. Next, click on the Event field, open up the Advanced tab (under Field Settings) and check the box that says “Allow field to be populated dynamically”. Now enter a parameter name (something like “event”). Finally, save your form.

Now head back to your View, open up the Single Entry Layout, and add a Custom Content field by clicking on the + Add Fields button and selecting Custom Content.

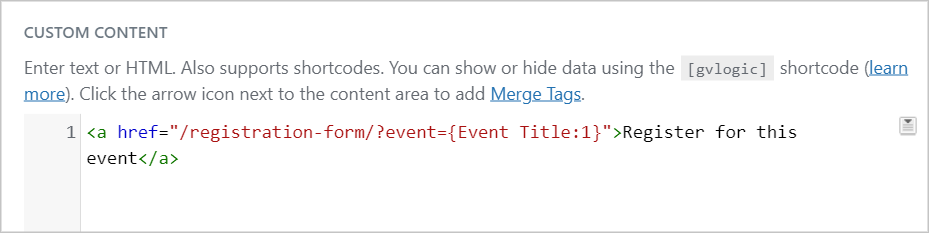
Open the custom content field settings by clicking on the gear icon and inside the text editor, paste the following code:
<a href="/your-page/?event={Event Title:1}">Register for this event</a>📝 Make sure to replace “/your-page/” with the permalink to the page containing your event registration form.
The above code creates an anchor link to the page containing our registration form. The end of the URL contains the following query parameter: ?event={Event Title:1}. This ensures that the “Event” field will be prepopulated with the name of the event that the user wants to register for.
Here’s how it works:
First, the user hovers over an event on the calendar and clicks “Read more”.
They are then taken to the Single Entry page for that event where they can view a detailed description of the event, including the location. At the bottom is a link to register.
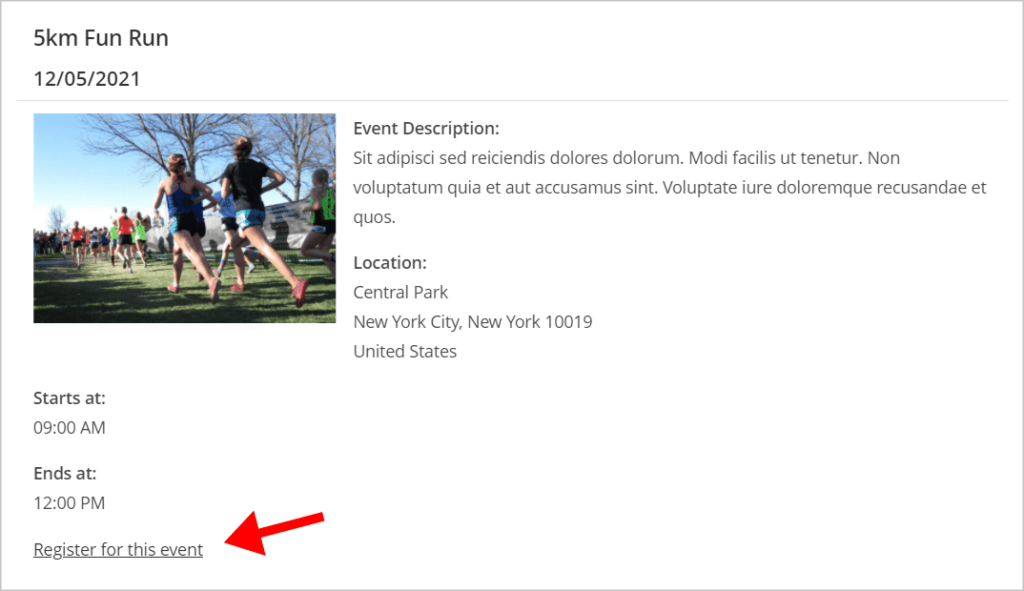
Once they click on this link, they are taken to the event registration form, which is prepopulated with the event name.

That’s it! 🙌
💡 Pro tip: Take things further by using GravityView to display a guest list.
Bonus: Syncing your events calendar with Google or Apple Calendar
As of version 2.0, our Gravity Forms Calendar add-on includes subscription links, allowing users to subscribe to calendar feeds using their Google or Apple Calendar! The feed link will update in real-time as you add new events.
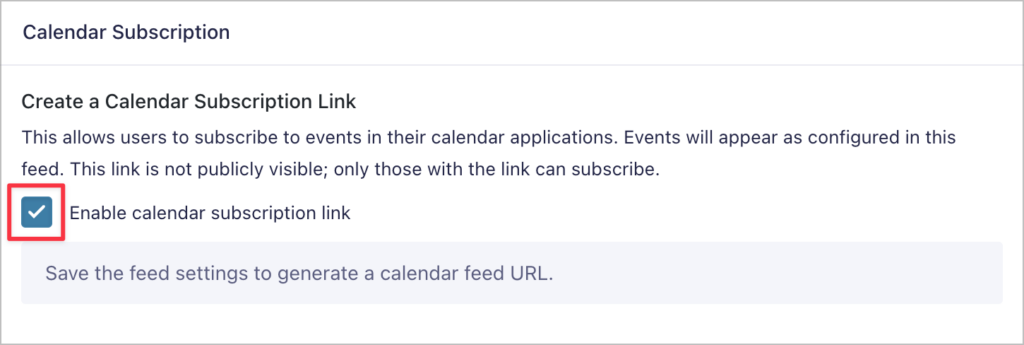
To enable the subscription link, head over to your Calendar feed settings, scroll down and check the box that says “Enable calendar subscription link”.
You can now copy the subscription link to your clipboard or display it on your website using one of the new Calendar blocks.
After subscribing to the feed, your Google/Apple calendar will update periodically to reflect any updates made to your Gravity Forms Calendar. If you’re using Apple Calendar, you can adjust the refresh rate by updating the “Auto-refresh” option.
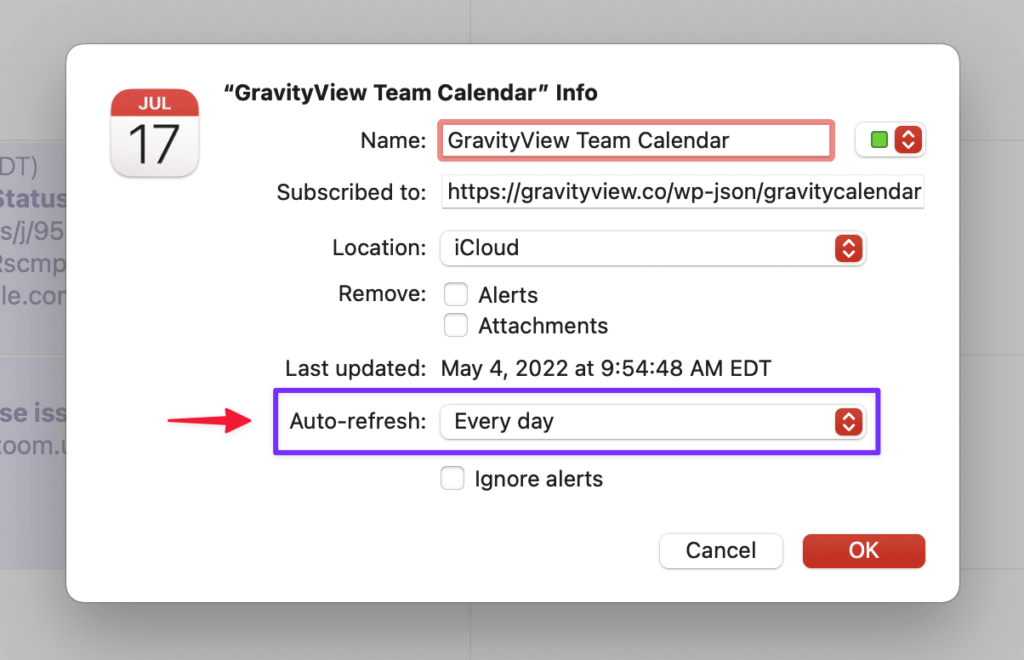
This option is not yet available in Google Calendar.
Create a Gravity Forms event registration calendar
In this post, we showed you how to create a WordPress event calendar that allows users to view information about upcoming events and register for events on the front end.
The Gravity Forms Calendar plugin is a powerful solution for displaying Gravity Forms entries on a dynamic and responsive calendar. By using it together with GravityView, you can build an automated event registration system for your WordPress website!
If you found this tutorial valuable, check out how to build a vacation calendar using GravityCalendar and Gravity Flow!

Helpful tips right in your inbox.
Subscribe to our biweekly newsletter for tips, special offers, and more!
Helpful tips right in your inbox.
Subscribe to our biweekly newsletter for tips, special offers, and more!