
Do you use Gravity Forms to register new users on your website?
In this post, we’ll show you how to create user profiles from Gravity Forms submissions and allow logged-in users to edit their information from the front end. Using the powerful GravityView add-on for Gravity Forms, you can easily display user-submitted content on your site.
Ready? Let’s get started! 👇
💡 Check out a live demo of the finished user profile and get your own free trial site preloaded with all GravityKit add-ons!
Download the user profile form template now!
Import the template into Gravity Forms and customize as necessary.
Sneak peek
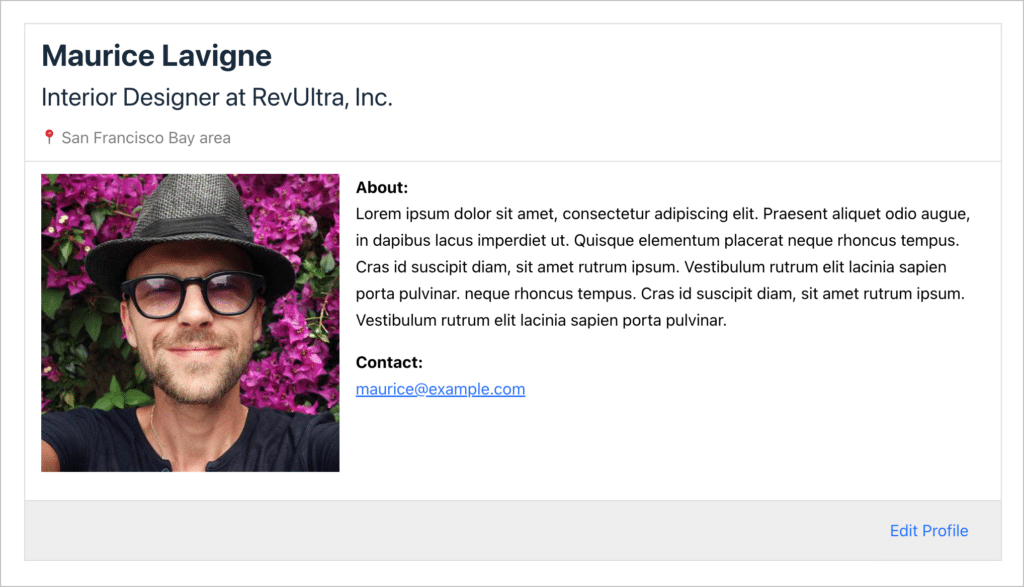
Here’s a sneek peak at a basic user profile we built using Gravity Forms and GravityView:
Displaying user profiles using GravityView
GravityView is an add-on for Gravity Forms that allows you to display form submissions on the front end of your website. You can also make fields editable, allowing users to edit their information without needing to see the backend.
If you’re looking for an easier way to create and edit user profiles, you’re probably dealing with one of the following scenarios:
- You want to display team member profiles for your site’s About page
- You want to display user profiles for a member directory
Follow our step-by-step guide to see how GravityView can provide a better way to create, manage and update user profiles in Gravity Forms.
1. Create a user profile form
The first step is to create a form in Gravity Forms allowing users to submit information for their personal profile. To create a new form, we’ll hover over “Forms” and click “New Form”.
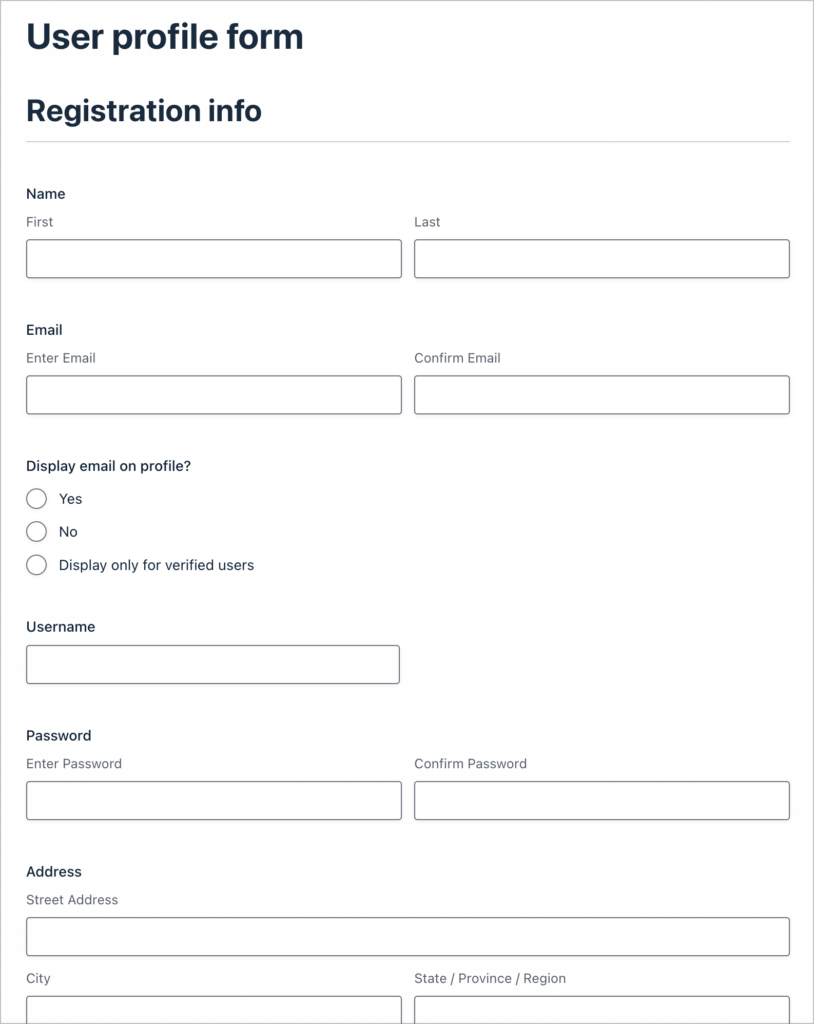
For this example, we’ll keep things simple by creating a new form with the following fields:
- Name (Name field)
- Job title (Single Line Text field)
- Company (Single Line Text field)
- Location (Address field)
- Bio (Paragraph field)
- Profile picture (File Upload field)
- Email address (Email field)
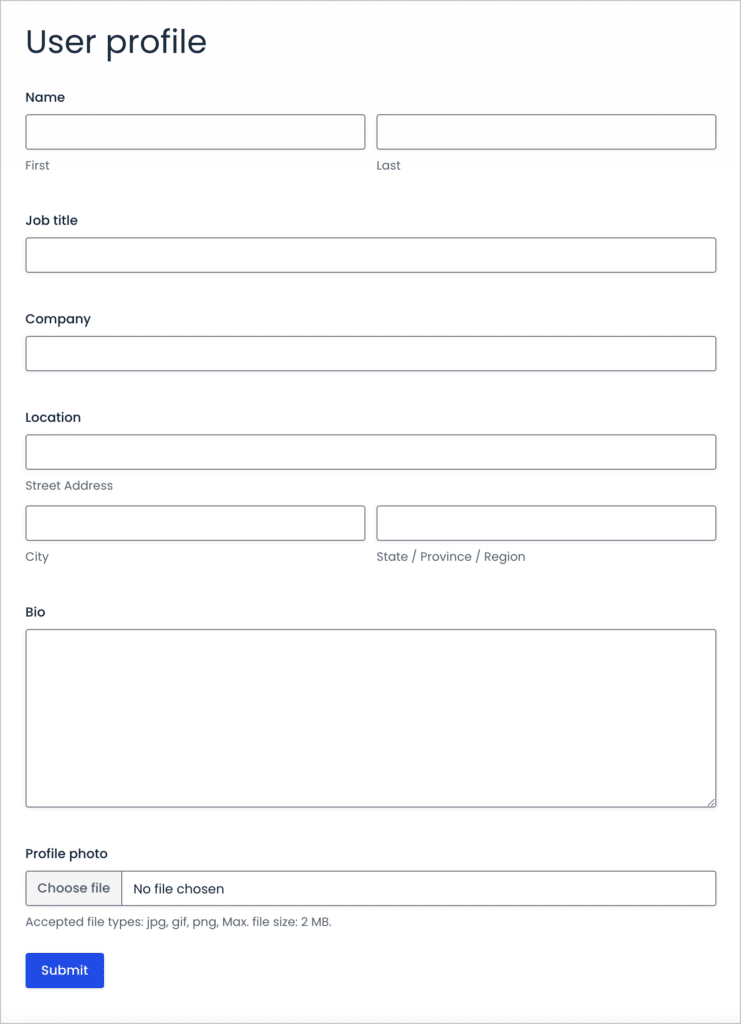
Here’s what it looks like on the front end:
Save time and download our free, comprehensive user profile form template now!
Now that we have a form for capturing user information, the next step is to create a View to display user profiles on the front end.
2. Use GravityView to display user profiles
💡 Pro tip: GravityView is a Certified Add-On for Gravity Forms that allows you to display form data on the front end and build powerful web apps.
After users have submitted their profile information, the next step is to take that information and display it on the front end. To do that, we’ll need to use the GravityView plugin.
After installing GravityView, we’ll create a new View by hovering over “Views” and clicking “New View”. Next, we’ll give our View a name and select a data source. In this case, the data source will be the form we created in the previous step!

After that, we’ll need to choose a View Type. GravityView supports several View Types, allowing you to display form submissions using different layouts. For this example, we’ll select the “List” type.
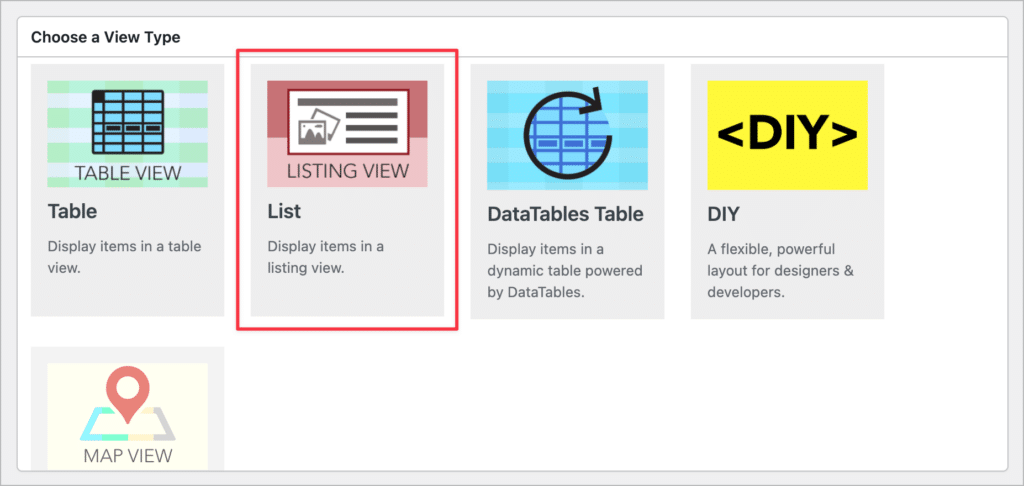
After selecting a layout, we can begin adding fields to our View using GravityView’s drag and drop editor! At the top of the View editor, you’ll see three tabs corresponding to the three pages that make up a View:
- Multiple Entries Layout: The page where your entries will be displayed one after the other. If you’re building a directory, this would be the main directory page.
- Single Entry Layout: Users can click through to the Single Entry page to see more details about a particular entry.
- Edit Entry Layout: This is where users can edit their user profile information from the front end.
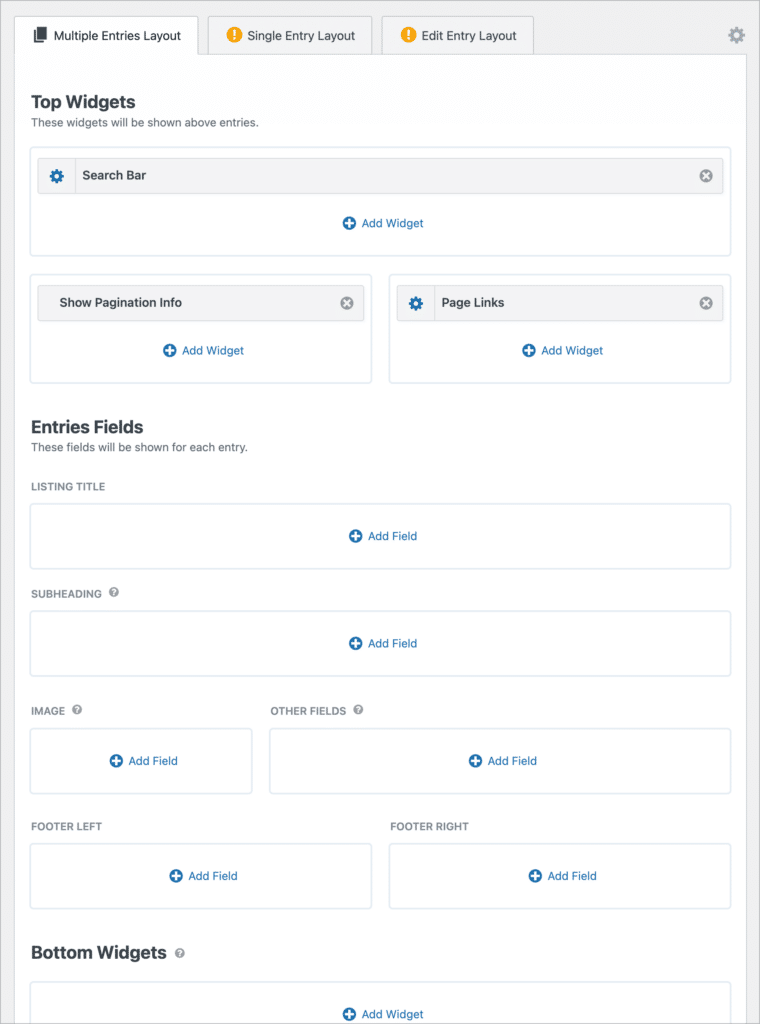
As you can see, the View editor allows you to add form fields to display user-submitted content, as well as widgets (such as search bars, and more!). Now let’s start building out user profiles by configuring the Single Entry layout.
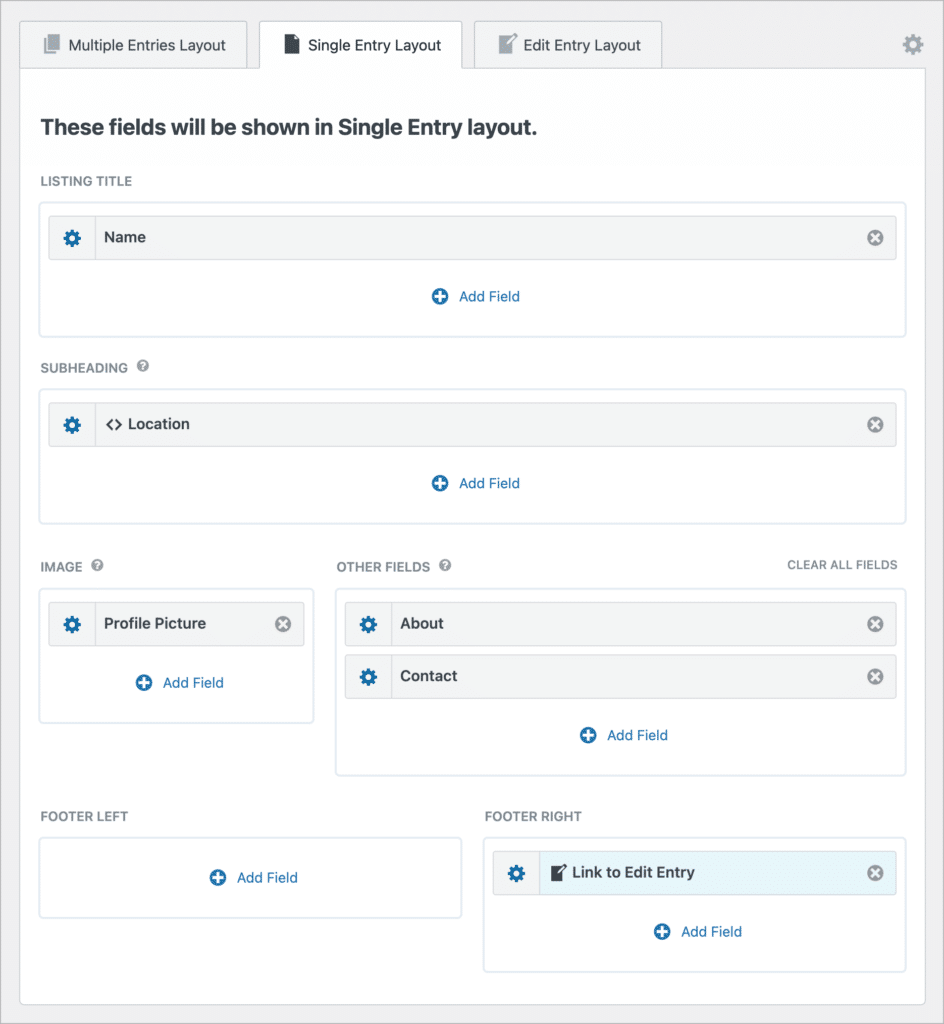
Adding fields to the Single Entry layout
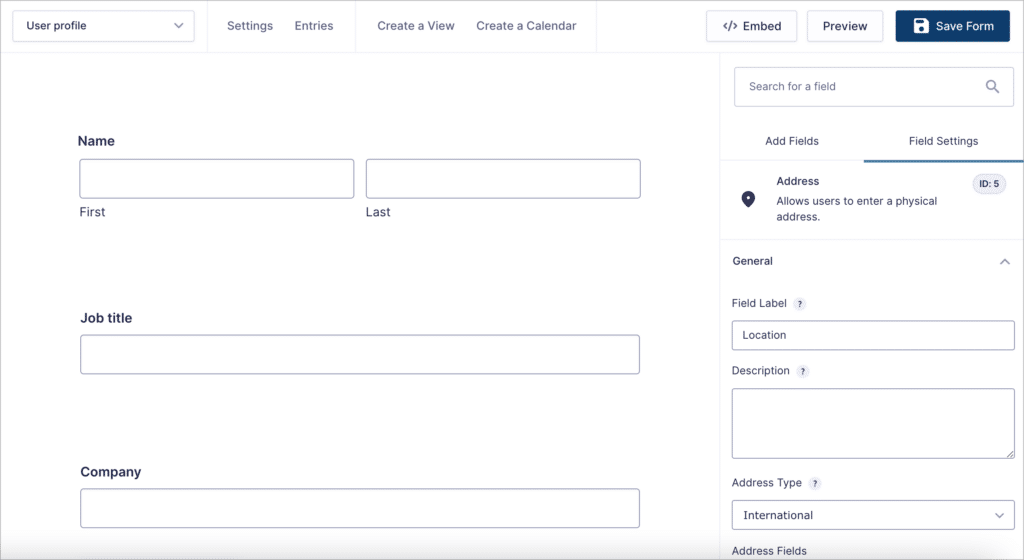
We’ll start by adding the “Name” field to the “Listing Title” section, and the “Location” field to the “Subheading” section.
Next, we’ll add the “Profile picture” field to the “Image” section and add both the “Bio” and “Email” fields to the “Other Fields” section. Finally, we’ll add a link to the Edit Entry layout in the right footer section (this will allow users to edit their profile information from the front-end).
Here’s what our layout looks like after adding our user profile fields:
Okay, here’s what a user profile looks like on the front end:
As you can see, there is an “Edit profile” link in the bottom right. Now let’s turn our attention to making profiles editable from the front end.
Making user profiles editable from the front end
First, we’ll need to enable this functionality in the View settings. To do this, we’ll scroll down to the View Settings, click on the “Edit Entry” tab and check the box that says “Allow User Edit”.

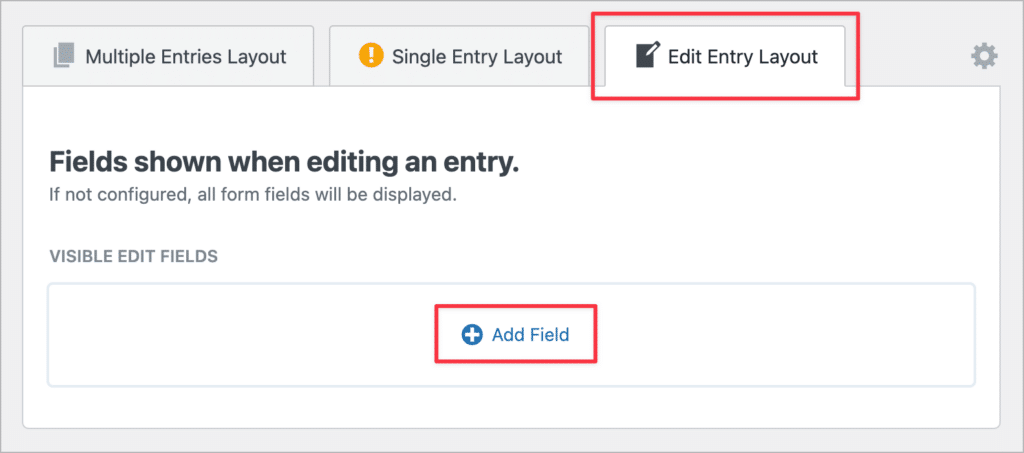
Next, we’ll scroll back up and click on the “Edit Entry Layout” tab at the top. Fields you add to the Edit Entry Layout will be made editable from the front end. If you leave the layout blank, all fields will be editable!
💡 Pro tip: Learn more about editing entries in Gravity Forms.
3. Only show the profile of the logged-in user (optional)
If you’re running a directory, you may wish to only display the profile of the currently logged-in user. This would ensure that logged-in users only see their own profiles, and not those of other users. We can set this up using the GravityView Advanced Filtering Extension.
The Advanced Filter allows us to filter entries in a View using conditional logic!
After installing the Extension, we’ll head back to our View editor, and click on the “Filter & Sort” tab in the View settings. Next, we’ll click “Add Condition” to add a new conditional logic filter.
Here’s the condition we’re going to add: “Create By” – “is” – “Currently Logged-in User”.

Now, when users log into your website, they will only see their own profiles!
4. Set up entry approval (optional)
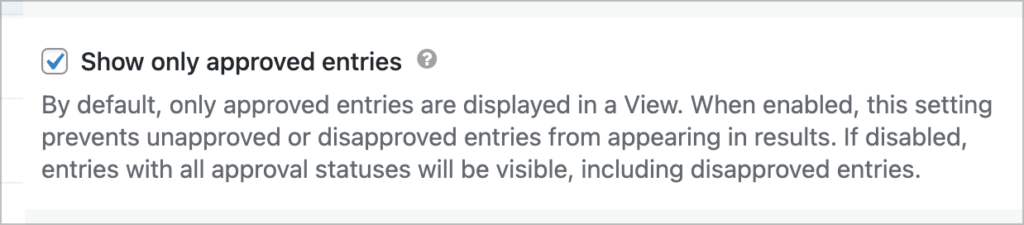
If you’d like more control over user profile submission, you can enable GravityView’s entry approval feature. GravityView allows you to hold new entries for approval before they show up in your View.
To enable entry approval, check the box that says “Show only approved entries” in the View Settings.
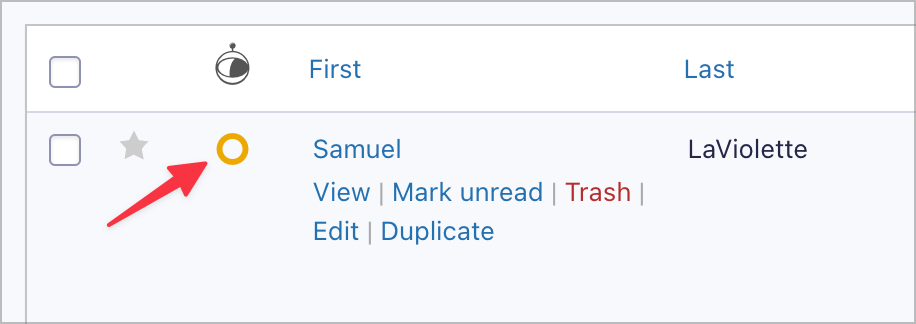
To approve a new entry, head over to the Gravity Forms “Entries” page, hover over the circle next to the entry on the left and click on the green checkmark.
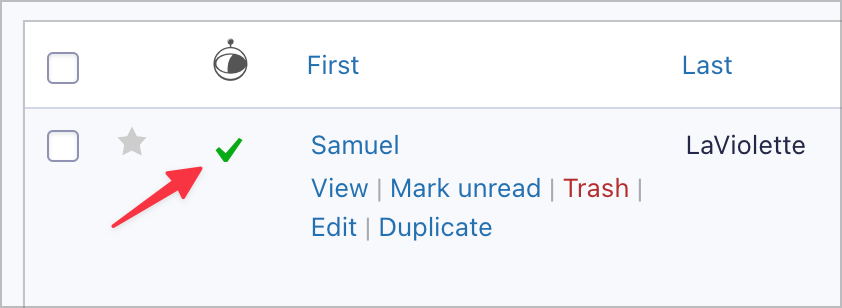
When the circle icon changes to a green checkmark, it means the entry has been approved! To unapprove an entry, click on the red ‘X’ icon.
That’s it. As you can see, GravityView makes it easy to create Team pages, About pages, and member directories!
Doing more with Gravity Forms and GravityView
If you want learn more about GravityView, check out some of our other popular tutorials:
Create and edit user profiles in Gravity Forms
In this post, we showed you how to edit Gravity Forms user profiles from the front end of your site using GravityView.
Sending users to the backend of your site to update their profile makes for a bad user experience. GravityView solves this problem by allowing you to display user profiles on the front end and add a link to edit the entry.
If you found this post helpful, read our comparison of the best user profile plugins next!

Helpful tips right in your inbox.
Subscribe to our biweekly newsletter for tips, special offers, and more!
Helpful tips right in your inbox.
Subscribe to our biweekly newsletter for tips, special offers, and more!