
🚀
Learn how to do calculations in Gravity Forms. This includes advanced calculations, product pricing, date calculations, and how to display tables and charts on the front end.
Estimated reading time: 9 minutes
The Gravity Forms calculations functionality is the most powerful out of all WordPress form builders. Using Gravity Forms, you can perform calculations inside form fields, notifications, and confirmations.
Gravity Forms calculations are helpful for event registration forms, product pricing, customer survey reports, and any other forms that collect pricing or numerical data.
In this guide, we’re going to explore all the ways to do calculations in Gravity Forms. We’ll look at how to do date and time calculations, powerful add-ons, and much more!
Get GravityMath! Perform advanced calculations on your form data – display the number of form submissions, calculate the average age of your respondents, build a front-end calculator, and more!
Table of contents
- Why make calculations using Gravity Forms entry data?
- Different types of Gravity Forms calculations
- Performing calculations in Gravity Forms (example)
- Gravity Forms product pricing calculations
- Building front-end calculators using Gravity Forms
- Gravity Forms advanced calculations using GravityMath
- Gravity Forms date and time calculations
- Gravity Forms calculations based on conditional logic
- Creating charts from Gravity Forms entries using GravityCharts
- Gravity Forms survey calculations
- Gravity Forms calculations: final thoughts
Why make calculations using Gravity Forms entry data?
Performing calculations based on Gravity Forms entries allows you to build a variety of powerful applications.
There are so many ways to utilize calculations in Gravity Forms. For example, here are some things you can build:
- Dynamic product pricing form
- Quote calculator
- Mortgage calculator
- Detailed customer survey report
Adding calculations to your Gravity Forms forms helps improve the user experience and reduces the time it takes for you to manually analyze and respond to entries.
For example, instead of writing up quotes for each customer that requests one, you could automate the process by automatically calculating the quote total based on user inputs.
Different types of Gravity Forms calculations
There are so many ways to do calculations in Gravity Forms, including:
- Product pricing
- Form field calculations
- Calculations using a shortcode
- Displaying data and calculations on the front end
- Calculations based on conditional logic
- Date and time calculations
- Displaying data on charts and graphs
- Survey Calculations
As you can see, Gravity Forms offers a lot of functionality! If you’re feeling overwhelmed, don’t worry. We’ll cover everything you need to know in this post.
Performing calculations in Gravity Forms (example)
Gravity Forms allows you to do basic calculations based on user input values. You can do calculations within a field by using the “Number” field.
For example, let’s build a form that can calculate the area of a circle based on its radius. We’ll start by creating a new form in Gravity Forms. We can do this by hovering over “Forms” and clicking on “New Form”.
Next, we’ll add a “Number” field to the form, called “Circle Radius”. After that, we’ll add another “Number” field below the first one called “Circle Area”, and click “Publish” to save our form.
Under “Field Settings”, we’ll check the box that says “Enable Calculation”. In the box below, we’re going to insert our formula. To calculate the area of a circle, you multiply pi (~3.14) by the square of the radius.
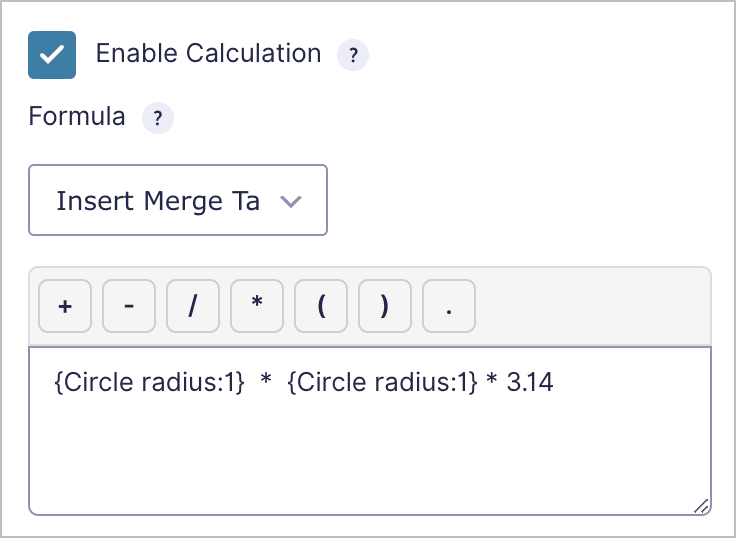
As you can see, we’re using a merge tag to reference the user input value from the first field. Then we’re squaring it and multiplying it by 3.14.
After writing our formula, we’ll check that it’s valid by clicking “Validate Formula”.
Here’s what our form looks like on the front end. When a user inputs the radius of their circle, Gravity Forms automatically calculates the area and displays it in the Circle Area field.
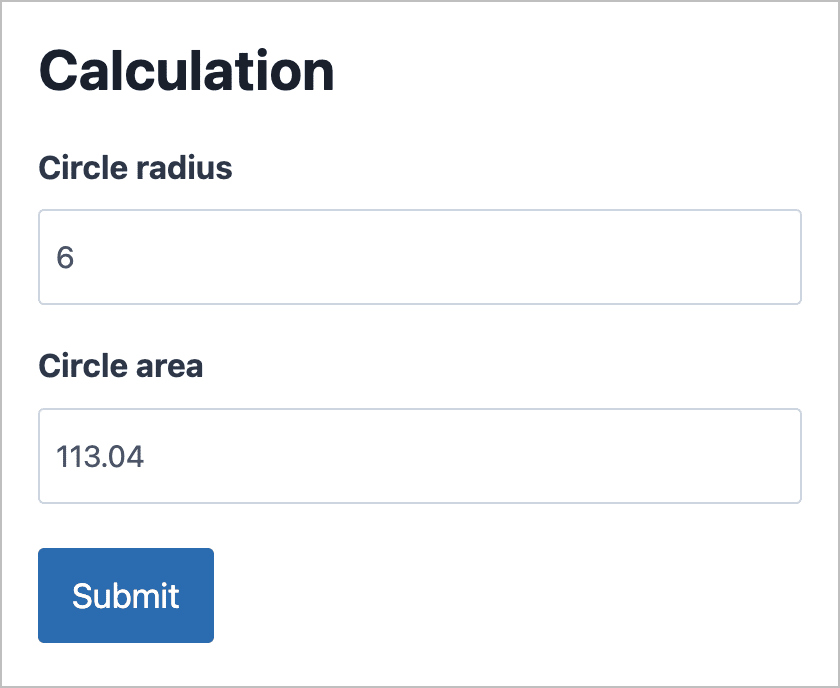
This is just one small example of how to use calculations in your Gravity Forms.
Gravity Forms product pricing calculations
When selling products on your website, it’s helpful to be able to calculate shipping costs, discounts as well as other metrics such as average order value.
Product calculations are built into Gravity Forms, but if you want to take things further you’ll need to install one or more plugins. See the articles below for more guidance on performing product pricing calculations:
- How to perform product field calculations in Gravity Forms
- Must-have add-ons for advanced product calculations in Gravity Forms
- Calculating the average order value and other eCommerce metrics
Building front-end calculators using Gravity Forms
Using Gravity Forms calculations, you can easily create sophisticated calculators for things like quotes, loans, and marketing metrics.
- How to create a Gravity Forms quote calculator
- How to build a Gravity Forms ROI calculator
- How to build a Gravity Forms mortgage calculator
Gravity Forms advanced calculations using GravityMath

GravityMath is a WordPress plugin that allows you to do advanced calculations on your website. The plugin integrates seamlessly with Gravity Forms, allowing you to:
- Perform complex functions
- Count the number of entries in a form (values are always up to date)
- Display calculations anywhere on your WordPress site
- Perform calculations based on conditional logic
- Perform calculations based on product pricing fields
After activating the plugin, you’ll be able to use the [gv_math] shortcode to perform advanced calculations on your website.
The [gv_math] shortcode also supports several mathematical functions and constants for all types of advanced calculations.
You can also use the [gv_math] shortcode inside your WordPress pages and posts; values will update dynamically when new data is added!
- The GravityMath shortcode: all you need to know
- Adding advanced calculations to blog posts
- Creating complex calculations using nested shortcodes in GravityMath
Performing advanced Gravity Forms calculations in GravityView
GravityView is an add-on for Gravity Forms that allows you to display your form data on the front end and build powerful, form-based web applications. GravityMath integrates with GravityView, enabling you to add calculations to tables containing form submission data, or anywhere inside a View.
- Adding calculations to GravityView
- How to add field calculations to the table footer in GravityView
- How to perform Gravity Forms time calculations in GravityView
Gravity Forms date and time calculations
Are you wondering how to do date and time calculations in Gravity Forms? In order to perform date and time calculations inside your forms, you’ll need the Date Time Calculator add-on by Gravity Wiz.
After activating the add-on, go to Gravity Forms and create a new form with one or more “Date” or “Time” fields.
Now add a “Number” field to your form and check the box to enable calculations. Inside the text box, you can add date and time field merge tags into your calculations!
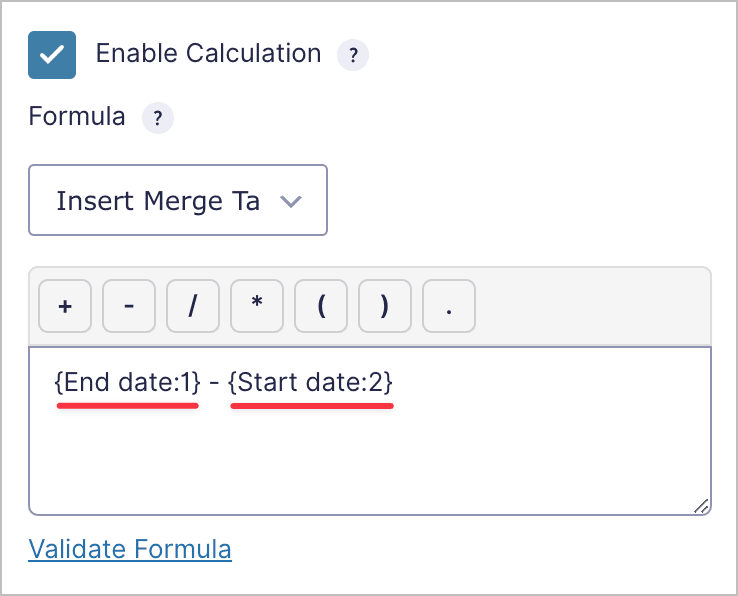
In this example, we’re subtracting the start date from the end date, to get the number of days between the two dates.
This add-on allows you to change the calculation units, count the number of weekdays between dates, and much more.
Gravity Forms calculations based on conditional logic
If you have GravityView installed along with GravityMath, you can combine two very powerful shortcodes to perform calculations based on conditional logic.
The GravityView conditional logic shortcode, called [gvlogic], allows you to display information based on parameters that you set. You can use the [gv_math] shortcode inside [gv_logic] to create complex formulas.
Here’s a brief overview of how it works:
[gvlogic if="{product:6}" is="Option One"]
Total cost: [gv_math] 100 + 50 [/gv_math]
[else]
Total cost: [gv_math] 75 + 50 [/gv_math]
[/gvlogic]
Using [gvlogic] you can set up different conditions, so your formula will return different results depending on the information submitted by the user.
Creating charts from Gravity Forms entries using GravityCharts
Today, businesses rely on graphs in order to visualize large amounts of data in a meaningful way. If you’re using Gravity Forms to collect information on your website, you may be wondering how to extract that data from the database and visualize it using graphs and charts.
You can do this using GravityCharts, a powerful add-on for Gravity Forms that allows you to create charts without writing any code!
- How to create graphs in Gravity Forms using your form data
- How to display your Gravity Forms data using charts
Gravity Forms survey calculations
A survey is an important marketing tool that allows you to learn more about your customers. If you want to conduct surveys on your website using Gravity Forms, you can use the Gravity Forms Survey Add-On.
The survey add-on also integrates with GravityView, allowing you to display surveys on the front end of your website. And if your surveys have scoring enabled, you can use GravityMath to display footer calculations based on survey results.
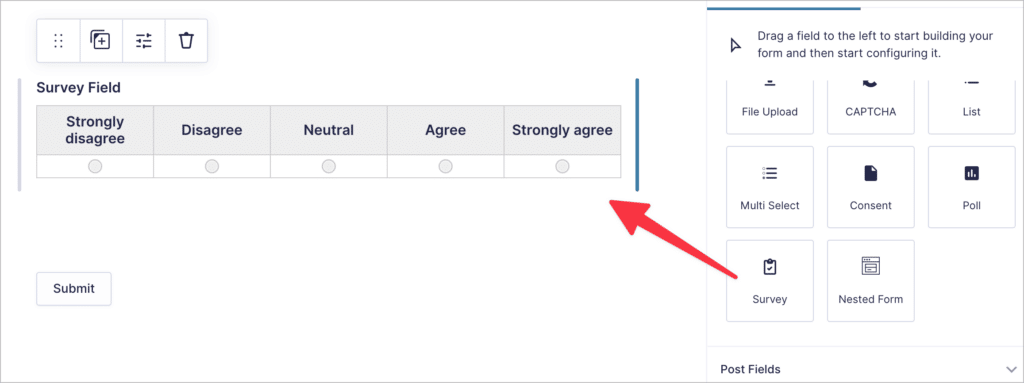
To create your first survey, start by installing the Gravity Forms Survey add-on. Next, create a new form and add a Survey field.
Under “Field Settings”, check the box that says “Enable Scoring”.
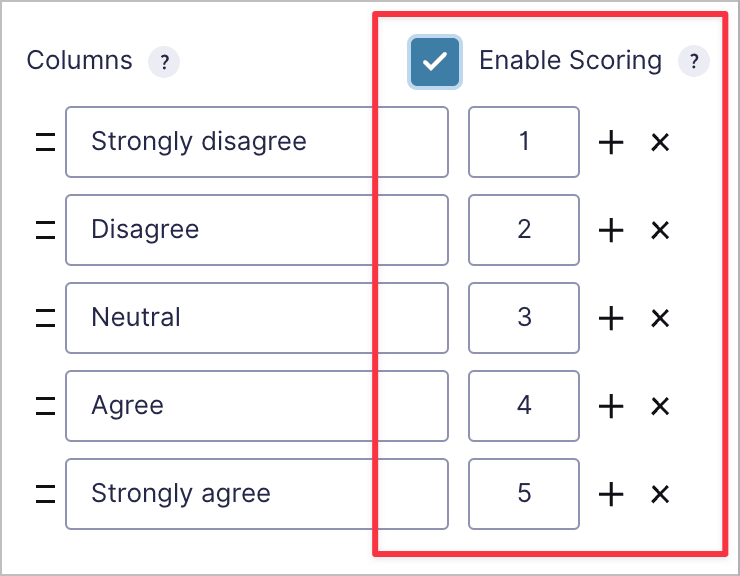
You’re all set!
Gravity Forms calculations: final thoughts
In this guide, we explored all the different ways to use calculations inside Gravity Forms.
First, we showed you how to build advanced applications such as automated quote calculators and mortgage calculators.
Then, we looked at field calculations, pricing calculations, date calculations, and advanced calculations using the [gv_math] shortcode. We also covered how to display chart and graphs on the front end using GravityCharts.