
GravityView’s powerful sorting and filtering capabilities allow you to reorganize entries in a View, and limit entries being displayed based on conditions that you set.
In this edition of Feature Highlights, we’re going to explain the difference between sorting and filtering in GravityView and show you how to best take advantage of these features. We’ll also explore the advanced functionality offered by our A-Z Filters and Advanced Filtering extensions.
💡 Learn more about GravityView, or check out our live demos to see what’s possible with this powerful plugin!
Filtering and sorting: The where and how
What do filtering and sorting mean in GravityView? It’s simple:
- Filtering lets you choose which entries will appear in your View, according to parameters that you set. For example, you could limit entries in a View to those submitted within a certain date range, or you could filter entries using conditional logic filters.
- Sorting lets you reorganize how your entries are displayed in a View. For example, if you were displaying people profiles, you could sort your entries alphabetically by Last Name.
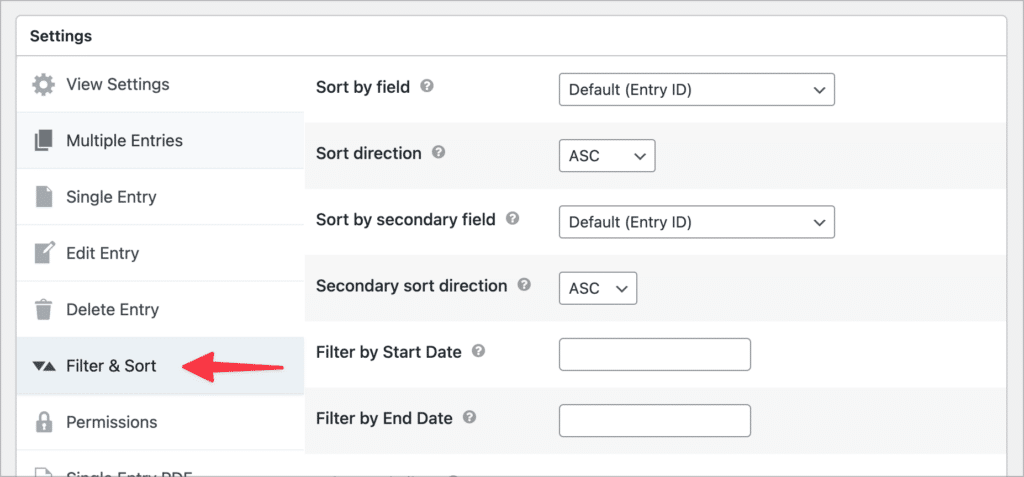
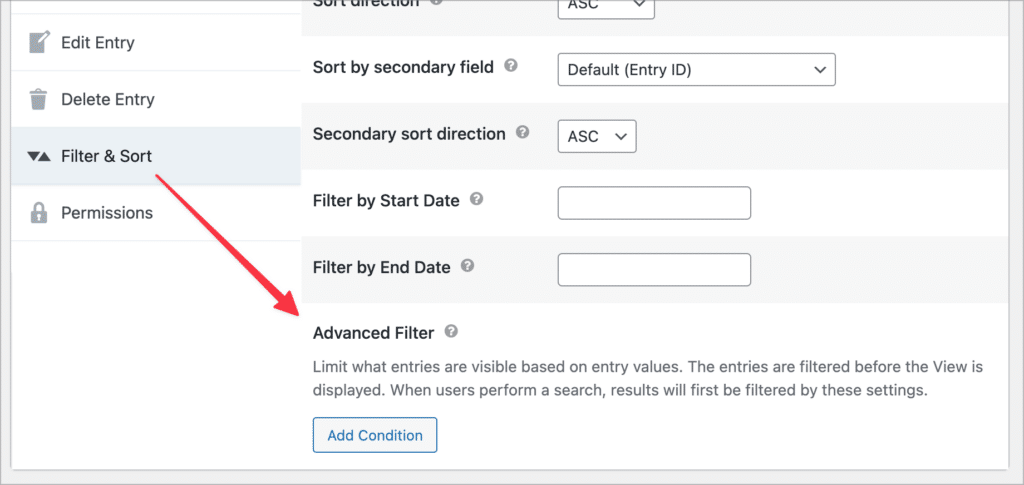
You can find the bulk of the filtering and sorting options in the GravityView settings panel at the bottom of the View editor, under “Filter & Sort.”
To use the more advanced filtering options, you’ll need the Advanced Filtering extension but we’ll cover this more later.
Sorting by a specific field
This option allows you to choose the field by which the entries are sorted in your View. After selecting a sort field, you will also need to specify the sort direction. There are three options to choose from:
- ASC (Ascending): From A to Z, or lower numbers to higher numbers.
- DESC (Descending): From Z to A, or higher numbers to lower numbers. This is useful if you want to display a list of numbers from large to small.
- Random: In a random order. Note that this order will be randomly generated every time the View is reloaded.
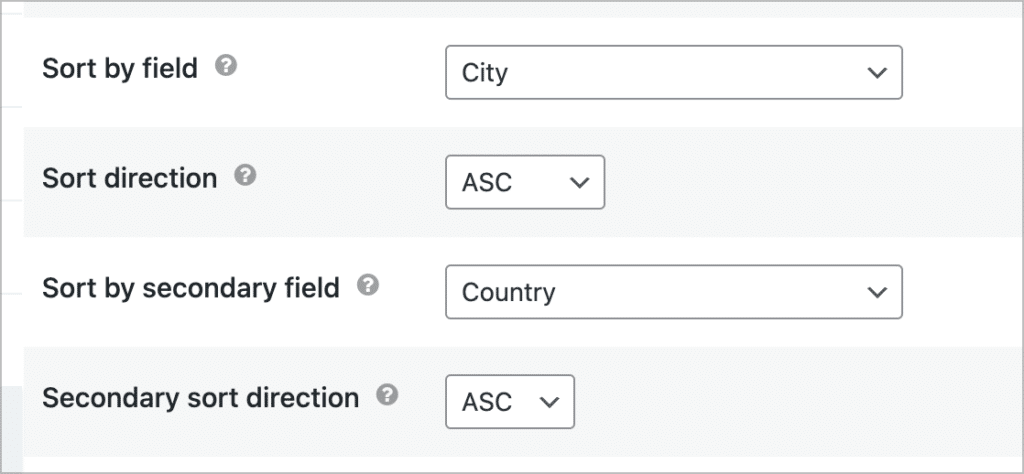
In the example above, we’re sorting entries by the “City” field ascending (alphabetically, from A-Z). As you can see, GravityView also allows us to select a secondary sort field! In this example, we set this to “Country” ascending.
Filtering by start and end date
Filtering by date allows you to limite the entries in your View to those submitted within a certain date range. In the below example we’ve set the start date to May 1st, 2023 and the end date to August 31st, 2023. This means that our View will only contain entries submitted within that four month period.
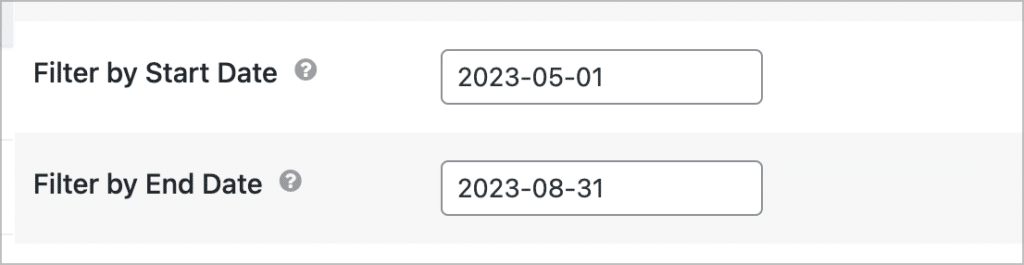
If you want to, you can leave the end date blank and only have a start date. Likewise, you can also leave the start date blank and only enter an end date.
💡 Pro tip: You can also use relative dates, such as “one week ago”. You can read the full list of accepted relative dates here.
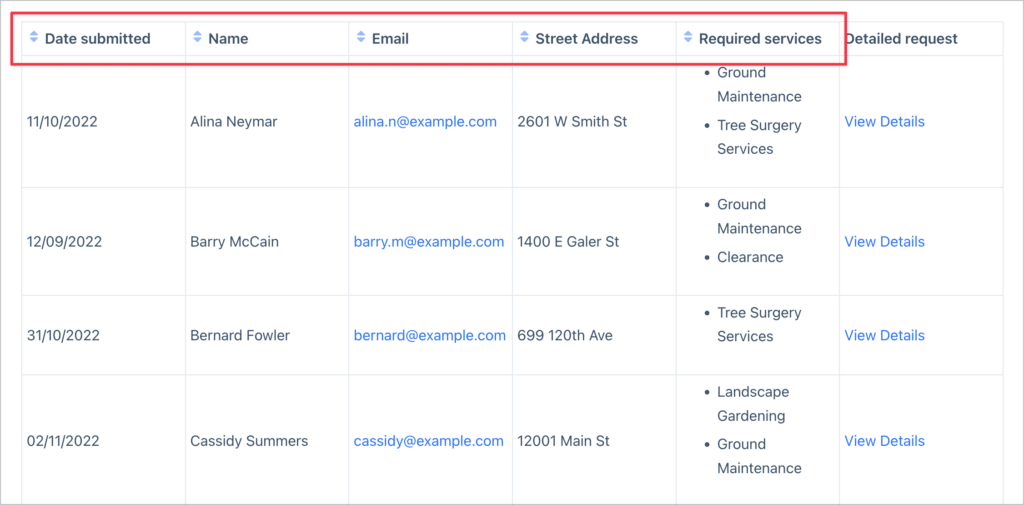
Column sorting for table Views
If your View is using the Table layout, you’ll see an option in the “Filter & Sort” settings titled “Column Sorting”.
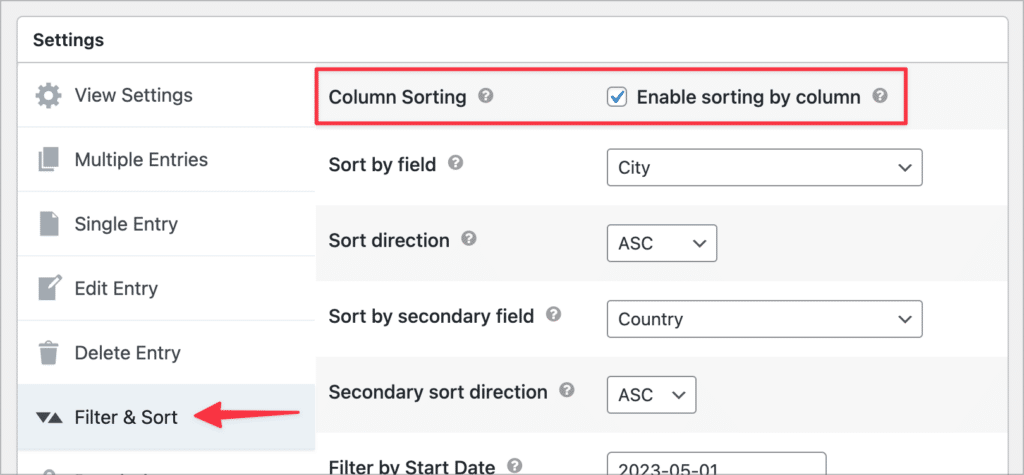
If this option is enabled, a tiny arrow will appear next to each column header in your table. If you click the arrow, the entries will be sorted by that field. For example, if you click on “Name”, the table will reload with the entries sorted alphabetically by that field.
Now let’s look at how we can filter entries using conditional logic.
Filter entries using conditional logic with the Advanced Filter
With the GravityView Advanced Filtering Extension, you can filter entries in a View based on one or more conditions that you set! This gives you finer control over which entries show up in your View.
After clicking “Add Condition”, you’ll be able to set custom filtering conditions (you can add multiple conditions by using the AND and OR operators).
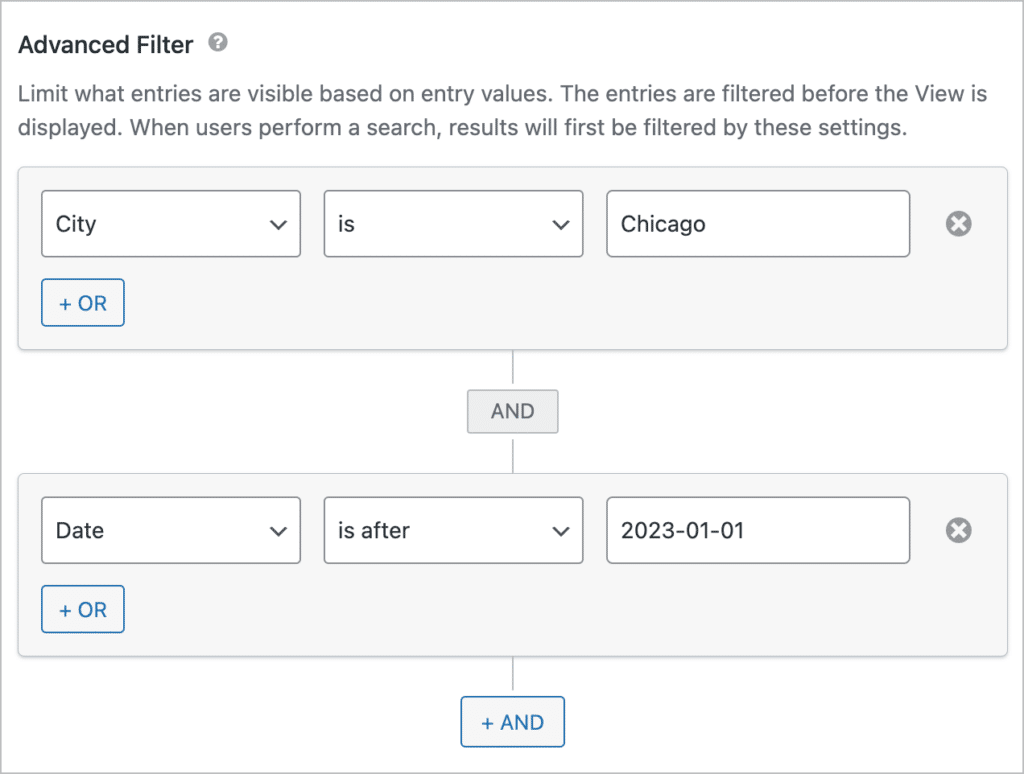
In this example, we’ve added two conditions, limiting entries in our View to those where the “City” is “Chicago” and the date of submission is after January 1st, 2023.
💡 Pro tip: To learn more about conditional logic in Gravity Forms (and GravityView), read our ultimate guide here.
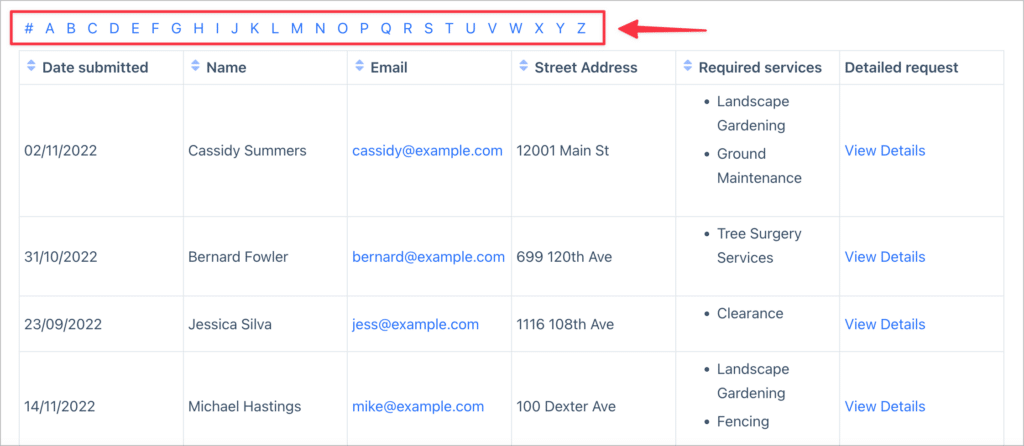
Sort your entries alphabetically using A-Z Filters
With our A-Z Filters extension, it’s easy to sort entries alphabetically from the front end. This is perfect for staff directories or student databases!
After installing the extension, you’ll be able to add an A-Z Entry Filter widget to your View that outputs a list of links from A-Z. You can even choose which field to filter by, and which alphabet to use (over 26 languages are supported). Users can click one of the letters to see entries that start with that letter!
Here’s what it looks like on the front end:
Have you mastered sorting and filtering in GravityView?
Filtering and sorting in GravityView allow you to control which entries are displayed in a View and the order they show up in.
In this edition of Feature Highlights, we showed you all the ways to filter and sort entries in a View. We also explored some of the advanced functionality offered by our A-Z Filters and Advanced Filtering extensions.
To try out these features for yourself, sign up for a free 30-day demo site!

Helpful tips right in your inbox.
Subscribe to our biweekly newsletter for tips, special offers, and more!
Helpful tips right in your inbox.
Subscribe to our biweekly newsletter for tips, special offers, and more!