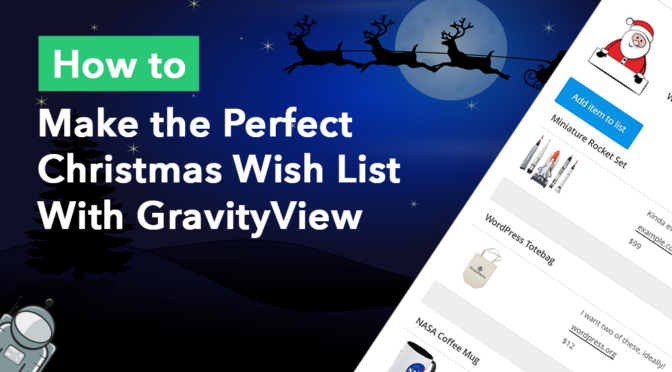
Have you noticed that it’s starting to look a lot like Christmas? 🎄
It’s that time of the year when the weather starts to cool down, the trees bare their branches, and the sound of Jingle Bells fills every store. These are all signs that the biggest gift-giving holiday of the year is about to begin.
And you know what that means… it’s time to start writing your Christmas wish list! 🎅
In this post, we’ll show you how to create an online Christmas wish list that you can share with your friends and family using Gravity Forms and GravityView!
So what are you waiting for? Grab a cup of hot chocolate (Floaty’s got the perfect recipe) and let’s dive in!
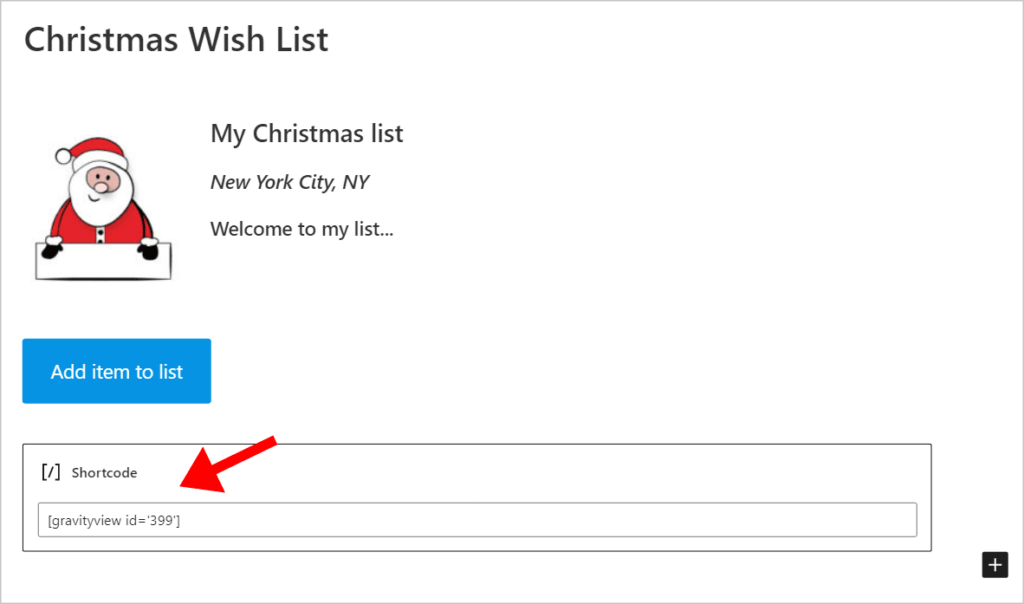
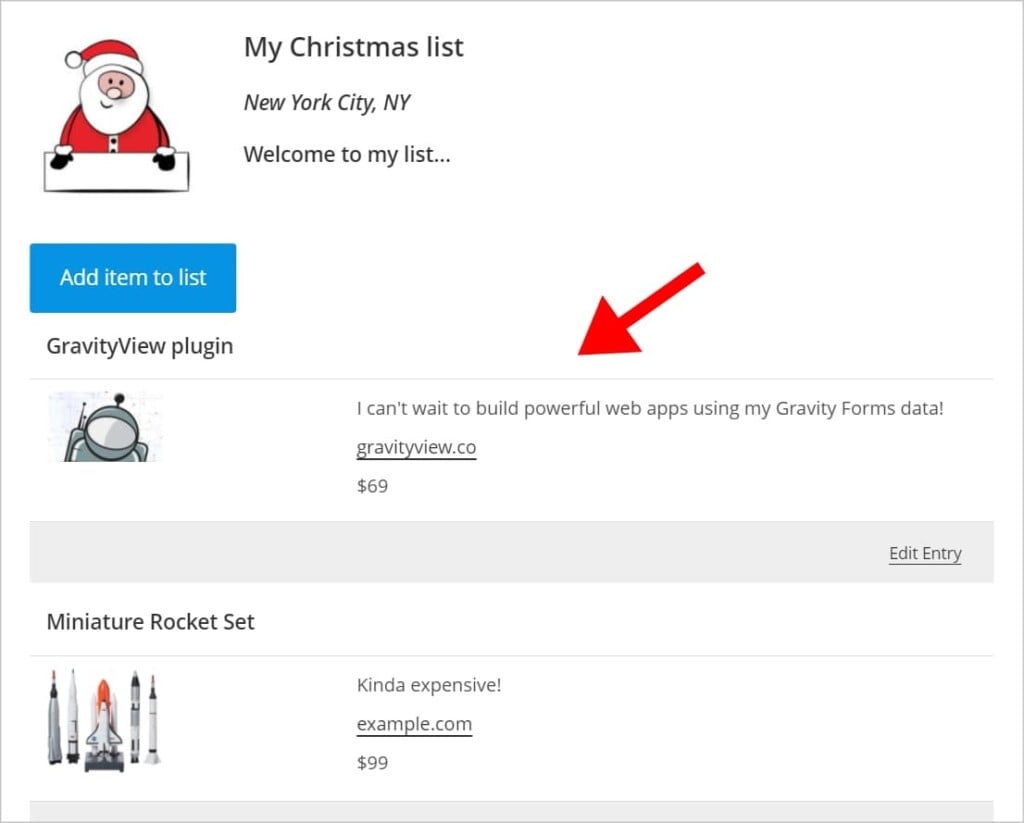
Sneak Peek
Here’s a sneak peek at what we’re going to build in this tutorial:
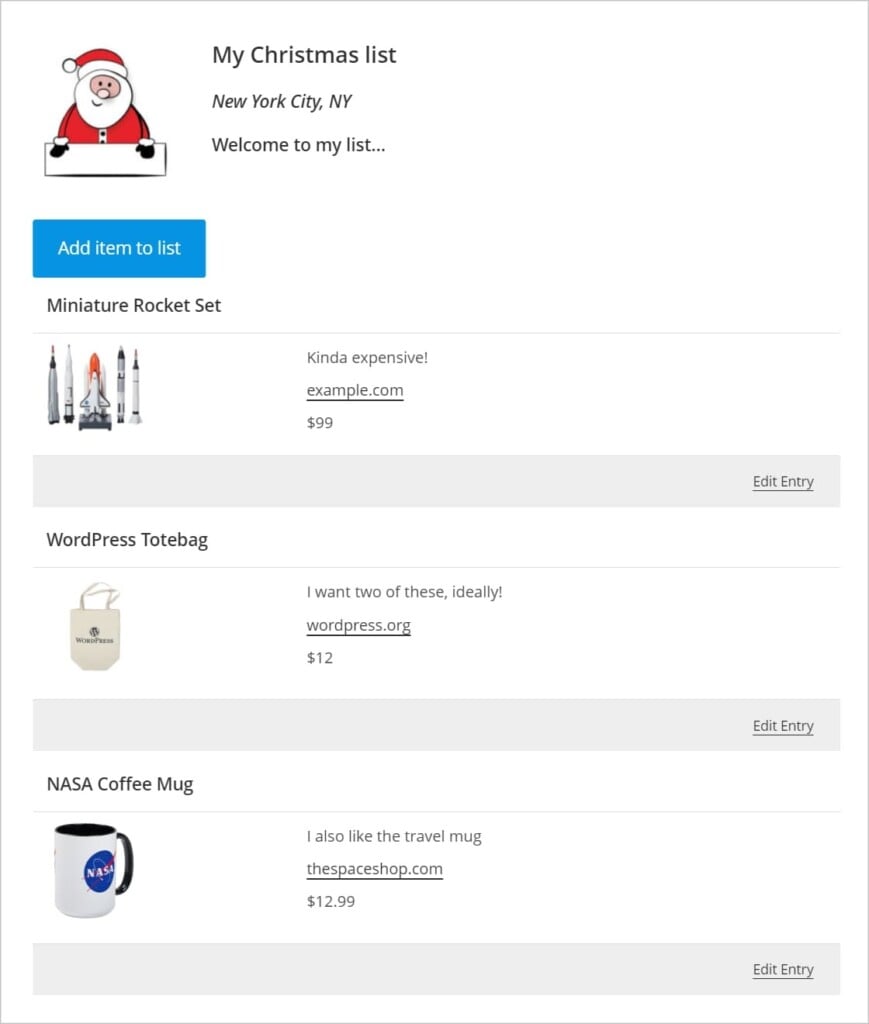
And if you click on the “Add item to list” button, a popup opens up with a form where you can add new gifts to your list!
Pretty cool, right?
What Is a Christmas Wish List?
A Christmas “wish list” or “wishlist” is a list of items that a person hopes to receive as gifts for Christmas! The goal of a wish list is to open up a clear channel of communication between the gift receiver and gift giver.
This ensures that the gift receiver gets exactly what they want, and reduces stress for the gift giver so they don’t have to guess at what to buy. In some cultures, people exchange wish lists prior to Christmas.
People use wish lists and gift registries for other occasions too, including weddings, baby showers, housewarmings, and charity drives.
How Do I Make a Wishlist on WordPress?
There are different ways to create wishlists on WordPress but one of the best ways is by using Gravity Forms and GravityView. In this tutorial, we’ll show you how to save new gifts using Gravity Forms and display them in a list on the front end using GravityView.
Creating the Gift Form
Okay, let’s start building our online Christmas wish list! The first step is to create a form that allows us to add new items to our list.
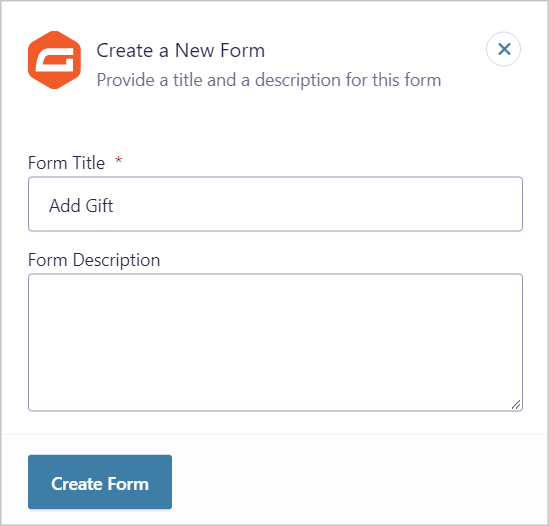
To create a new Gravity Form, we’ll hover over Forms and click on New Form. Next, we’ll give our form a name and click Create New Form.
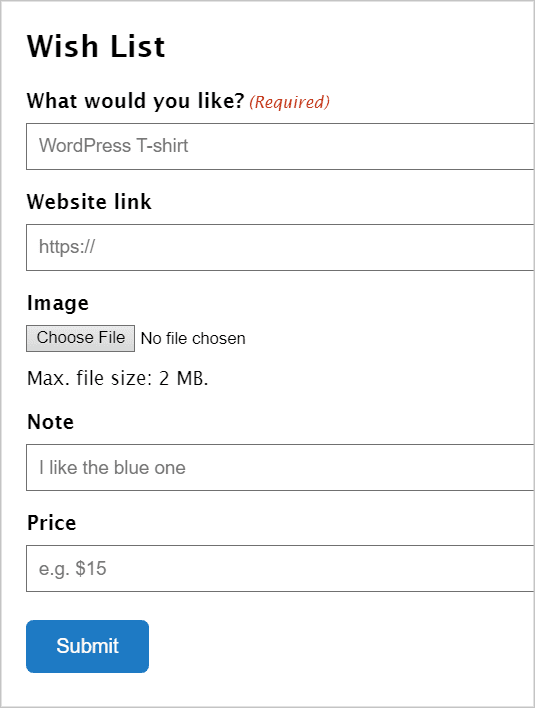
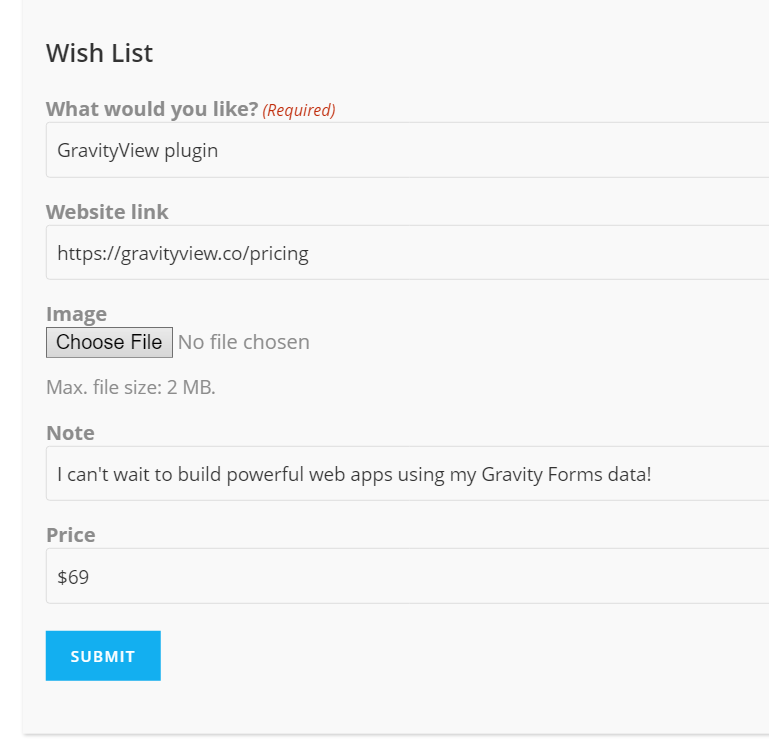
Now we can start building our form using Gravity Forms’ handy drag and drop interface! We’ll keep things simple by adding the following 5 fields:
- What would you like? (Single Line Text field)
- Website link (Website field)
- Image (File Upload field)
- Note (Single Line Text field)
- Price (Single Line Text field)
Here’s what our form looks like if we preview it:
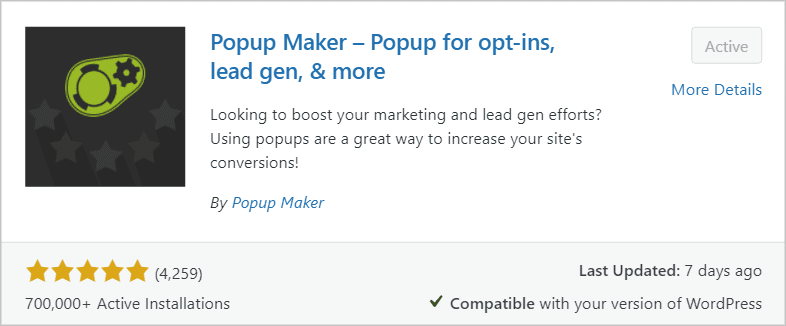
The next step is to embed our form inside a popup and create a trigger so that it appears when we click on the “Add item to list” button. To do this, we’ll need to install the free “Popup Maker” plugin.
Creating the Form Popup
To install Popup Maker, we’ll hover over Plugins and click Add New. Next, we’ll search for “Popup Maker” and click “Install”. As you can see, with a five-star rating and over 700,000+ installations, it’s a popular plugin!
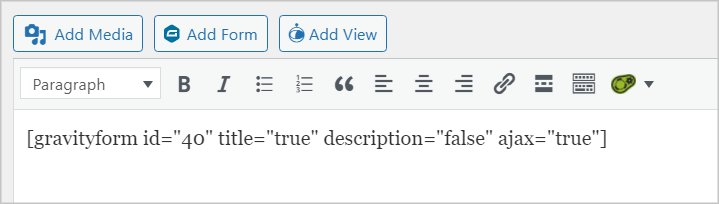
After installing and activating Popup Maker, we’ll create a new popup by hovering over Popup Maker in the left-hand menu and clicking Create Popup. We’ll give our new popup a name and then we’ll add our form to the content area using the Gravity Forms embed shortcode.
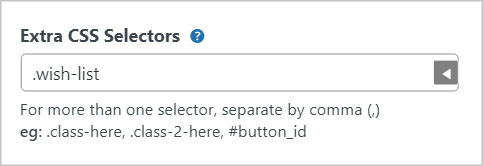
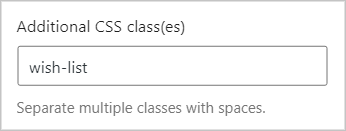
Now we need to add a trigger to our popup so that it opens on click. To do this, we’ll scroll down to the Popup Settings, select Triggers on the left, and click Add New Trigger.
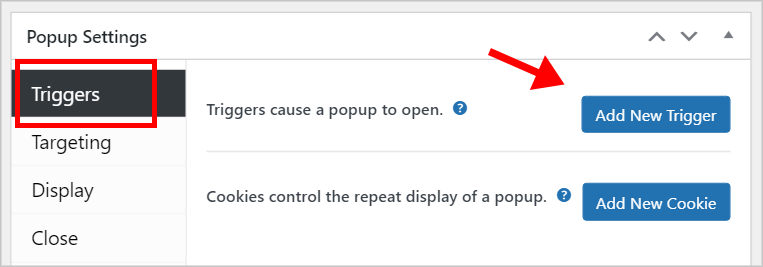
Now under where it says “What kind of trigger do you want?” we’ll select “Click Open” and click Add. Finally, we’ll add a CSS selector class. We’ll need to add this class to our button to ensure our popup opens when we click on it.
The next step is to create a new View that allows us to display gifts on the front end.
Building the List View
📝 GravityView is an add-on for Gravity Forms that allows you to build powerful web apps with your form data. New to GravityView? See what GravityView can do for you.
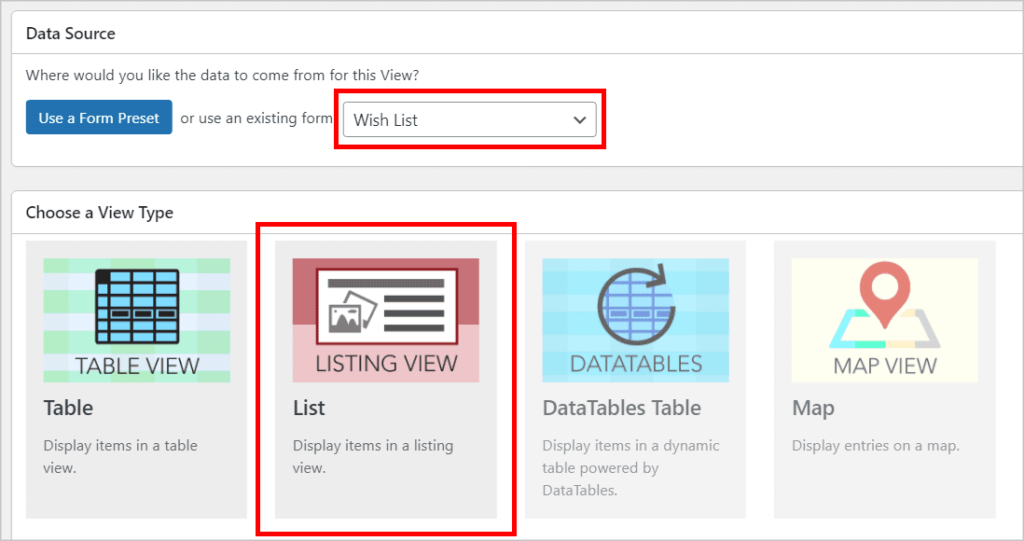
To create a new View, we’ll hover over Views and click New View. We’ll give our View a name and select our new Gravity Form as the Data Source. Finally, we’ll choose List as the View Type.
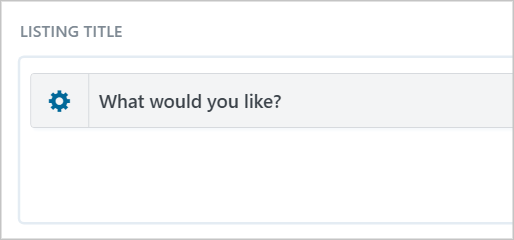
Now we can configure the Multiple Entries Layout using GravityView’s drag and drop builder! We’ll start by removing all the widgets (as we won’t need these). Next, we’ll add the “What would you like?” field to the Listing Title section.
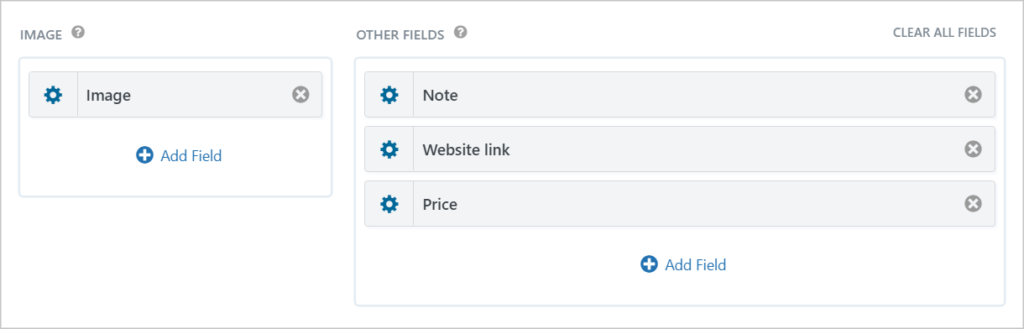
Now we’ll add the Image field to the Image block, and the remaining fields to the Other Fields section, like this:
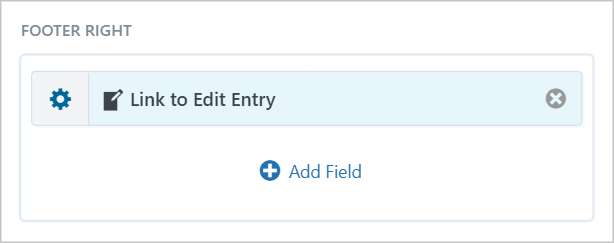
Finally, we’ll add a link to the Edit Entry page in the right footer area. Clicking on this link will allow us to edit or delete items on our list.
Okay, we’re finished configuring our View! Now all that’s left to do is put it all together on a single page.
Putting It All Together
To create a new page we’ll hover over Pages and click Add New. First, we’ll add a picture of Santa Clause at the top along with some information about our list. Next, we’ll add a button by clicking on the ‘+’ icon and selecting the Gutenberg Button module.
This will be our “Add item to list” button that opens our form popup when clicked. To ensure this works, we’ll need to add the CSS class we created in a previous step.
Finally, we’ll add our View by copying and pasting the GravityView embed shortcode into a Gutenberg Shortcode module.
That’s it! When you’re done, save your page by clicking “Publish”.
Adding Gifts to Your Wish List
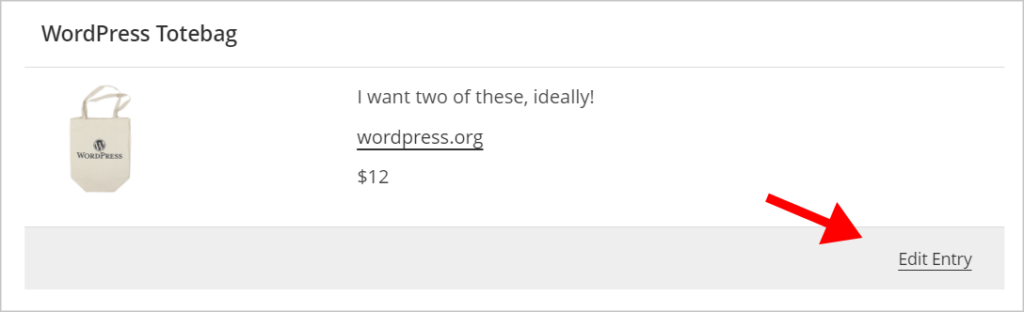
When you’re browsing the internet and spot something that you want to add to your Christmas wish list (like this awesome WordPress merch), all you need to do is follow the steps below.
Head over to your online Christmas list page and click the “Add new item to list” button to bring up the list form. Fill in the title of the product, the website URL, and the price. You can also add an image and a note if you want to. Now click Submit.
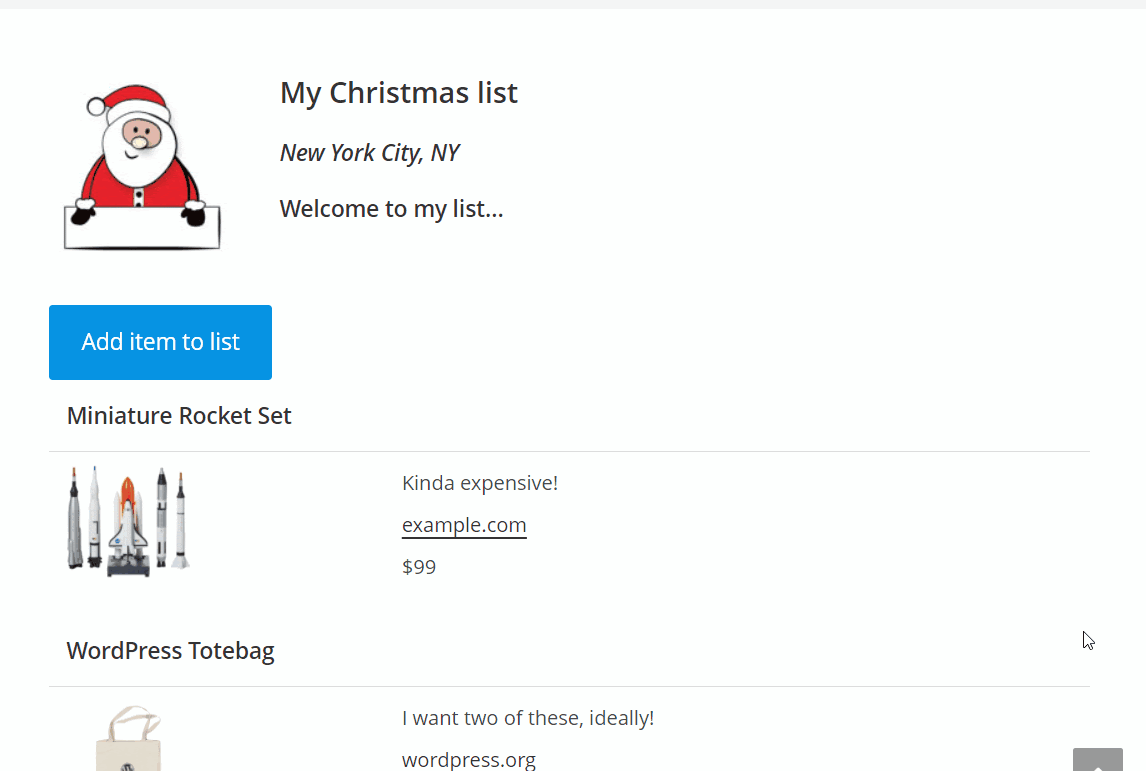
As you can see, the item is now added to your wish list and visible on the front end!
Now that your Christmas wish list registry is up and running, you can start sharing it with your family and friends.
Editing and Deleting Gift Entries
To edit or remove an item on your wish list, all you need to do is click on the “Edit Entry” link at the bottom right of the entry.
This will take you through to the Edit Entry page where you can make changes to the entry or remove it from your list.
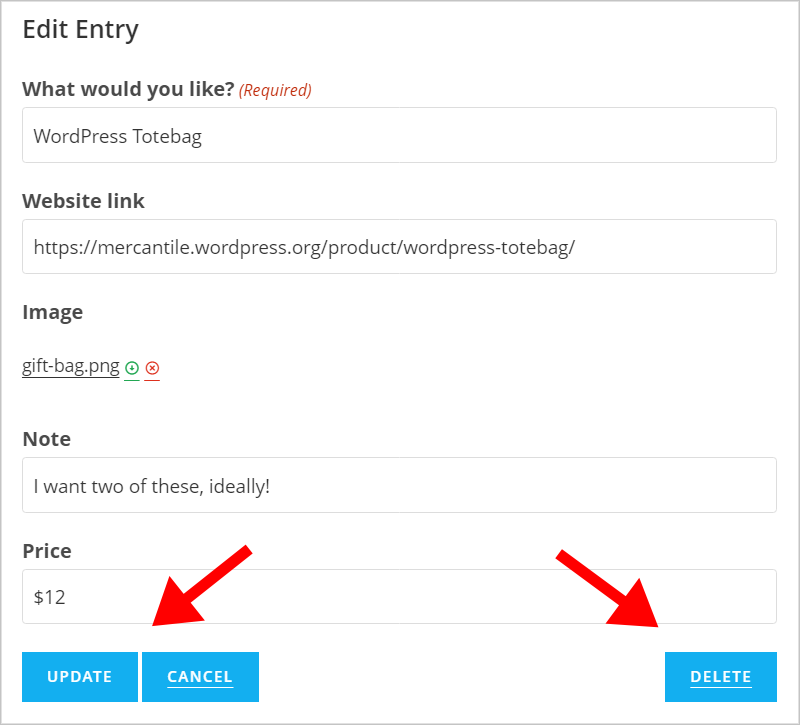
Yep, it’s as easy as that!
Sharing Your Christmas Wish List With Family and Friends
To share your Christmas wish list with your friends and family, all you need to do is send them the URL of the page where your View is embedded.
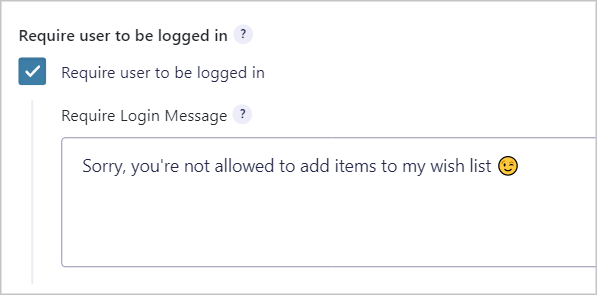
If you’d like to prevent anyone else from adding items to your list, you can move the wish list form to a separate page or simply update your form settings to require a user login.
Start Assembling Your Christmas Wish List Today!
As the gift-giving holiday approaches, it’s time to start thinking about your Christmas wish list. Keeping a wish list is the perfect way to ensure that your friends and family know exactly what to buy you.
In this post, we showed you how to build your own online Christmas wish list using Gravity Forms and GravityView. Now, what are you waiting for? Create a Christmas wish list and start filling it with all those precious Christmas items! 🎄
Join Our Newsletter!📧🙌
✅ Helpful Gravity Forms content straight to your inbox
✅ Be the first to hear about new updates and releases