
Updating entries in Gravity Forms can be a time-consuming process, especially if you’ve got hundreds of entries that need editing! Bulk entry editing allows you to save precious time and streamline your workflow.
In this post, we’re going to show you two different ways to bulk update entries in Gravity Forms.
- Using the GravityActions plugin
- Using the GravityImport plugin
Both methods allow you to edit your form entries en masse and change one or more field values at the same time! If you’re looking to save time and increase your productivity, this post is for you!
Why bulk update entries in Gravity Forms?
There are several reasons why it’s beneficial to bulk update Gravity Forms entries as opposed to editing them individually. Here are a few scenarios where bulk editing will improve your workflow.
Change the status of product orders in bulk
Let’s suppose you’re using Gravity Forms to collect product orders for your eCommerce store. When orders are received they are marked as “confirmed” but when they ship out, you have to manually update them to “shipped”. If you have a lot of orders that need updating, it can be a tiresome process.
Bulk updating allows you to change the status of multiple orders at the same time!
Correcting errors
Maybe you’re using Gravity Forms to power a directory where users can sign-up to have their profiles featured on your website. If multiple users made a mistake in their registration, it can be troublesome to correct each one individually.
Bulk editing allows you to correct errors in form submissions en masse and it only takes a few seconds!
1. Bulk updates using GravityActions
GravityActions is a game-changer when it comes to streamlining your workflows and reducing the time it takes to update existing entries in Gravity Forms. Using GravityActions, you can bulk edit your form entries and change multiple fields at the same time.
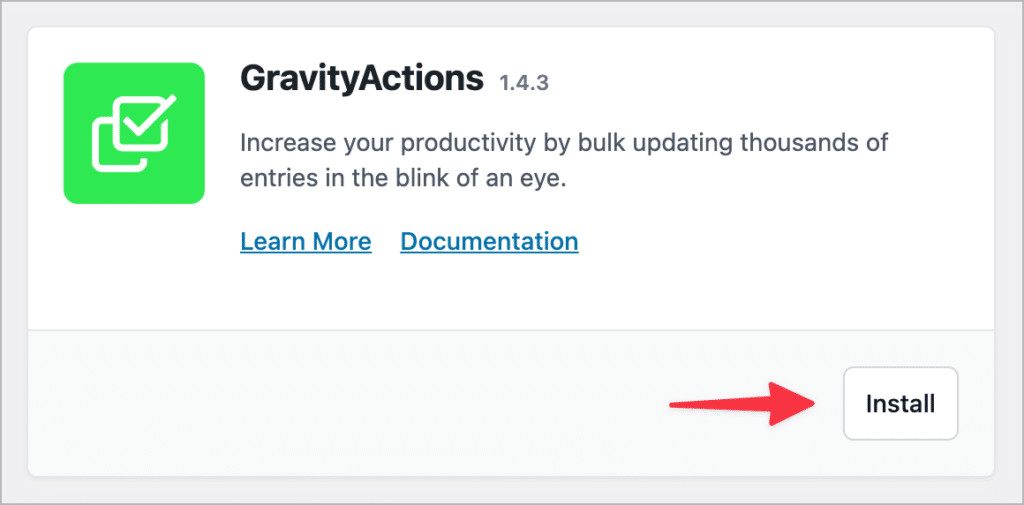
To get started with GravityActions, install the plugin from the “Manage Your Kit” screen in the WordPress Admin dashboard.
Now you’re ready to start bulk updating your form entries! We’ll show you how this works, step by step.
Step 1: Select the entries you want to update
First off, hover over “Forms” and click on “Forms”. Next, hover over your form and click on the “Entries” link. Now you’ll see all of the entries that belong to that form.
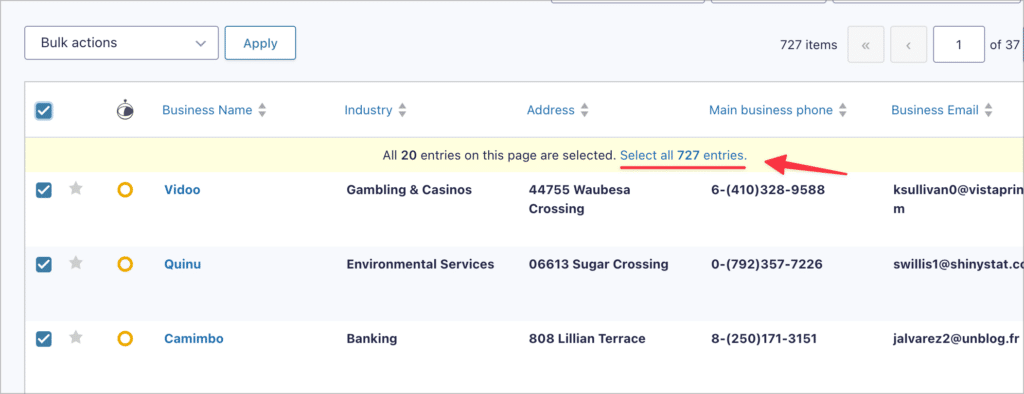
Use the Gravity Forms search functionality to search for the entries you want to update, or bulk select entries using the bulk selector checkbox. If you want to select all entries, check the box at the top to select all entries on the page and then click the link that says “Select all # entries”.
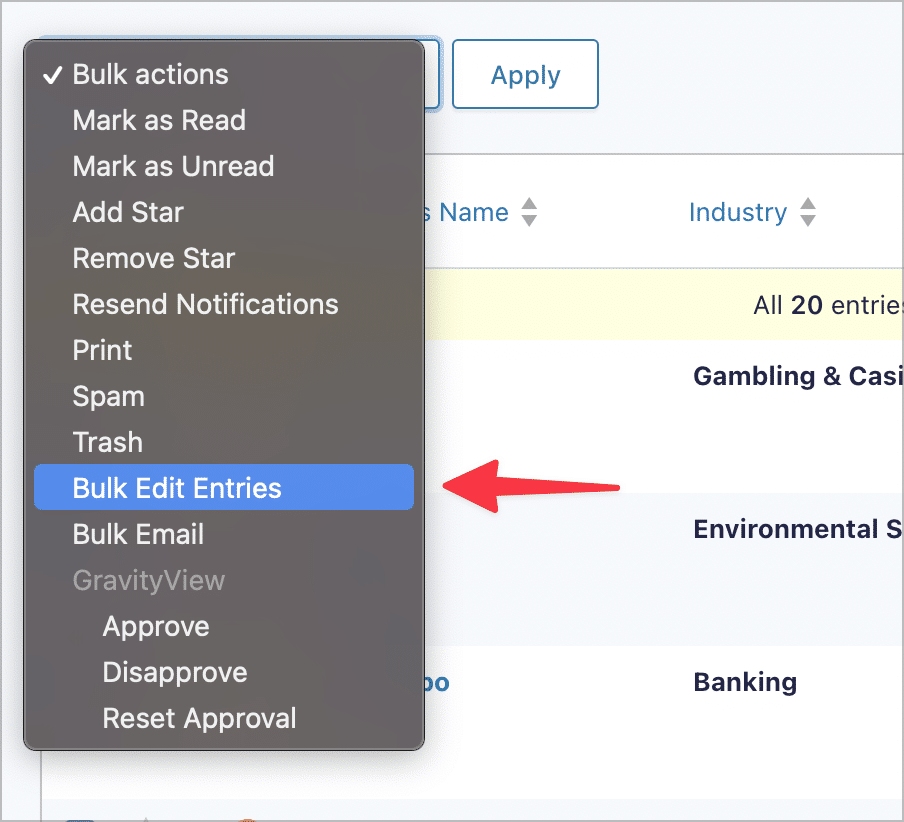
After selecting your entries, click on the “Bulk actions” dropdown menu and choose the option that says “Bulk Edit Entries”.
Step 2: Select the fields to change
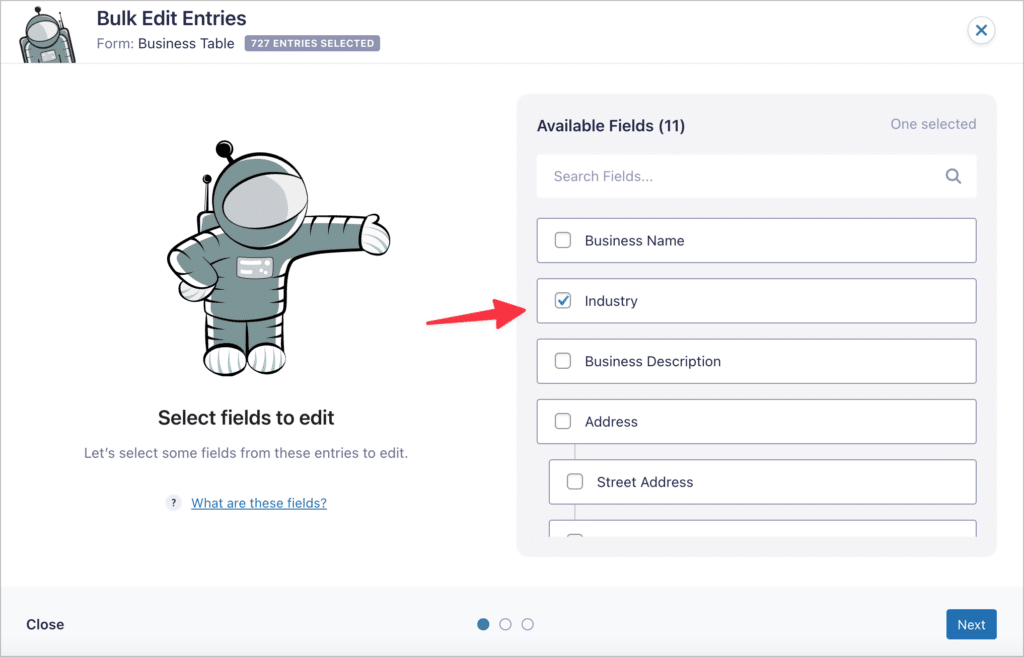
The GravityActions popup window will now appear to guide you through the bulk editing process. Start by selecting the fields you want to change. On the right, you’ll see a list of editable fields—simply check the box next to the fields you want to update (meta data is also supported!). You can select as many as you wish! When you’re done, click “Next”.
Step 3: Update the field values
The final step of the bulk editing process is to update the field values with your new content.

You’ll now see a summary of your changes, along with a message warning you that your changes are permanent and cannot be undone. That’s why we strongly recommend you take a backup of your entries before running a bulk update!
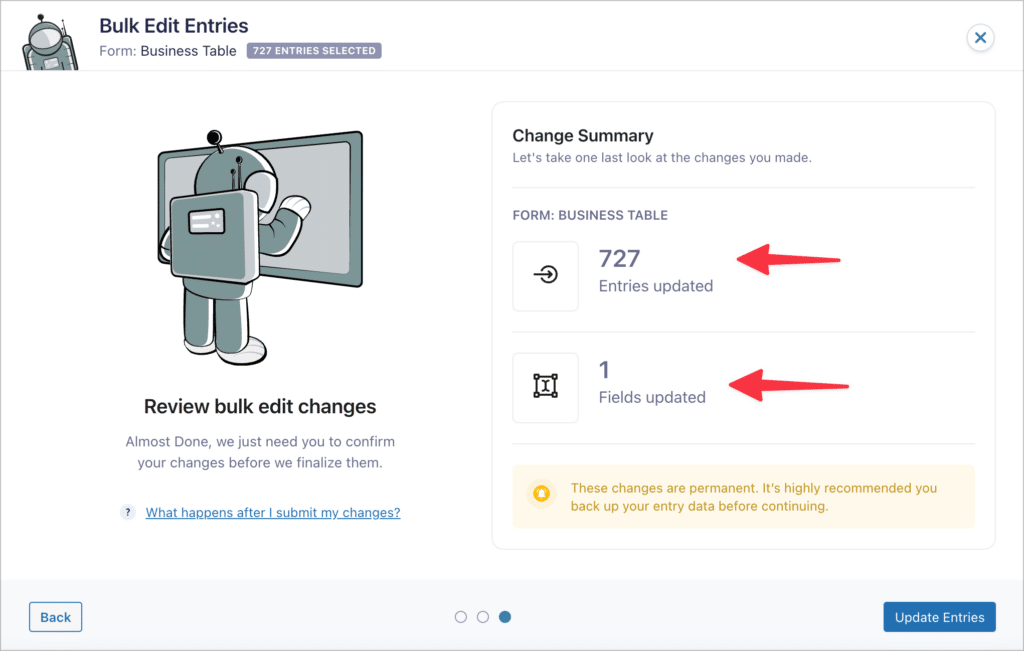
If you’re happy with everything, click “Update Entries”. GravityActions will now update your entries.
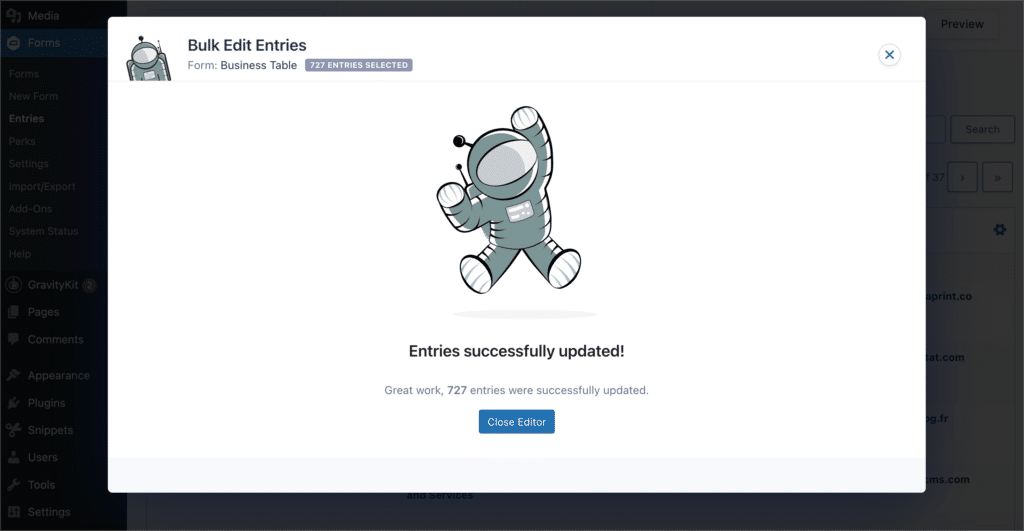
When the update has finished, click “Close Editor”. The page will now refresh to reflect your changes!
2. Bulk editing entries using GravityImport
GravityImport allows you to import entries to Gravity Forms from a CSV file, but you can also use it to update existing entries. All you need to do is ensure that your CSV contains an Entry ID column.
GravityImport will then check the Entry ID against your existing entries and overwrite matching entries (entries with the same Entry ID) with your imported content. This allows you to export entries, edit them en masse in Excel or another spreadsheet program, and then re-upload them to Gravity Forms. Here’s how it works:
Step 1: Export your existing entries
To export your existing entries from Gravity Forms, log in to your WordPress website and hover over “Forms” in the left-hand menu. Next, click on “Import/Export”. Now, click on the “Export Entries” tab on the left.
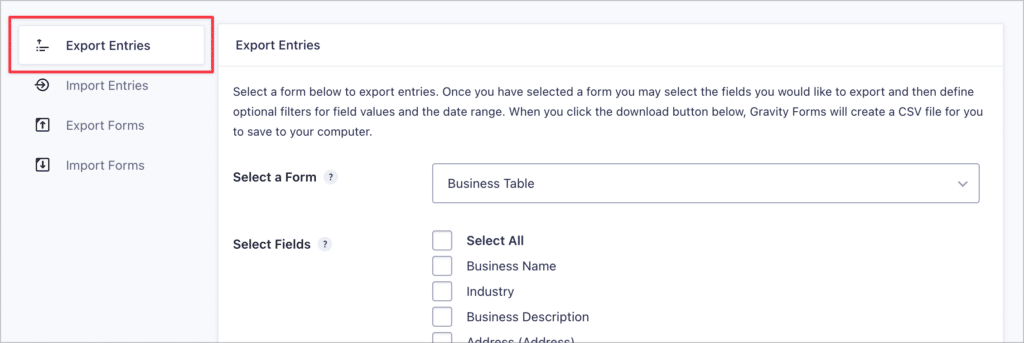
Select your form from the dropdown menu and choose the fields you want to export. Make sure you include the Entry ID field as this is crucial for the next step. When you’re done, click “Download Export File”. Your entries will now be downloaded as a CSV file.
Step 2: Edit your entries using excel
The next step is to open the exported CSV file in Excel or another spreadsheet program so that you can make changes to the entries. This is much quicker than editing each entry individually in Gravity Forms!
For example, in Excel, you can “find and replace” values. You can also quickly filter entries to make it easier to find the ones you need to edit. When you’re done, make sure to save your CSV file.
Step 3: Import your CSV file back into Gravity Forms
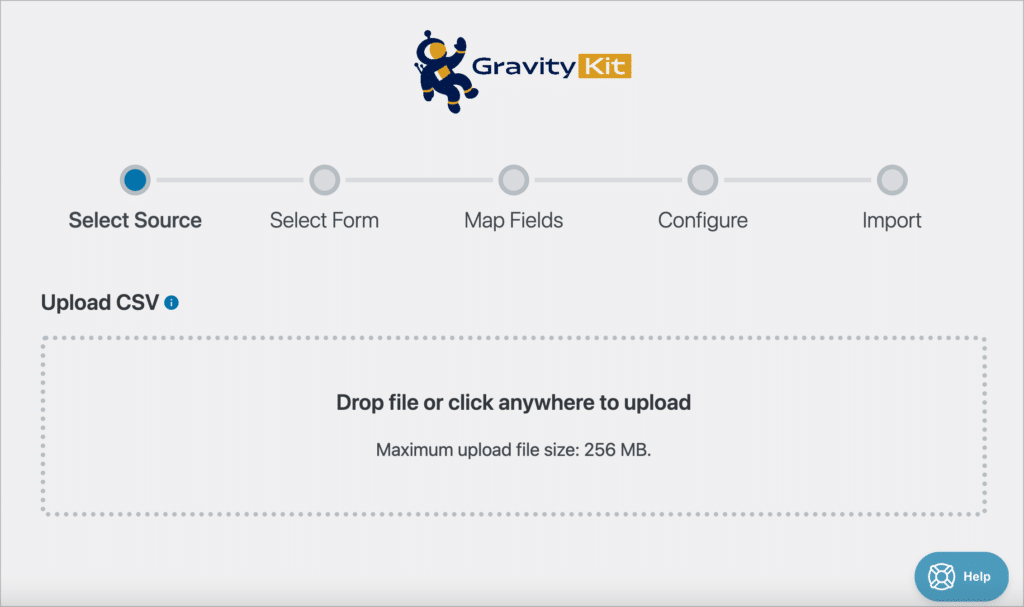
The final step is to import your updated form entries into Gravity Forms and overwrite the old ones. Gravity Forms doesn’t have an inbuilt import feature, so you’ll need to download and install the GravityImport plugin.
Now, hover over “Forms” and click “Import/Export”. Next, click on the tab that says “Import Entries”. Now you’ll see the Import Entries screen prompting you to upload your CSV file. To upload your file, simply drag and drop it into the box.
You can now choose to import your entries to an existing form or create a new form. Choose “An Existing Form” and select your form from the list that appears.

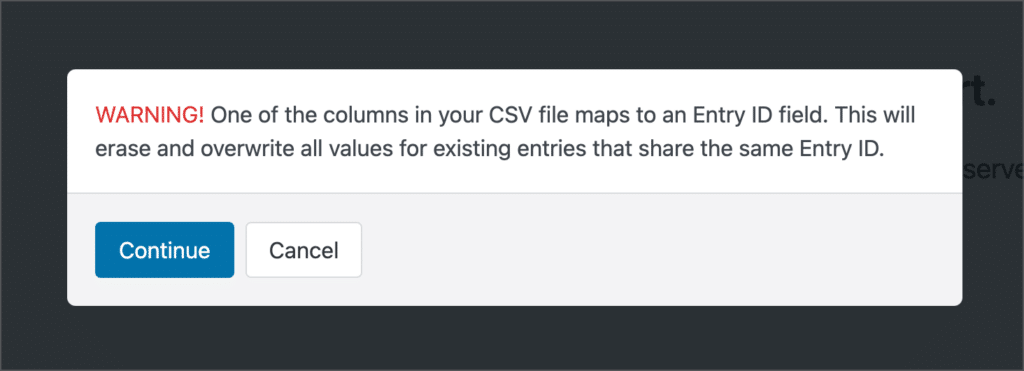
After detecting that your CSV contains an Entry ID column, GravityImport will display a notice warning you that your existing entries will be updated, and that the changes will be permanent. Click “Continue”.
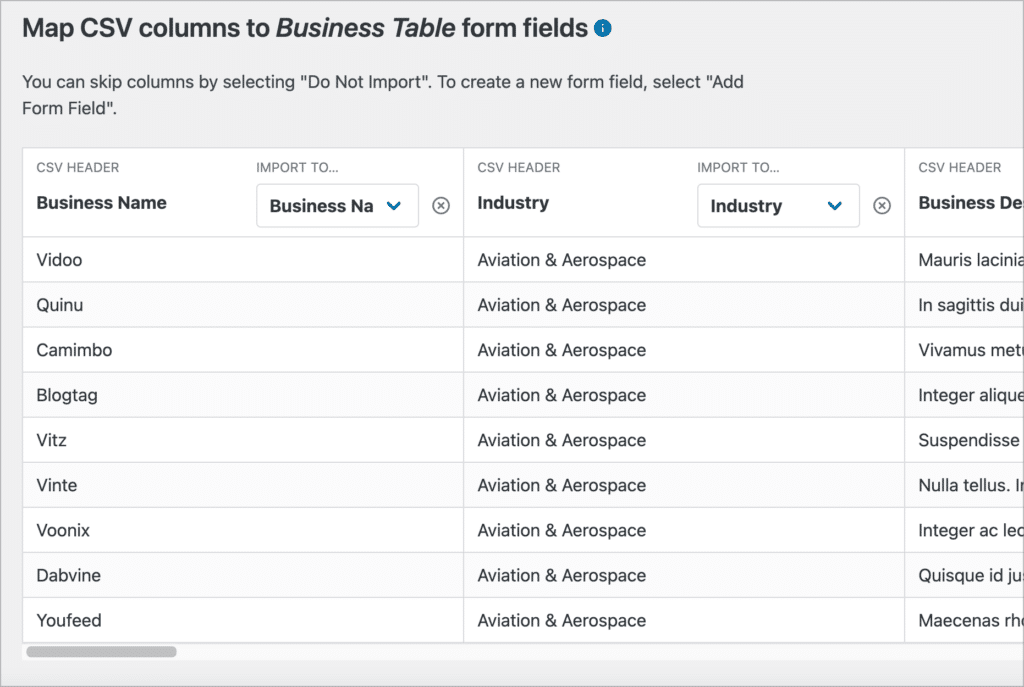
The next step is to map the columns in your CSV file to the correct form fields in Gravity Forms. GravityImport will try to detect your fields and map them automatically, but you can overwrite this by choosing a new field from the dropdown menu.
After mapping your fields and configuring the import options, click “Continue With Import” to update your existing entries. Once the import is complete, click “View Imported Entries” to see your updated entries in Gravity Forms. That’s it!
Gravity Forms: Bulk edit your form submissions
Editing entries in Gravity Forms manually is a slow and tedious process. Bulk updating form entries helps you to save time and improve your productivity.
In this post, we showed you two ways to bulk edit your form entries in Gravity Forms. The first method is by using GravityActions—an add-on for Gravity Forms that allows you to bulk update one or more form values at the same time.
The second method we showed you involves using the GravityImport plugin to import a CSV file containing an Entry ID column. This allows you to overwrite existing entries with new content during the Import process.
To learn more about editing entries in Gravity Forms, read Editing entries in Gravity Forms: The ultimate guide.

Helpful tips right in your inbox.
Subscribe to our biweekly newsletter for tips, special offers, and more!
Helpful tips right in your inbox.
Subscribe to our biweekly newsletter for tips, special offers, and more!