Are you tired of sifting through countless job applications and struggling to keep them organized?
Streamlining your job application process is crucial for effective recruitment and data management. In this article, we’ll show you how to build your own job application management system using Gravity Forms and GravityView.
Say goodbye to manual data entry and chaotic spreadsheets—it’s time to streamline your hiring process. Let’s get started!
💡 Check out a live demo of the finished job application management system and get your own free trial site preloaded with all GravityKit add-ons!
Download the free job posting form template now!
Import the template into Gravity Forms and customize as necessary.
Sneak peek
Here’s a sneak peek at the finished job application management system. As you can see, applications are listed in a table and there are buttons for exporting the data and adjusting the table columns.
There is also a search widget at the top, allowing recruiters for search and filter applications based on several criteria. And finally, applications are sorted by their approval status—”Approved”, “Rejected” or “Waiting review”.
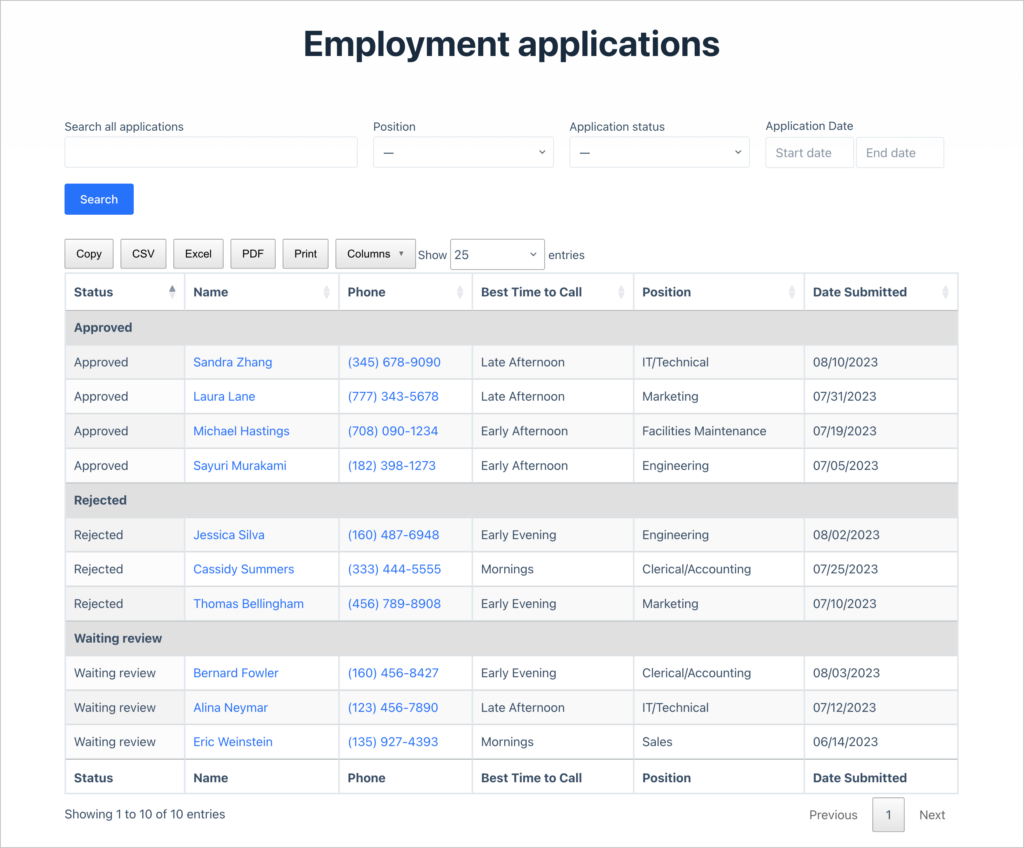
Recruiters can click on “View Details” to see the full application. There is also a button here for downloading the applicant’s resume.
What you’ll need
Here are the plugins/extensions you’ll need need to create a job application management system like the one above:
Why build a job application management system on WordPress?
Whether you run a recruitment agency or work as a hiring manager for a large organization, building a job application management system on WordPress has several advantages:
Customization: Building your own Job Application Management system on WordPress allows you to tailor it to your specific needs. You have the freedom to customize every aspect, from the job application form to the data management features, ensuring it aligns perfectly with your recruitment process.
Integrations: By using WordPress as your web platform, you can seamlessly integrate your system with other plugins and tools. Furthermore, Gravity Forms also integrates with several third-party apps, including email marketing platforms and automation tools, allowing you to save time and enhance your existing workflow.
Cost-effective solution: Developing your own job application management system on WordPress can be a cost-effective option compared to investing in a dedicated software solution. WordPress offers a wide range of free and premium plugins, reducing the need for custom development and potentially saving you significant expenses.
User-friendly interface: Gravity Forms is renowned for its user-friendly interface, making it easy for both administrators and applicants to navigate. With Gravity Forms and GravityView, you can create intuitive application forms, manage applications efficiently, and provide a seamless experience for candidates.
Scalability and flexibility: Building on WordPress ensures scalability and flexibility. Moreover, both Gravity Forms and GravityView support a range of extensions, allowing you to expand functionalities and integrate new features when you need to!
Now let’s start building our job application management system, step by step.
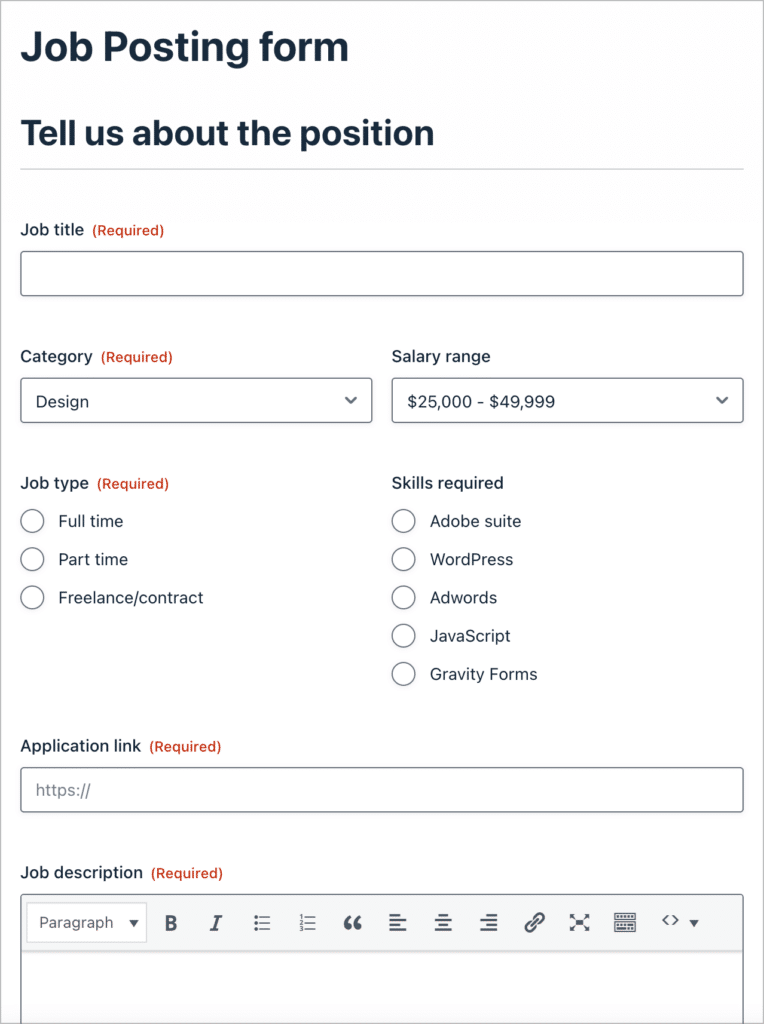
Creating the job application form
The first thing we need to do is create the job application form. This will allow interested prospects to apply for jobs.
To create a new form, we’ll hover over “Forms” and click “New Form”. After giving our form a name, we can start adding fields using the Gravity Forms drag-and-drop builder.

We’ll add the following fields to our form:
- Your personal information
- Your name (name field)
- Your email address (Email field)
- Address (Address field)
- Your phone (Phone field)
- Best time to call you (Drop Down field)
- Position you’re applying for
- Position (Radio Buttons field)
- Hours you are available for work (List field)
- Previous employment
- Your previous employers (List field)
- More about you
- Tell us about yourself (Paragraph field)
- Upload your resume (File Upload field)
- Terms and conditions (Consent field)
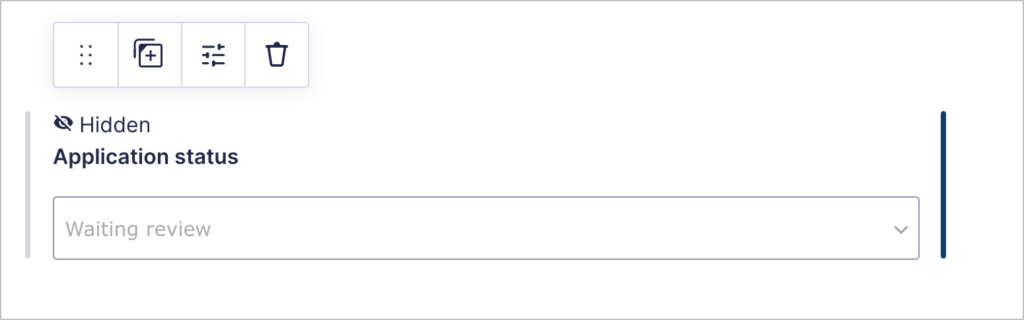
And finally, we’ll add a hidden dropdown field titled “Application status” with three options: “Waiting review”, “Approved” and “Rejected”. The default selection will be set to “Waiting review” as we want all applications to have this status when submitted.
Having this field hidden will ensure that applicants don’t see it when filling out the form. Only Admins will be able to see and update this field!
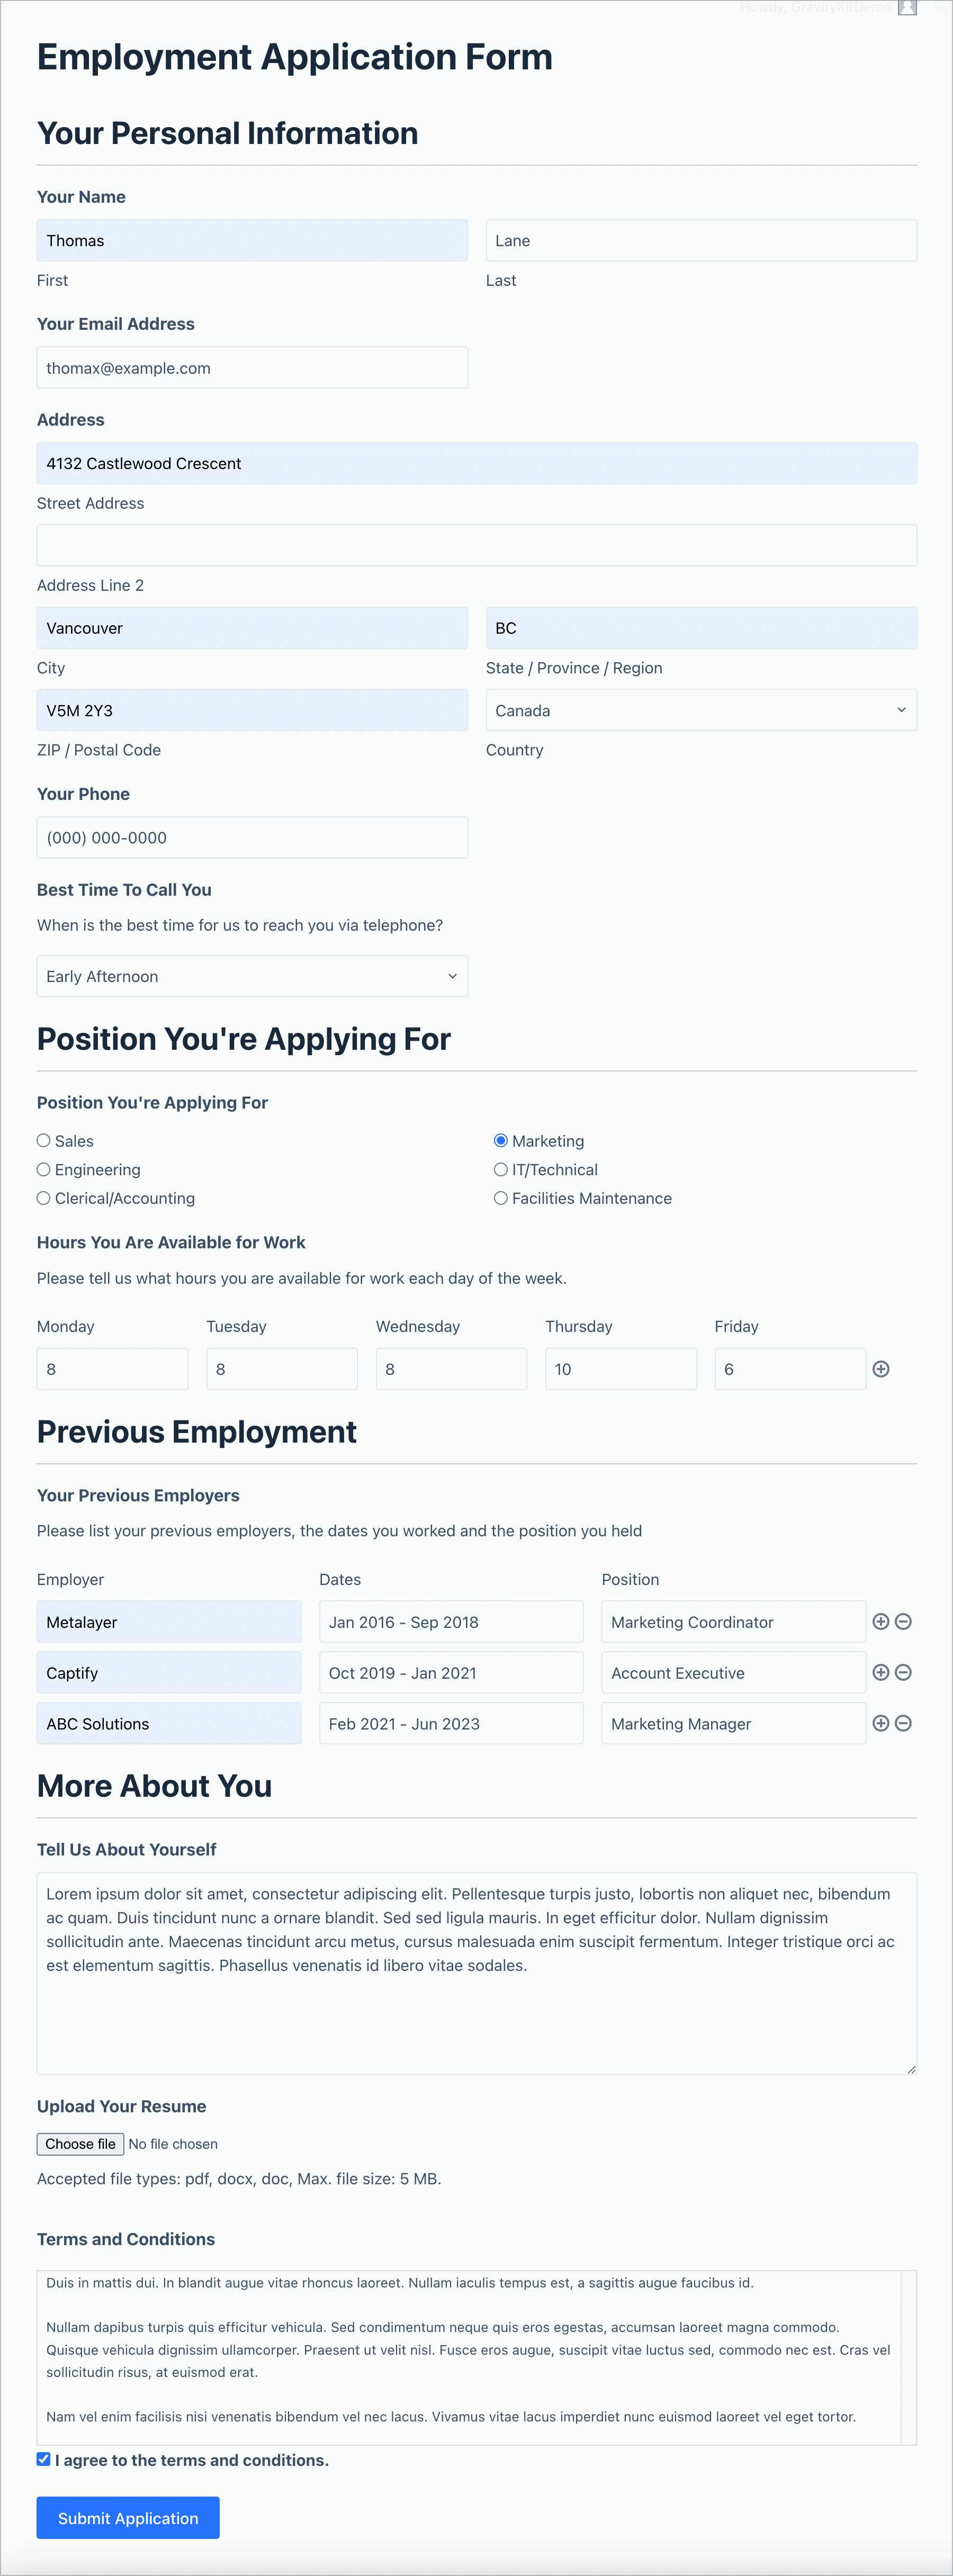
Here’s what the full form looks like on the front end:
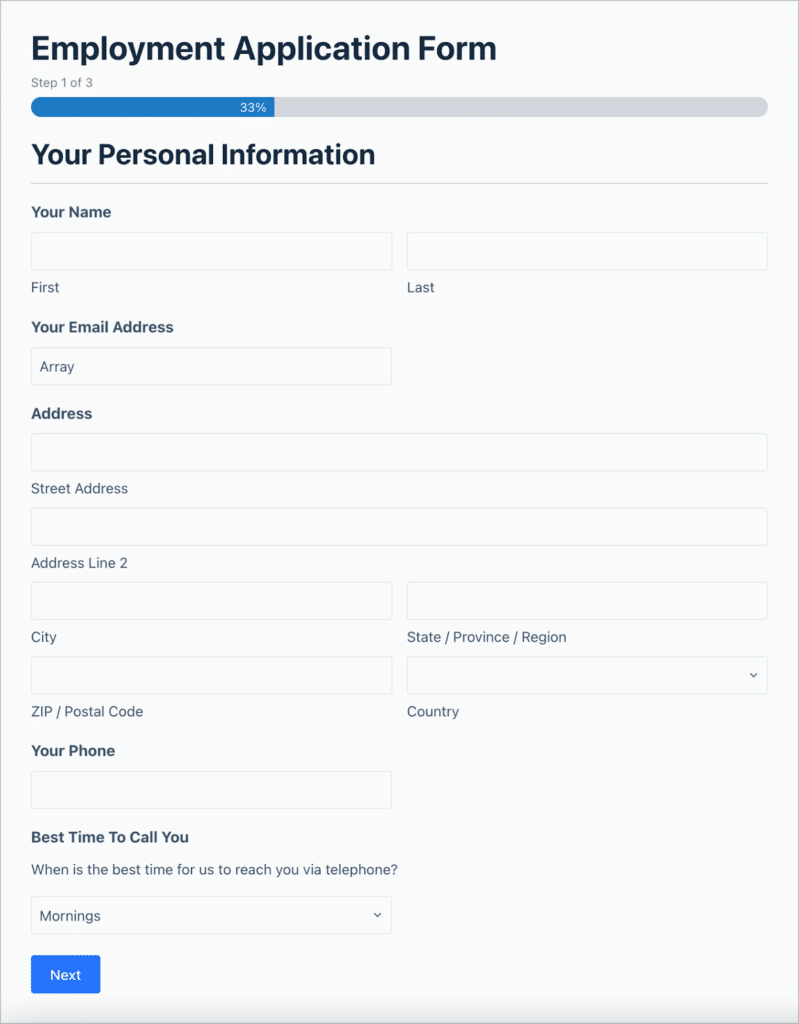
As you can see, our job application form is quite lengthy, so we’ll make things easier by creating a multi-page form. We can do this by using the Gravity Forms “Page” field (you’ll find this under “Standard Fields”).
We can use this field to add a page break every time we want a new section of the form to begin!
Here’s what our form looks like after splitting it up into multiple pages. As you can see, it’s a lot less daunting now, and there’s a progres bar at the top showing applicants how much of the form they have already completed.
💡 Pro tip: Make longer forms easier to manage: Learn more about creating multi page forms in Gravity Forms.
Now that we have our application form set up, the next step is to build the application management interface.
Building the application management interface
Interested prospects can now apply to jobs through our employment application form. Next, we need to build an interface that allows us to manage applications from the front end!
We’ll start by creating a new View. We can do this by hovering over “GravityKit” and clicking “New View”. After giving our View a name, we’ll need to select a data source and View Type.
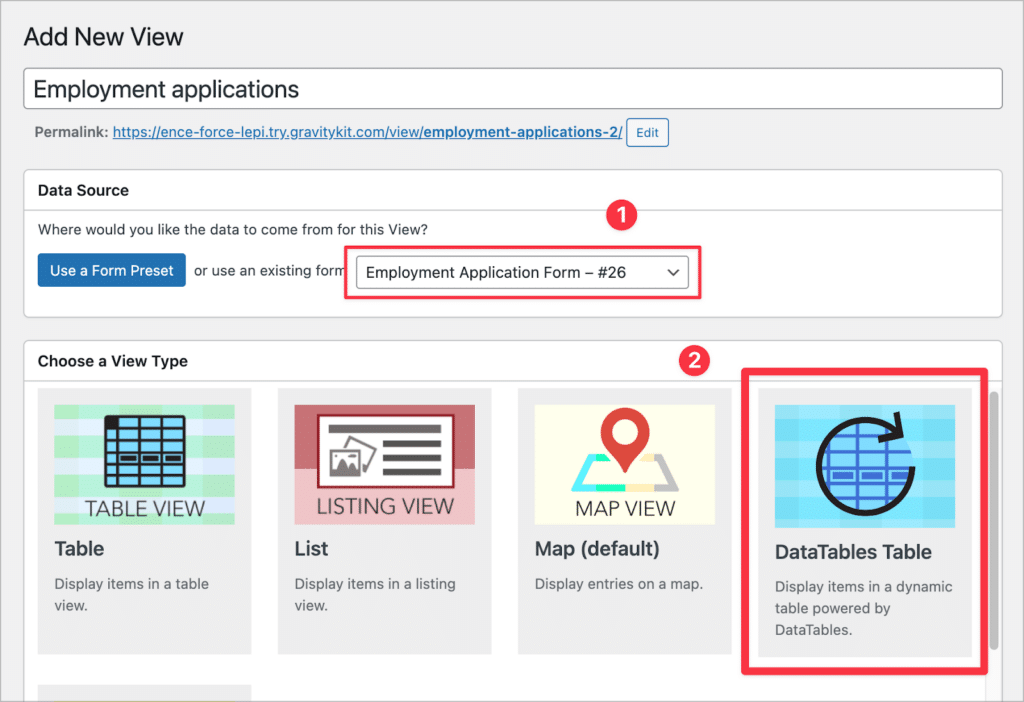
- Data source: This refers to the form in Gravity Forms containing the data we want to display. Once we link a form to a View, we’re able to harness that form’s data for displaying on the front end. For this example, we’ll select our “Employment application” form that we created in the previous step.
- View type: The View Type refers to the layout you want to use for displaying your data. GravityView supports several View Types, allowing you to display data in a table, a list, on a map, and more. For our employment application management system, we’re going to use the DataTables layout.
After selecting a data source and View Type, we can start constructing our View using GravityView’s intuitive drag-and-drop builder. Let’s start by configuring the Multiple Entries Layout—this is the page where all of our employment applications will show up in the table.

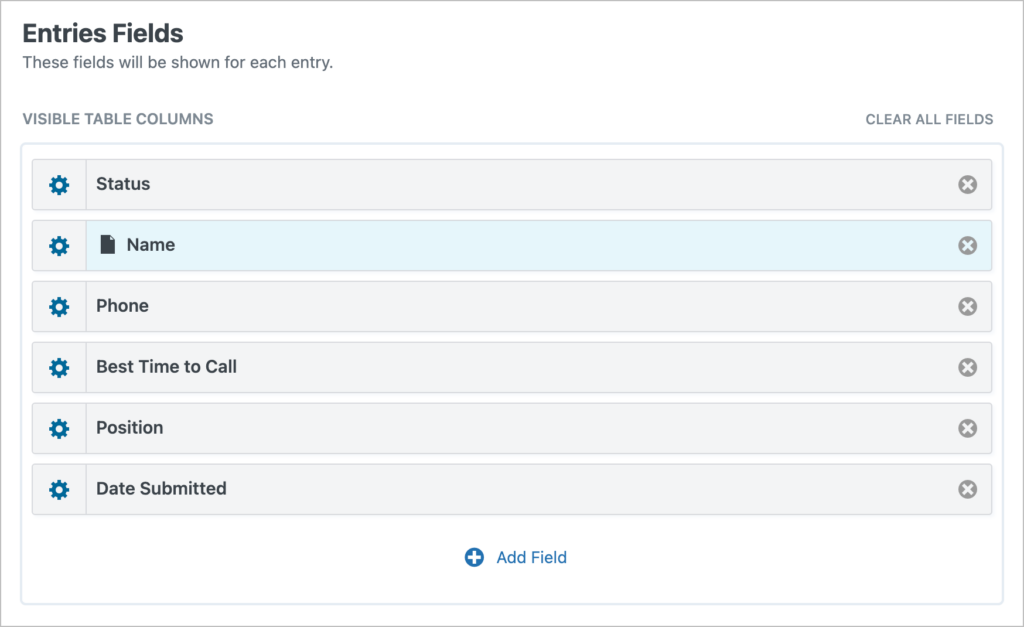
To add fields to our table, all we need to do is scroll down to the “Entries Fields” section, click the “Add Field” button and select them from the list. Let’s go ahead and add the following fields:
- Application status
- Name
- Phone
- Best Time To call
- Position
- Date submitted
After adding our fields, we’ll open the settings for the “Name” field and check the box labeled “Link to single entry”.
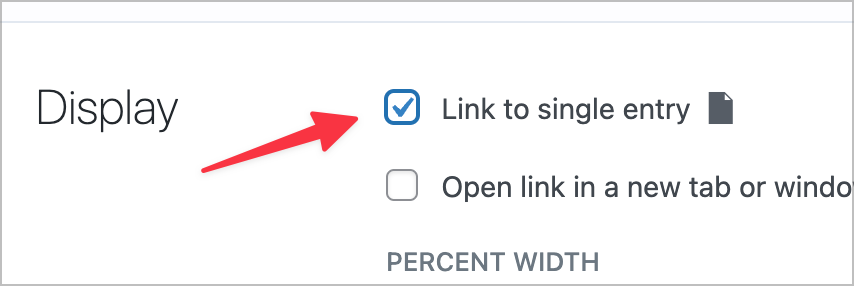
Enabling this optio will turn the Name field into a link that takes users to a page where they can view more details about that application (we’ll go into more detail about this in the next section).
Now that we’ve added all the necessary fields, we can turn our attention to the search functionality.
Adding a search bar widget
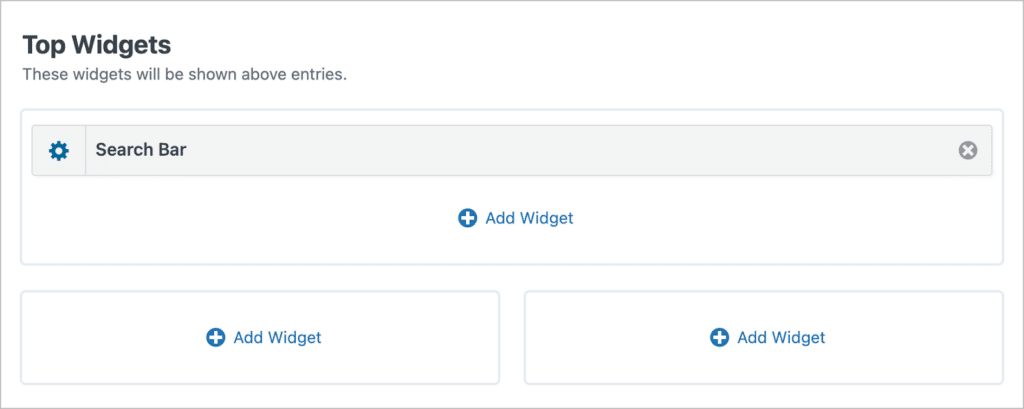
In the View editor, there are two areas (at the top and bottom) for adding widgets. GravityView includes a powerful Search Bar widget, allowing us to add custom search inputs to our Views.
To add a search bar widget, we’ll click the “Add Widget” button and select “Search Bar”.
Next, we’ll click on the gear icon to configure the search functionality. Here we can modify the search settings and add additional search input fields.
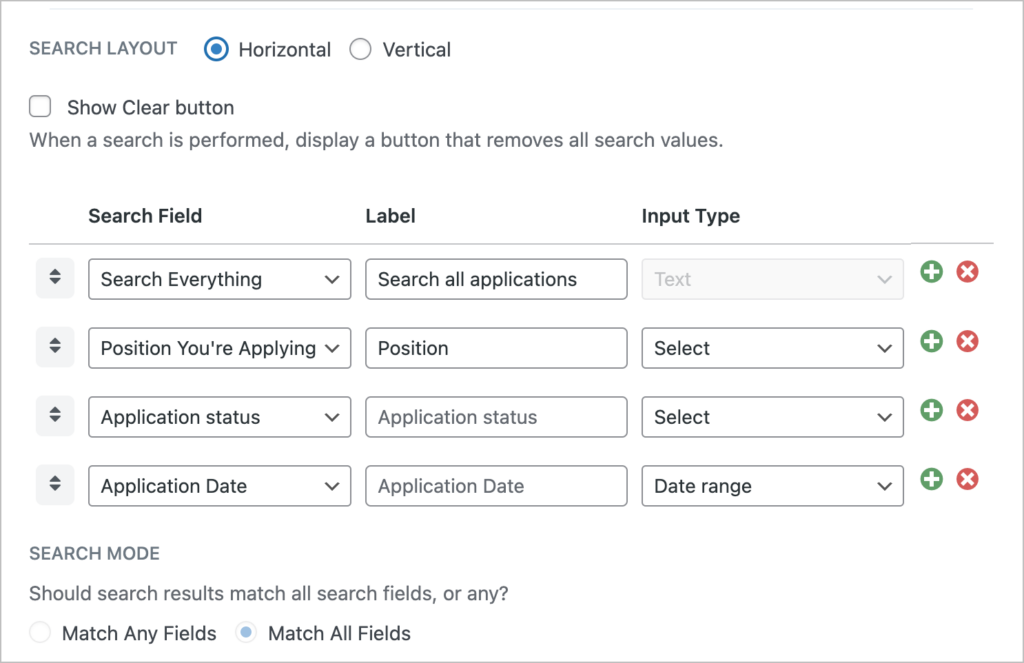
We’re making good progress! We now have a table of employment applications with a search bar allowing us to search and filter entries. Now let’s add more functionality.
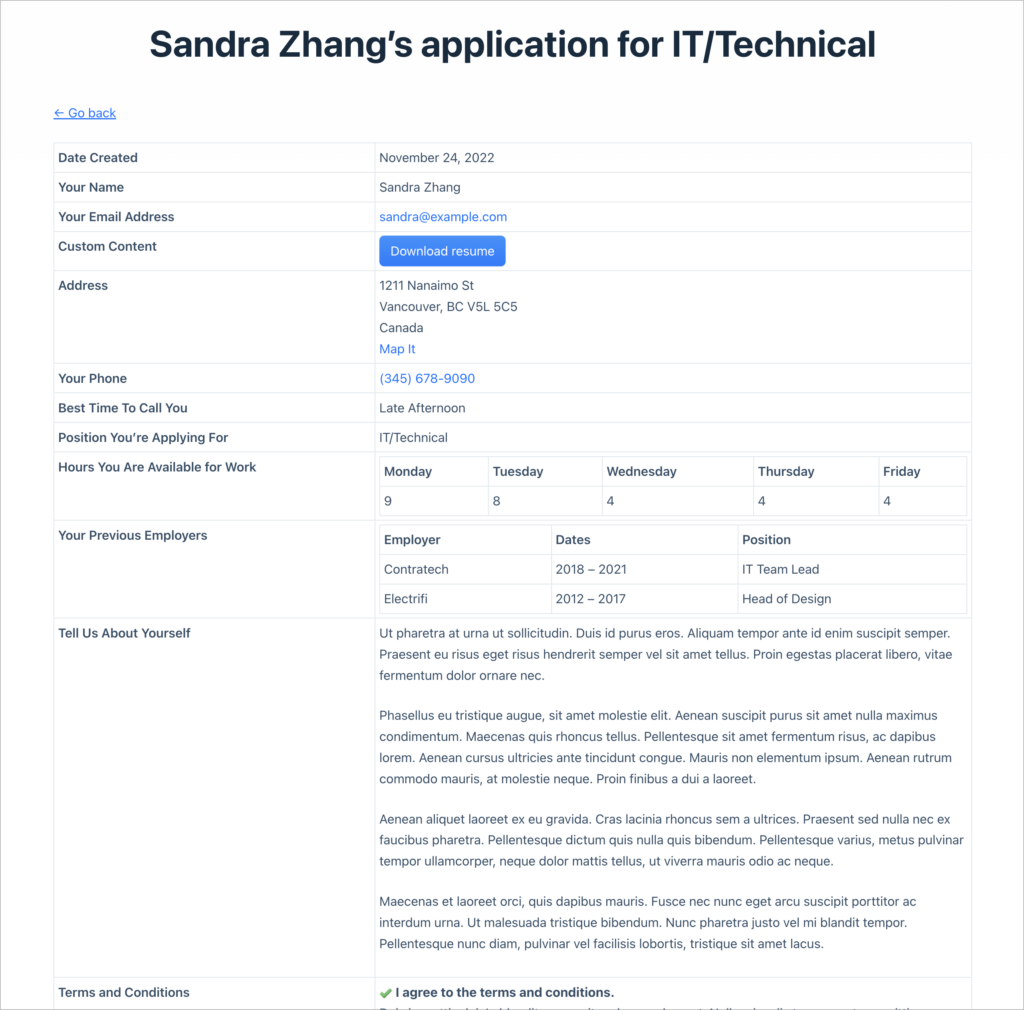
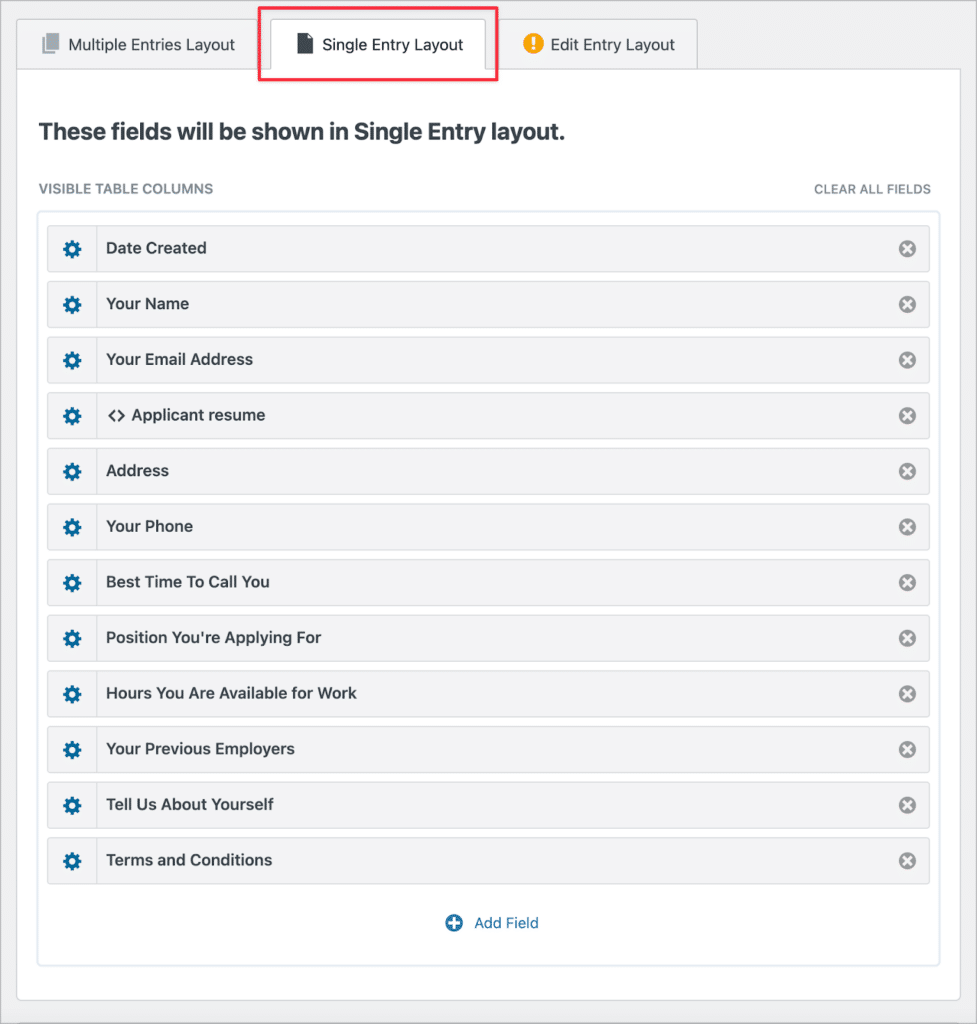
Configuring the Single Entry Layout
The Single Entry layout enables us to display additional information about each application. To configure this layout, we’ll click on the “Single Entry Layout” tab and add fields using the “Add Fields” button.
We’ll go ahead and add all of our form fields here, including the date the application was received:
- Date Created
- Your name
- Your Email Address
- Applicant resume
- Address
- Your Phone
- Best Time To Call You
- Position You’re Applying For
- Hours You’re Available For Work
- Your Previous Employers
- Tell Us About Yourself
- Terms and Conditions
We’re going to turn the “Applicant resume” field into a download button that will allow recruiter (or anyone reviewing applications) to download the applicant’s resume. We can do this by using GravityView’s Custom Content field.
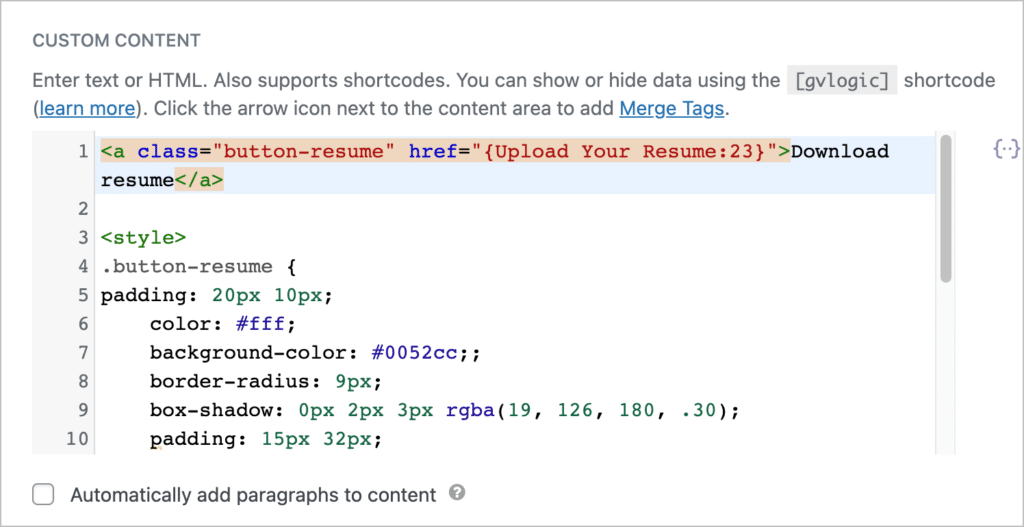
💡 Pro tip: In GravityView, Email and Phone fields are links that will generate an email or phone call when clicked (optional)!
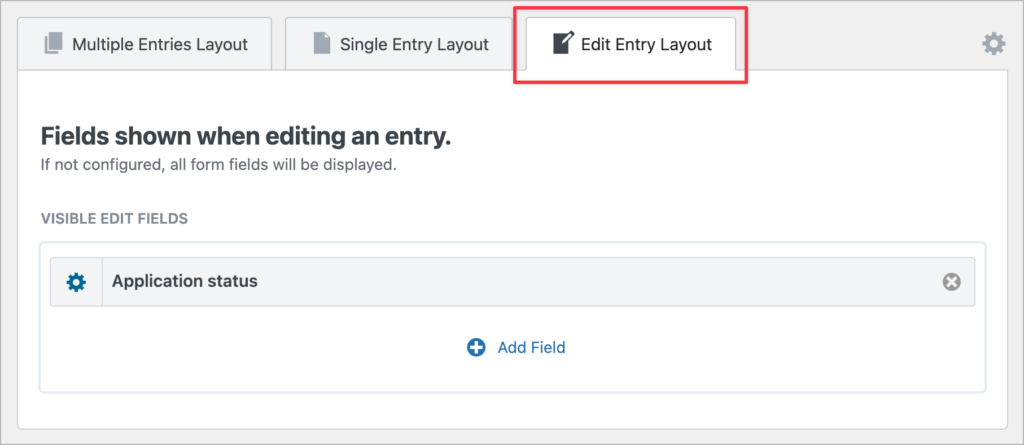
Configuring the Edit Entry layout
The next step is for us to configure the GravityView Edit Entry layout. This will enable hiring managers to update the status of job applications directly from the front end, without the need for backend access.
All we need to do is click on the “Edit Entry Layout” tab in the View editor. Any fields we add here will be editable from the front end! In our case, we only want the application status to be editable, so we’ll add the field here.
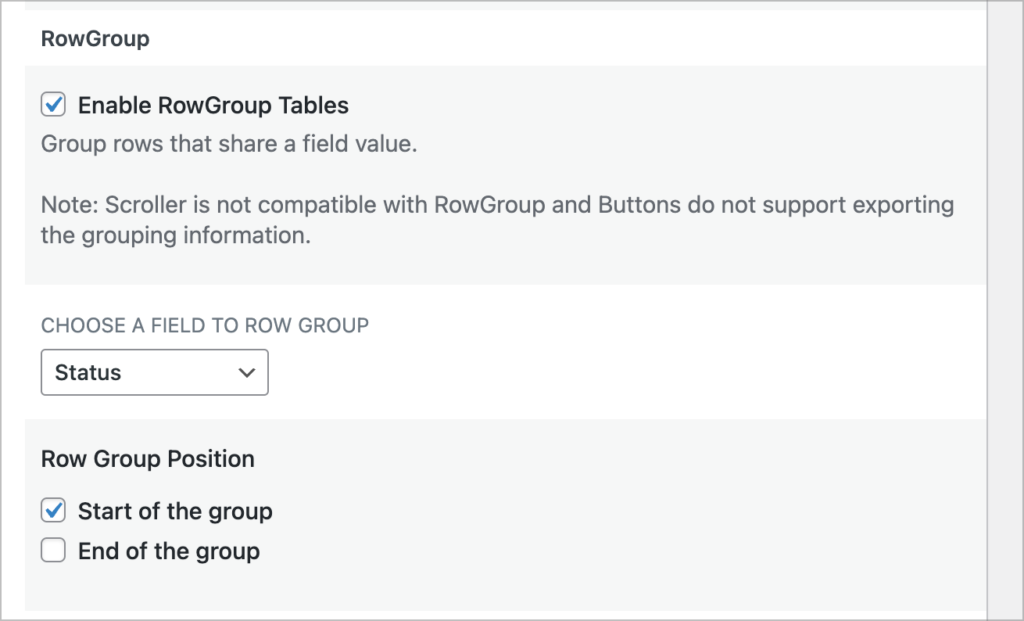
Grouping applications by status
Finally, we’re going to group all job applications by status. This way it’s easy for our hiring managers to see which applications still need to be reviewed and which ones have already been approved.
To group applications by status, we’ll scroll down to the View Settings, click on “DataTables” and enable “RowGroup Tables”. After that, we’ll choose a field to group by (the “Status” field) and a position.
The GravityView DataTables layout includes several powerful features, such as the ability to export data in multiple formats, column control, and automatic updates! The DataTables layout is available in our GravityView Pro license.
Here’s what our job application management system looks like on the front end:
And here’s the Single Entry page. This is what staff will see when they click on an applicant’s name.
That’s it!
We’ve successfully created an employment aplication management system on WordPress using Gravity Forms and GravityView!
Taking it further: Adding advanced functionality
There are several powerful extensions for GravityView that add enhanced functionality to Views. There are also features of GravityView that we didn’t explore in this tutorial! Let’s take a look at some of the ways we could extend the functionality of our employment application system:
- Build a full job board: Using Gravity Forms and GravityView, we could build a full job board, allowing companies to post job listings and applications to send in applications! For a complete guide on building a job board, read this tutorial: How to build a WordPress job board using GravityView.
- Bulk email applicants: Using our add-on, GravityActions, you can send bulk emails to job applicants!
- Filter applications based on conditional logic: Using the GravityView Advanced Filtering Extension, you can filter entries in a View based on conditions you set. This gives you finer control over which applications show up in your View.
Build your own system for managing job applications
In this post, we showed you how to build your own job application management system on WordPress using Gravity Forms and GravityView. By leveraging the power of these two plugins, you can take control of your recruitment processes and manage job applications more efficiently.
Say goodbye to the chaos of manual data entry and disorganized spreadsheets. With a custom job application management system, you can streamline your hiring process, save time, and ensure a seamless experience for both administrators and applicants!
So, what are you waiting for? Learn more about GravityView, and start building your own job application management system today!
Helpful tips right in your inbox.
Subscribe to our biweekly newsletter for tips, special offers, and more!
Helpful tips right in your inbox.
Subscribe to our biweekly newsletter for tips, special offers, and more!